

As seen in my, Painting with Frit Video.
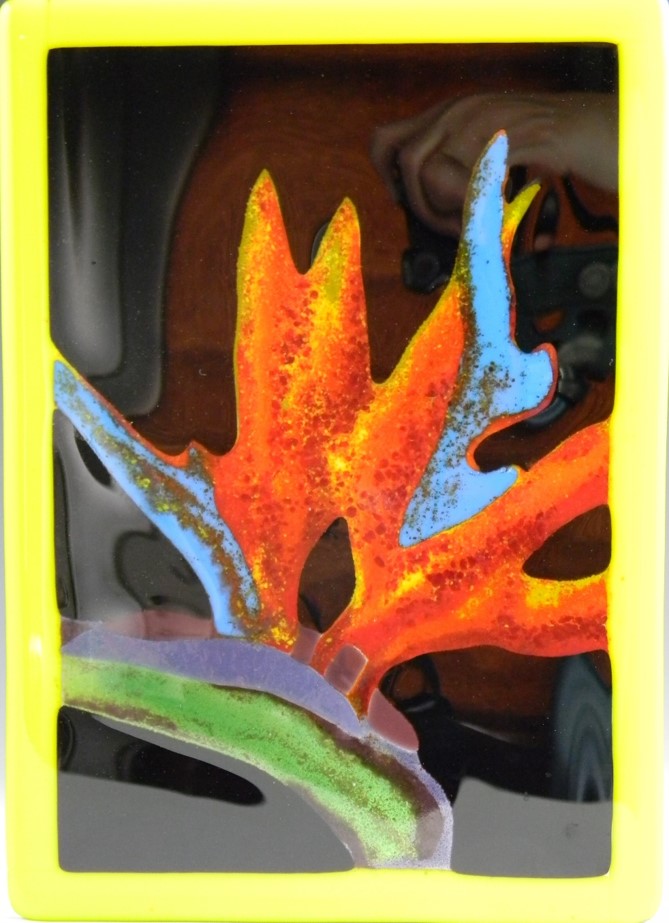
Tropical flowers, with their vivid colors and striking shapes have always been a favorite subject for my glass art. The bird of paradise flower is especially fun. Thanks to its easily recognizable profile, I can render it in fantasy colors knowing the image will remain familiar and be imprinted with my personal, artistic flare.
When planning this project, I imagined the spiky flower petals having blended colors that would add a rounded quality and fullness to the design. I decided glass frit would give me the bright colors and subtle shading I was looking for. I then decided to use a high contrast, solid color background that would showcase the flower.
Frit and cut sheet glass are a great combination for creating dramatic images.
Frit is a terrific filler material, but it’s difficult to establish a hard edge with frit alone. It leaves a fuzzy or blurred line around the individual design shapes. And so, wherever I want strong line quality and solid color saturation I cut the glass shapes out of sheet glass. The cut glass outlines and contains the frit giving my artwork the professional quality crispness I strive for.

How to make the bird of paradise flower.
This project is made with two layers of glass. The base layer is clear glass.
The second layer is made up of cut pieces and frit. I started the second layer with a narrow border to visually frame the art and add a nice punch of color.
I selected black glass for the background to contrast the colorful flower petals and plant stem. The background is cut with a saw to minimize the number of pieces and to give me a very clean, accurate shape for the flower. The cut pieces of the second layer are glued to the base layer with a small amount of fuser’s glue.
Tip: Let the glue dry before applying the frit. Otherwise, the cut glass pieces move around during assembly which results in a blurry edge.

Select your frit sizes and colors with purpose.
I chose to use fine and medium size frit, in both opal and transparent glasses. I selected bright, eye-popping colors that would contrast the flat black and dance in the light. I apply the frit with a spoon, filling the open spaces to the height of the cut glass surrounding them. Once filled, I grade the frit with a paint brush to blend and soften the colors.
Clean up is key to exceptional quality craftsmanship.
Once I’m satisfied with my frit color mixes and the coverage, I take a small paint brush and clean any overflow off the background glass. I take my time with this step and make sure to remove any excess frit that might distract the viewer from my beautifully detailed flower.
Frit is a fun way to add a painterly quality to fused glass art. I use it to add detail and shading to increase the visual intricacy and attractiveness of my pieces. Applying frit is a fast, easy way to put a personal spin and your artistic touch on your favorite patterns. Go ahead. Give frit a try. The possibilities are endless.

Tips for Fabulous Frit Designs
Use different frit sizes to enhance your design.
Cut glass wherever you want solid color and strong line quality.
Use both transparent and opal glasses.
Create a light source.
Apply light colors first then layer dark colors on top.
Blend your colors.
Use dark, high contrast colors to create shadows.
Pile the frit on. Don’t be skimpy.
Plan your frit application. It shouldn’t be random.
Use stringers and noodles to add linear details.
Be meticulous about your clean up.
Wherever you are in your artistic journey you’re doing great! Keep learning, trying new techniques and seeking the support of community. It only gets better.
This Bird of Paradise pattern is one of 6 graceful designs in my, Painting with Frit video now available as a download here on my website.
Firing Guide COE96
Full fuse for projects 12 inches in size or smaller.
Segment 1: Ramp 300 F/hr to 1300 and hold 30 min.
Segment 2: Ramp 500F/hr to 1465 and hold 10 min.
Segment 3: Ramp 9999(AFAP*) to 960 and hold 40 min.
Segment 4: Cool to room temperature.
*As fast as possible
NOTE: Kilns fire differently. Test fire this guide in your kiln, adjust as needed.
I use COE96. But I use this same firing guide for COE90 and have the same great results.
Check out the Bird of Paradise excerpt from my Painting with Frit video here: https://youtu.be/fQYYG33KMIE
Happy Fusing!
Lisa
Follow my blog for more tips and tricks!
Website www.LisaVogt.net
YouTube http://www.youtube.com/watch?v=dhOifd7wukk
Facebook www.Facebook.com/LisaJVogt
Twitter https://twitter.com/lisajvogt
Instagram lvogt_originalsinglass
NEW Instagram through_the_artists_lens

I look forward to seeing you in Las Vegas!
Glass Craft & Bead Expo 2020, Las Vegas, NV, April 1 – April 5, 2020, Get more info here. There’s still time to register for my Sunday class! But act fast there are only 2 seats left. SU-01 NEW Sculptural Fused Glass DESIGN Made Easy, 2 SEATS LEFT

Now Registering! Sculptural Fused Glass, 4-Day, Hands-on Workshop September 22-25, 2020
Register today! Only 4 seats available Register here on my website.
Wesley Chapel, Florida, 4-Day, Hands-on, Class size is limited.
It’s hard to describe what it’s like when I’m feeling the creative flow. Time flies. Hours pass in what I thought were minutes. My naturally distracted mind is focused on what my hands are doing, and nothing else. I get lost in my own world. When I return to reality, I feel rejuvenated and spiritually uplifted. That’s why I like sharing my studio space with others. I try to give them that experience and hope they feel the same inspiration and fulfillment I do. -Lisa
Join me and I’ll show you all the pro tips and tricks I use to make stunning 3-dimnesional art. You’ll learn how to combine advanced techniques in new ways to create extraordinary sculptural pieces of art.
You’ll leave class with several completed glass sculptures, my custom firing guides and a deeper understanding of sculptural fused glass fabrication. You’ll have the knowledge, confidence and inspiration you’ve been craving to take your artwork to the next level.
Materials are included, that’s a $150.00 value! Plus, a professional photo shoot of your artwork is also included.
This is the turning-point workshop you’ve been waiting for.

Here’s what the students are saying about the workshop.
“Instruction was clear, help was always available, and Lisa’s explanation of the equipment was great.” -Sherry
“My favorite thing about the class was the friendly atmosphere that encouraged open thoughts and sharing ideas.” -Lyn
“I enjoyed making all the projects, especially the flow piece and the freedom to be creative with our work.” -Joy
“My favorite thing about the class was the ability to see multiple pieces of art that originated from concepts taught.” -Vicki
“Lisa is very professional, knowledgeable and freakishly talented. House, art, mosaic, her work – really fun and beautiful.” -Lorna
“Incredible class. Lisa shared her artistic knowledge of color flow and her technical knowledge of glass.” -Larry
“I had so much fun! Lisa is a great teacher!” -Brenda
Things that surprised the students about the class.
“I was surprised by the photo booth demo-it was very helpful.” -Joy
“I was surprised by the limitless glass we had access to, for our projects.” -Lyn
“The valuable education on glass art photography surprised me.” -Sherry
“I was surprised by the hominess of your hospitality!” -Vicki
This class is for you! Any skill level can attend. Beginner, intermediate and advanced students alike will learn how to advance their glass fusing skills and expand their artistic style.
Watch it NOW! Start fusing today!
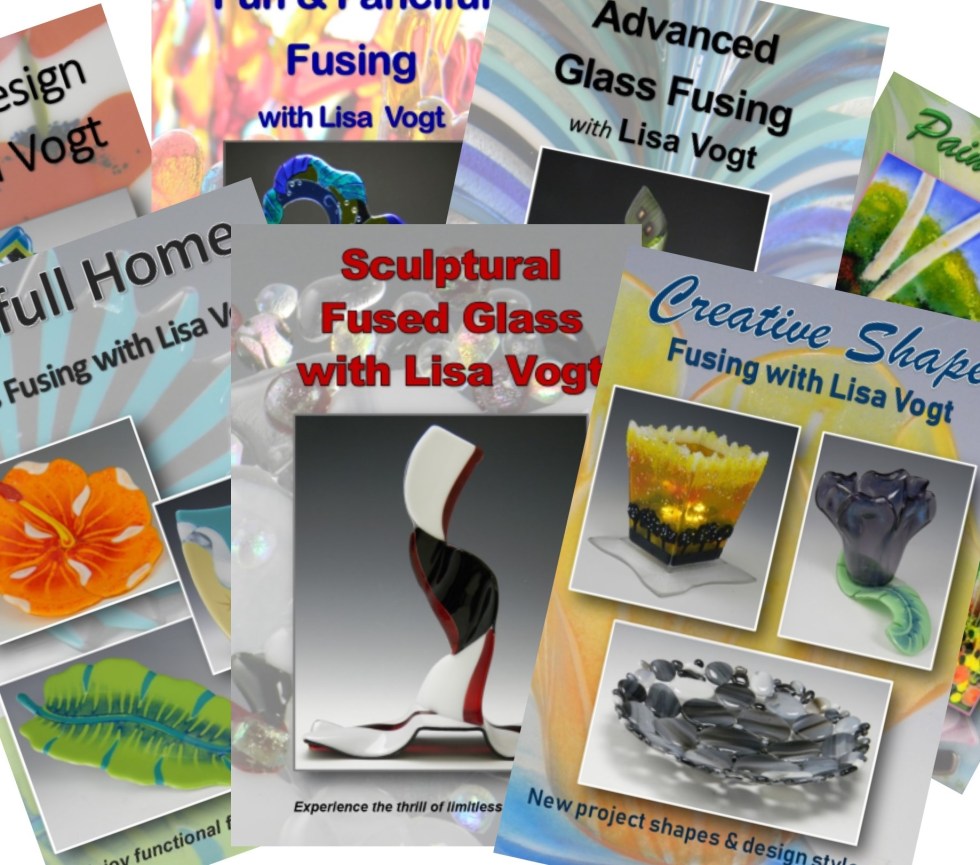
Downloadable instructional videos for every skill level.

Check out my eBooks for elegant patterns and detailed fusing instructions.