


Firing your own projects is exciting. It empowers you to make your own decisions and gives you the freedom to try new advanced techniques. The best way to gain confidence in your fusing is to build consistency into your firings. You want to get to know how your particular kiln works and define the results you want to achieve. At first, you’ll make mistakes and have varying results. That’s okay. You’ll learn something valuable from every firing. Plus, you’ll gain experience and learn to trust your process.
Start with project assembly.

How projects are assembled has a direct effect on the durability and, “look” of the finished piece. Most of my projects are assembled using two full layers of glass.
Glass settles at a thickness of ¼ inch when it’s heated to the full fuse temperature. By assembling with two layers of glass, I maintain control over the size and shape of my finished piece.
Fusing one layer of glass will cause the project to shrink. And it will have a fragile, sharp, irregular edge. While fusing three layers of glass will result in the project growing in size, which changes the original shape considerably.
Since two layers is my go-to type of assembly, the projects I made for these comparisons are made with the 2 layers of glass. If your go-to is a different type of assembly, you’ll want to duplicate that for the following firing comparisons.
I fired several 6” x 6” square projects made with 2 layers of glass for these comparisons.

Characteristics of a terrific full fuse firing.
The full fused glass retains its shape and original size. It also has a uniform thickness, smooth surface, rounded edges, and a clean back side. The design accent details melt into the top layer giving the project a shiny, smooth surface.
Characteristics of an under-fired full fuse firing.
An under fired project will retain its rigid shape and its original size. The edges are hard, angular, and sometimes sharp. Since the two layers are not completely fused together, a seam may appear on the edge showing how the layers were stacked. The back side of the project is clean and smooth. Design details, like frit have texture and are not fully melted into the top layer.
The solution to an under fired project is to re-fire it a little hotter. To get more heat results, I usually add ten degrees to the target temperature. The target temperature is the temperature that gives me the desired results.
Firing Target Temperatures for 96 COE & 90 COE.
Full Fuse: 96 COE 1465°F (796°C), 90 COE 1480°F (804°C), hold 10 minutes
Tack Fuse: 96 COE 1365°F (741°C), 90 COE 1385°F (752°C), hole 10 minutes
Slump: 96 COE 1265°F (685°C), 90 COE 1265°F (685°C), hold 10 minutes
Characteristics of an over-fired full fuse firing.
An over fired project will grow in size. The outside edges will round out. The glass will lose its square shape and be larger than the original 6 inch by 6 inch size. Kiln wash may stick to the backside and may be difficult to remove. The design details, like frit will be completely fired in giving the project a smooth shiny surface.
The solution for an over fired project might be to grind the edges to regain the square shape. Or you can remake and re-fire the project at a lower temperature.
Characteristics of a successful slump.

A successfully slumped glass project conforms to the shape of the mold. It also retains a clean shape and the sides of the project retain their height.
Characteristics of an under-slumped project.
An under-slumped project does not conform to the mold. The glass project doesn’t have enough drop and so the piece is shallow. The piece may also wobble on the table because it didn’t come in contact with the flat bottom of the mold like it should have.
The solution is to re-fire the glass in the mold and hold it at the target temperature a little longer than the first time. I usually add 10 minutes hold to the original program.

Characteristics of an over-slumped project.
The backside of an over-slumped project will pick up unwanted texture from the mold. It also loses some of its shape because the sides slide down into the mold. The result is an uneven top edge or rim. The solution is to call it something new or remake the project.
Tack fusing test.
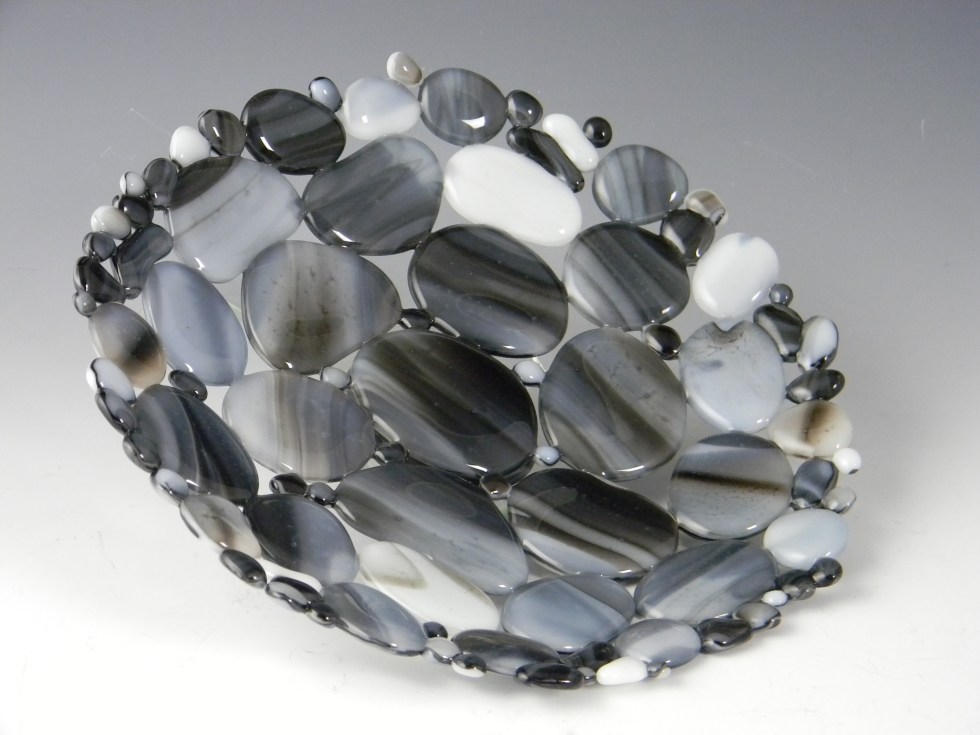
I made three different size nuggets to make a bowl that would look like it was made out of rocks. I cut a bunch of round shapes out a grey glass. Then I cut matching pieces out of clear glass. I capped the grey with the clear and fired the stacked glass nuggets to a full fuse temperature. The pieces came out great.
Don’t hesitate to customize your programs.
Then I arranged the fused glass nuggets on a kiln shelf to make a circular design. I tried using the Auto Mode on my kiln and set the controller to tack fuse the glass together. The finished project looked great, but the pieces didn’t stick together. In Auto Mode the kiln didn’t fire hot enough to tack the glass pieces together while they were resting next to each other. The lower temperature was intended to tack fuse glass pieces stacked on top of each other.
The solution was to enter my own program in the kiln controller and re-fire the glass to a hotter temperature. It worked! I then slumped the tacked piece to make a shallow bowl. The finished art was a beautiful success!
Take notes.
I recommend taking notes outlining how you assemble your pieces and on your firing steps. This way you can easily reproduce your successes and learn from the pieces that didn’t come out as you expected.
You can do it. I believe in you!
It takes a time to get comfortable firing a kiln on your own. The upside is you’ll learn new and exciting things every step of the way. Relax and enjoy your process. No matter what your results are be grateful for your creative development. And take advantage of the opportunity to make your own personalized pieces of art.
Happy Fusing!
Lisa
Follow my blog for weekly inspiration sent to your inbox!

You’re Invited to Join Me!
NEW Webinar

REPEAT! NEW Fire & Ice Webinar August 4, 2022
Hot techniques for cool projects!
Get fired up for advanced design techniques that invigorate your artistic spirit. You’ve loved making all the simple projects. Now experience the thrill of breaking away from familiar shapes to create striking free-form fused glass designs.
It’s easy! In this comprehensive webinar, I will guide you step-by-step from beginning to end. I’ll share my methods of glass selection, show how to lay out organic shaped projects for success, and offer fabrication tips for professional quality results. I’ll also demonstrate how to beautifully and safely display your sculptural artwork.
Join me and I’ll show you how to create free form projects that ramp up the visual elegance of your work. You’ll love my easy-to-follow instruction and seeing how I create intricately detailed designs in just a few steps. You’ll be amazed by the shortcuts and construction tips I offer that result in polished works of art with a gorgeous three-dimensional flair.
Beginner, intermediate and advanced fusers alike will enjoy applying the many simple, yet effective techniques I share in this in-depth, live event.
I include my custom firing guides, project patterns and materials list in PDF form.
Get excited about your glass work again! Attend this inspiring event and you will leave with the burning excitement and the cool confidence to create your own striking pieces of art. You’ll be eager to break out of your comfort zone and reinvent the possibilities while taking your glass art in a new and exciting advanced design direction.

Fused Glass Sculptures Webinar August 23, 2022
Creating striking sculptural fused glass forms is easy when you know the professional tips and tricks!
Join me in this comprehensive webinar and learn how easily you can put tried and true methods to use in unlikely ways, to create extraordinary sculptural art.
Enjoy the thrill of limitless possibilities.
In this in-depth webinar, you’ll learn pro tips and tricks for better glass cutting. See how to mix different fusible materials to make more elaborate designs.
You’ll be amazed how using standard slumping molds in unique ways can drastically improve the shape of your art.
You’ll be inspired by the innovative combination of ordinary techniques I share.
You’ll be confident to fuse glass after seeing how easy it is to load, program and fire a kiln.
Best of all, you’ll have an exclusive technical advantage with the advanced understanding of my dependable firing programs. And you’ll love the stunning three-dimensional results you can achieve by fusing all of these concepts together.
Beginner and advanced students alike will find inspiration, motivation and renewed artistic freedom from seeing the step-by-step construction of more than 5 sculptural projects in this webinar.
After this exciting webinar you’ll have the professional knowledge and increased confidence to incorporate these innovative methods in your new work.
In addition, you’ll have a working knowledge of kiln operation, custom firing guides, and a deeper understanding of sculptural glass fusing fabrication.
You’ll have the burning desire, and the cool self-confidence, to take your passion to greater heights.

Lustrous Lanterns Webinar September 1, 2022
Light up with me! Create colorful luminaries to brighten your home, office, porch, or anywhere else you’d enjoy the comforting glow of a dazzling accent light.
In this comprehensive live event, I will show you how to make 6 sparkling fused glass lanterns. You’ll learn how easily you can construct and build stunning 3-D lamps. I’ll guide you step-by-step through the many stages of construction, including pattern preparation, glass cutting, project assembly, fusing, slumping, and how to “cold fuse” the lanterns together.
You’ll also be shown how to finish the lanterns with custom, professional quality glass display bases. In addition, I’ll share how to utilize ready-made clear glass candle shelters to make fast and easy pick-me-ups. I also show several quick and simple methods for lighting your beautiful new creations. Along with detailed instruction, you’ll receive 6 full-size lantern patterns, my project-specific firing guides, and supply list.
Beginner, intermediate, and advanced glass fusers alike will love the wide variety of unique shapes and elegant new patterns, custom designed to enrich any decor. Join me to rekindle your creative spark with lustrous lanterns designed to set your artistic imagination aglow.

Sculptural Fused Glass, 4-Day, Hands-on Workshop, October 18-21, 2022
Register now. Class is limited to 3 students and held in my private studio in Wesley Chapel, Florida. All class materials are included.
Sculptural fused glass is the creation of three-dimensional forms that rise above a flat plane. Artists create 3-D works by using multiple methods and techniques with complete freedom of materials and process.
You’re invited to join me for this intense workshop held in my private studio in Wesley Chapel, Florida.
In this comprehensive class you’ll learn how to design, build and creatively display multiple stunning pieces of art that reflect your personal style.
You’ll push the boundaries glass imposes. You’ll use innovative approaches to design and combine multiple advanced techniques to construct original sculptural art. You’ll enjoy: the one-on-one instruction, making large scale projects, the well-equipped classroom, and the intimate class size.
Its hard-core fusing in a nurturing, relaxed environment. You’ll love the concentrated, in-depth study and creative momentum you’ll gain while actively producing nonstop, for four consecutive days. You’ll also learn how to design and build custom art glass displays that enhance your original work.
You’ll leave class with several completed sculptures, a working knowledge of kiln operation and custom project-specific firing guides. You’ll have the design confidence and hands-on experience to rise above and take your work to the next level.
This is the turning point workshop you’ve been waiting for! Let’s get fired up!

Artwear Designed for Artists by Artists Tell them how you really feel with bold T-shirts, Eco-conscience tote bags and sassy mugs.


Downloadable instructional videos for every skill level.


