Posted on Leave a comment

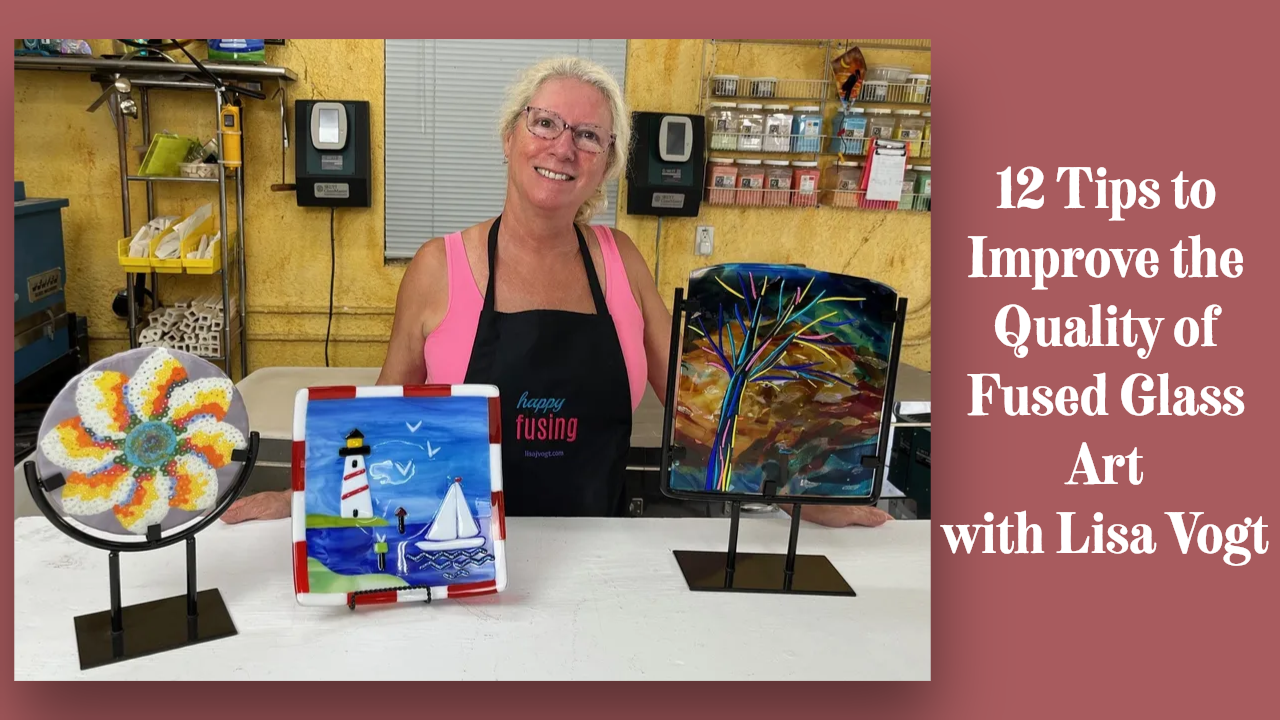
12 Tips to Improve the Quality of Fused Glass Art

1. Clean your glass before cutting it.

It’s much easier to clean a single square piece of glass than it is to clean a bunch of small pieces. You’ll also do a better job because you can see any dust or hint of glue from the manufacturer’s stickers more easily on the larger surface area. I avoid using chemicals or cleaners that might introduce potential contaminants to my fused glass. I use plain water and clean cotton towels to clean and dry my glass.

2. Improve your accuracy by using the right tool for the job.

When cutting glass strips or circles for my projects I use certain tools to help improve the fit of my pieces. The benefits of using strip cutters and circle cutters are they reduce waste and scrap glass. Plus, their ease of use makes the project assembly faster, easier and more precise.

Wet saws are great for cutting intricate shapes that otherwise would have to be done in multiple pieces. This time and material saving approach also enables you to make more elaborate designs.

Mosaic nippers are handy to quickly and efficiently produce irregular pieces for playful patterns and whimsical designs.

3. Pick a color pallet and stick with it.

Being selective about the colors you use increases the strength of your artwork. It shows the purposeful design direction of the artist and at the same time establishes the mood of the piece. Use multiple shades of the same colors to create depth and greater visual interest. Select both transparent and opal glass in your color pallet to increase design depth.

4. Use high contrast colors.

Be bold! Combine striking colors to bring your design to life. Using high contrast colors enhances the linear details of your design. It’s an easy way to increase the impact and overall attractiveness of your glass art.  

5. Include a focal point.

A focal point gets the viewer’s attention, engages them and makes your art memorable. Focal points can be literal like a leaf, a bird or a wave. Easily recognizable images are relatable and endearing. While abstract designs also benefit from having a focal point too. You can include an unexpected shape or pop of color to make your art more engaging.     

6. Do your best work.

Be meticulous with every step. The time and effort you put into each step makes the next step faster, easier and more professional looking. Make sure your glass pieces fit well. If you ask yourself, is this good enough? It likely isn’t your best work. Redo that piece, re-cut the glass, do whatever it takes to make sure you’ll be proud of your finished work.     

7. Build your projects with two full layers of glass to make them visually attractive and structurally durable.

This method of assembly produces beautiful smooth edge quality and a uniform thickness throughout your finished piece of art. These characteristics elevate your work to a professional quality that’s consistent with high end, gallery worthy artwork.   

8. Make your pieces a little smaller than your slumping molds to ensure they slump evenly.

If you intend to slump your fused glass project measure the slumping mold you plan to use in advance of laying out your design. Make your project ½-inch smaller than the mold to accommodate any potential growth and to ensure the glass slumps evenly. When the glass is larger than the mold, or if it sits on the top edge of the mold, the glass may slip to one side and slump unevenly.  

9. Fire projects with other pieces with similar construction style.

It’s good practice to fire projects built with two layers together and fire projects made with one layer separately to ensure you have the best results possible for each type of construction. Large projects can be fired alongside small projects. Fire the kiln at a rate that’s appropriate for the largest project in the kiln.

10. If in doubt fire slower.

If you’re concerned about your firing rate it’s okay to fire your kiln more slowly and add more time to the annealing segment hold. This small change often improves your consistency and results in greater success.  

11. Re-prime your kiln shelf and slumping molds before use if they show signs of wear.

I clean and prime my kilns shelves every time in use them. Then I’m sure my glass won’t stick to the shelf. I prime my slumping molds when they show signs of wear. Wear includes: the primer looks thin or it’s pealing. This routine maintenance enables me to fuse and slump with confidence.

12. Allow your kiln and the glass inside to cool to room temperature before opening the kiln.

Be patient! I know it’s hard to resist opening the kiln. If I’m tempted to open my kiln, I ask myself what’s more important to me in six weeks from now? Is it that I get to see the project a few hours early OR that the project is cooled properly and stable? This idea gives me strength to be patient.  

Bonus 13. Take before and after pictures and take notes.

Pictures and notes help you gain confidence in your kiln work. They document your progress and are glowing examples of your artistic growth. They’re also useful for trouble shooting unexpected results. Pictures and notes help you reproduce your successes and learn from your failures.   

Check out my video.

Follow my blog for weekly inspiration sent to your inbox! 

Happy Fusing!

Lisa & Niki


Premium Video Courses by Lisa


Posted on Leave a comment

5 Pro Tips for Making Fused Glass Sinks and Large Bowls

Artists are the most generous people I know. We love to share our passion. We all want to make a more dramatic and memorable impression with our art. One of the bests ways to accomplish this is to go bigger and make large scale pieces that stand out from the crowd. 

But going bigger can be scary. You have to invest more time and material. And there are more design decisions to make. It’s a huge commitment and you want guarantees that the finished piece will exceed your expectations. Following are some fundamental tips that’ll greatly increase your success with all your fused glass artwork.  

1 Measuring the Slumping Mold

It seems trivial, but this is where most craftsman go wrong. Everyone wants to make the largest fused glass disc possible. They then measure the mold from the outer rim to the outer rim and cut their glass circles accordingly. They wrongly assume the glass that rests on the top rim of the mold will follow the center of the fused glass disc as it slumps into the mold. The problem is the glass on the flat rim drags. 

Therefore, it does not fall into the mold evenly. The result is a bowl with uneven height in the side walls. A lopsided bowl can be avoided simply by measuring across the inside of the mold and then cutting the glass ¼ to ½ inch smaller than that measurement. Yes, the bowl is slightly smaller. No one will notice. They’ll be too busy admiring your beautifully crafted, uniform bowl with even side walls all the way around. 

2 Durability is in the Design

When going larger it’s important to design your art in such a way that the glass thickness is uniform throughout the entire piece of art. If you design the round disc with two glass layers on one side and four glass layers on the opposite side, you’ll have unbalanced mass. This can cause the finished piece of art to break due to the stress of supporting its own weight. Instead, plan your design execution in advance to ensure you have the same number of glass layers across the entire disc. Small accents pieces decorating the top aren’t a concern, provided they’re added in moderation. 

3 Let it Shine

The beauty of glass is its transparency, and the attraction of glass fusing is our ability to mix transparent and opal materials, to create various color combinations and an infinite number of intricate patterns. The wonderful thing about going large is the extended size of the creative canvas. With more room, you have more opportunity to expand your design ideas and make a dynamic statement. So rather than fumble through, take time to plan a well thought out design. Consider including pre-tacked or fused glass components for added interest. Mix both transparent and opal glass to increase visible depth. The possibilities are endless.  

4 Do Your Best Work

Don’t cut corners. No excuses. If you think to ask, “Should I recut or redo this?” My answer is, “Yes.” The more time and effort you put into each step will greatly improve the overall quality of your finished pieces. Fabrication and execution are equally as important as design esthetics. If you implement this approach, every piece you produce will be a masterpiece.  

5 Fusing and Slumping

Slow it down. Larger usually also means thicker. You’ll dramatically increase your firing success rate by slowing down both the fusing schedule and the slumping schedule. I fire my large pieces at 300 degrees per hour and hold several times on the way up to 1465 degrees to fuse, and 1220 degrees to slump. I anneal the glass at 960 degrees for 180 minutes, for both fusing and slumping, and then slowly drop the temperature down to room temperature. By being conservative with the firing schedules, I achieve consistently beautiful results every time. You can too! 

Happy Fusing!

Lisa & Niki

Follow my blog for weekly inspiration sent to your inbox! 

Artwear T’s by Lisa Vogt

Artwear Designed for Artists by Artists Tell them how you really feel with bold T-shirts, Eco-conscience tote bags and sassy mugs.

Artwear Eco-totes by Lisa Vogt
Artwear Mugs by Lisa Vogt
Fused Vessel Sinks with Lisa Vogt Video Download

Downloadable instructional videos for every skill level.

Fused Vessel Sinks & More by Lisa Vogt eBook

Posted on Leave a comment

Welcome Summer! Bring the Beach Home

Sunny, relaxing summer days are here! It’s time for delicious family picnics, breezy boat rides and warm sand between your toes. This series of bowls combines simple lines, a pleasing color palate and a whimsical touch of nature with classic seaside style. Beach Day Bowls are perfect accents for creating beach style comfort in your home all summer long.

When I come across a pattern that really brings me joy, I like to recreate that design in different sizes. Then I display the companion pieces around my kitchen and family room to set a seasonal mood throughout our living space. If you’re attracted to this pattern, consider making it in a few different sizes to get the most out of the simple, yet stylized ocean theme.

Beach Day Bowls as seen in Artful Home Video

How-to make the bowls.

These bowls are made with two layers of glass. The base layer is clear glass. The second, design layer is made up of cut glass pieces. Start by cutting the clear base.

Enlarge the pattern to your desired dimension. Use the pattern as a guide to cut the design layer. Cut the paper up. Glue it to the glass with a glue stick. Cut the glass as close to the paper pattern as possible to minimize the amount of grinding needed.

There are some deep, inside cuts in my pattern. Cut the glass as accurately as you can. Grind the pieces to improve the edge quality and overall fit of the design. Assemble the cut glass pieces on top of the clear base. Use fuser’s glue to affix the design layer to the base layer. It’s okay if your pieces don’t fit perfectly. Let the glue dry. This will prevent the glass from moving when you apply the frit.

Wave Pattern from Artful Home Video

Use a spoon and pour fine blue frit on top of the glass. Use a paint brush to move the frit into the gaps between the pieces to fill in the space and add a linear detail. Remove any excess frit by sweeping it off the glass. Be meticulous about your cleanup. Attention to detail make a difference. Doing your best work on every step will dramatically improve the quality of your finished artwork.

Use a razor knife and cut a bird footprint stencil out of stiff paper. I use file folders or poster board. You can also use plastic stencils available at your local craft store in the scrap booking department. Place the stencil on the area of the design that represents the sand. Sift powder brown frit over the stencil. Carefully lift the stencil off the glass.

Fire the assembled project to a full fuse temperature using the firing guide below.

Place the fused glass on a slumping mold and fire it to a slumping temperature using the guide below.

My bowls measure 10 inch x 10 inch, 6 inch x 6 inch and 4 inch by 4 inch. You can make these bowls in different sizes and get the same beautiful results.

Artful Home has 16 projects you’ll love!

Check out my video.

Follow my blog for weekly inspiration sent to your inbox! 

Happy Fusing!

Lisa


Premium Video Courses by Lisa


Posted on Leave a comment

How to Fire Glass and Identify When You’ve Achieved the Best Artistic Results

 Firing your own projects is exciting. It empowers you to make your own decisions and gives you the freedom to try new advanced techniques. The best way to gain confidence in your fusing is to build consistency into your firings. You want to get to know how your particular kiln works and define the results you want to achieve. At first, you’ll make mistakes and have varying results. That’s okay. You’ll learn something valuable from every firing. Plus, you’ll gain experience and learn to trust your process.    

Start with project assembly.  

How projects are assembled has a direct effect on the durability and, “look” of the finished piece. Most of my projects are assembled using two full layers of glass.

Glass settles at a thickness of ¼ inch when it’s heated to the full fuse temperature. By assembling with two layers of glass, I maintain control over the size and shape of my finished piece.

Fusing one layer of glass will cause the project to shrink. And it will have a fragile, sharp, irregular edge. While fusing three layers of glass will result in the project growing in size, which changes the original shape considerably.

Since two layers is my go-to type of assembly, the projects I made for these comparisons are made with the 2 layers of glass. If your go-to is a different type of assembly, you’ll want to duplicate that for the following firing comparisons.

I fired several 6” x 6” square projects made with 2 layers of glass for these comparisons.

Characteristics of a terrific full fuse firing.

The full fused glass retains its shape and original size. It also has a uniform thickness, smooth surface, rounded edges, and a clean back side. The design accent details melt into the top layer giving the project a shiny, smooth surface. 

Characteristics of an under-fired full fuse firing.  

An under fired project will retain its rigid shape and its original size. The edges are hard, angular, and sometimes sharp. Since the two layers are not completely fused together, a seam may appear on the edge showing how the layers were stacked. The back side of the project is clean and smooth. Design details, like frit have texture and are not fully melted into the top layer.

The solution to an under fired project is to re-fire it a little hotter. To get more heat results, I usually add ten degrees to the target temperature. The target temperature is the temperature that gives me the desired results.

Firing Target Temperatures for 96 COE & 90 COE.

Full Fuse: 96 COE 1465°F (796°C), 90 COE 1480°F (804°C), hold 10 minutes

Tack Fuse: 96 COE 1365°F (741°C), 90 COE 1385°F (752°C), hole 10 minutes

Slump: 96 COE 1265°F (685°C), 90 COE 1265°F (685°C), hold 10 minutes

Characteristics of an over-fired full fuse firing.

An over fired project will grow in size. The outside edges will round out. The glass will lose its square shape and be larger than the original 6 inch by 6 inch size. Kiln wash may stick to the backside and may be difficult to remove. The design details, like frit will be completely fired in giving the project a smooth shiny surface.

The solution for an over fired project might be to grind the edges to regain the square shape. Or you can remake and re-fire the project at a lower temperature.

Characteristics of a successful slump.

A successfully slumped glass project conforms to the shape of the mold. It also retains a clean shape and the sides of the project retain their height.

Characteristics of an under-slumped project.

An under-slumped project does not conform to the mold. The glass project doesn’t have enough drop and so the piece is shallow. The piece may also wobble on the table because it didn’t come in contact with the flat bottom of the mold like it should have.

The solution is to re-fire the glass in the mold and hold it at the target temperature a little longer than the first time. I usually add 10 minutes hold to the original program.   

Characteristics of an over-slumped project.

The backside of an over-slumped project will pick up unwanted texture from the mold. It also loses some of its shape because the sides slide down into the mold. The result is an uneven top edge or rim. The solution is to call it something new or remake the project.

Tack fusing test.

I made three different size nuggets to make a bowl that would look like it was made out of rocks. I cut a bunch of round shapes out a grey glass. Then I cut matching pieces out of clear glass. I capped the grey with the clear and fired the stacked glass nuggets to a full fuse temperature. The pieces came out great.

Don’t hesitate to customize your programs.

Then I arranged the fused glass nuggets on a kiln shelf to make a circular design. I tried using the Auto Mode on my kiln and set the controller to tack fuse the glass together. The finished project looked great, but the pieces didn’t stick together. In Auto Mode the kiln didn’t fire hot enough to tack the glass pieces together while they were resting next to each other.  The lower temperature was intended to tack fuse glass pieces stacked on top of each other.

The solution was to enter my own program in the kiln controller and re-fire the glass to a hotter temperature. It worked! I then slumped the tacked piece to make a shallow bowl. The finished art was a beautiful success!

Take notes.

I recommend taking notes outlining how you assemble your pieces and on your firing steps. This way you can easily reproduce your successes and learn from the pieces that didn’t come out as you expected.

You can do it. I believe in you!

It takes a time to get comfortable firing a kiln on your own. The upside is you’ll learn new and exciting things every step of the way. Relax and enjoy your process. No matter what your results are be grateful for your creative development. And take advantage of the opportunity to make your own personalized pieces of art. 

Happy Fusing!

Lisa & Niki

Follow my blog for weekly inspiration sent to your inbox! 

Artwear T’s by Lisa Vogt

Artwear Designed for Artists by Artists Tell them how you really feel with bold T-shirts, Eco-conscience tote bags and sassy mugs.

Artwear Eco-totes by Lisa Vogt

Artwear Mugs by Lisa Vogt

Downloadable instructional videos for every skill level.

Posted on Leave a comment

You Can Draw Custom Designs. Really!

No Drawing Experience Needed. It’s Easy!

Creating lifts your spirit and gives you a more positive perspective and hopeful outlook on the future.

Artists are doers. We may be stuck at home, but that doesn’t diminish our passion for creative development. Here’s a productive way to take advantage of this quiet time, strengthen your skills and learn a new approach to design that’ll greatly advance your artistic range.

Watch the step-by-step drawing video here: https://youtu.be/IzwnK2VGvqI

5 Reasons to Draw Fused Glass Designs on the Computer

One of my favorite things about glass fusing is how easily I can jump right into construction with little or no planning. If the mood strikes, I can design spontaneously looking only to the materials for inspiration and come away with a striking new project. This artistic freedom usually produces loose, freestyle patterns I love, but sometimes I want more intricate images or designs that develop slowly from concept to construction. When that’s the case, I draw my designs on the computer.

Initially, it’s time consuming to draw on the computer, but there are several advantages and reasons you might like to give it a try.

Why design on the computer?

  1. Drawing on the computer greatly expands the range of your design complexity. It’s easy to draw unique compositions you might otherwise be afraid to try. You can import a photograph of a herd of horses for example. You can then draw over the picture including as much or as little detail as you want. Say you like one horse more than the others. It’s easy to copy and paste that one horse several times, customizing the design to meet your vision.
Rori Horse

Once you’ve put in the effort to draw the first horse, you can repurpose the drawing for any number of uses. Maybe you want to make a piece with only a horse head. The computer drawing is quickly edited and resized for a totally new project.

  1. It’s easy to test unusual color combinations on a computer-generated pattern without any waste. I’m much more likely to use a wild color palate if I can see it in advance of cutting any glass. This feature alone, has awakened an all new level of artistic expression for me.

4. Create an image library. As a commission artist I’m frequently asked to make the same or similar designs. Often the design is driven by regional themes. Tropical herons, dolphins, coral reef, and beach scenes are popular subjects with my local clients. My commission work is one-of-a-kind. I don’t make the exact same design twice. But I do borrow elements from previously drawn designs for new patterns. I take a heron from here, a fish from there, sea oats from another design. The elements are resized and regrouped to make a new original design.

Having an inventory of designs is a great way to accumulate popular images you can recycle over and over to make fresh, new compositions.

Clean, clear deigns are a powerful sales tool.

4 Afterglow 6' x 5' Lisa Vogt

  1. Clients have trouble imagining what a design will look like based solely on a verbal description. It’s easier to have a meeting of the minds and ensure customer satisfaction with a color rendering. I email the designs to my clients for review and approval. And if they want to make changes, they can be done quickly on the computer before I’ve invested labor or materials into building the job.

I use the Glass Eye program from Dragonfly Software. It’s intended for drawing stained glass patterns, but it works equally as well for fused glass patterns. I draw small simple projects as well as huge, complex commissions with the program. For the small pieces, I print a full-size pattern and build directly on that. For large scale works, I print a scale version of the design to use as a reference. Then I draw the full-size pattern by hand with a pencil on paper.

You don’t have to be a professional glass artist to benefit from expanding your design approach. Whatever your skill level, beginner to advanced artist, you’ll find the time spent learning how to develop designs electronically is valuable. It’s an investment in yourself that’ll enhance your artistic style.

Watch the step-by-step drawing video here

I know, focus is hard right now, but it’s important to take care of yourself. Together we’ll keep our artistic spirit alive and well.

I believe in you.

Except from my Fused Art Design video. https://lisajvogt.com/product-category/video-downloads/

Dragonfly Software, Glass Eye 2000

Happy creating!

Lisa & Niki

Follow my blog for more tips and tricks!

Website www.LisaJVogt.com
YouTube http://www.youtube.com/watch?v=dhOifd7wukk
Facebook www.Facebook.com/LisaJVogt

Twitter https://twitter.com/lisajvogt

Instagram @lvogt_originalsinglass

NEW Instagram @through_the_artists_lens

Watch it NOW! Start fusing today!

Video covers - Copy


Downloadable instructional videos for every skill level.

Book covers

Check out my eBooks for elegant patterns and detailed fusing instructions.