Posted on Leave a comment

The Incredible & Amazing Value of Test Firings

Donโ€™t run away screaming! I hate wasting time and throwing material away on test firings just as much as you do. Or at least I used to. But the truth is, youโ€™ll have faster artistic growth and a more expansive set of techniques to work from, if you learn to love test firing.

Make it fun.

Envy from Advanced Glass Fusing Video

When firing a planned project, I tuck a small test piece in the kiln on the corner of the shelf. This way I have the main project to look forward to, and a bonus project to learn from.

I had a sculptural piece of art in mind for years. It was a good fit for my new video, Advanced Glass Fusing, but I didnโ€™t know if I could pull the piece off. In my minds eye, the art curved in apposing directions. It had a strong linear pattern, accented with windows on the tips of three wings. The intricate design represented a lot of time and intense attention to detail.

Before committing to cutting the glass for the design I wanted to be sure I could create the fluid shape I wanted. I made a custom mold by draping 1โ€ thick fiber blanket over a series of ceramic bricks and kiln posts.

The artwork would be ยผโ€ thick. I cut a piece of double thick clear fusible glass to the size and shape of the intended art and slumped it over my custom mold. The slumped shape was close to what I envisioned. But it was too shallow and lacked dramatic flair. I made the mold steeper, giving it a more severe angle.  I also increased the hold time at my conservative slumping temperature of 1220 degrees from 20 minutes to 35 minutes. The second piece of double thick slumped beautifully. The glass had a graceful curve and broad sweeping wings.

When I assembled the intricate pieces to make the artwork I did it with confidence knowing it would be slumped in a way worthy of the effort.

That feeling of artistic freedom was empowering. It also spurred new design directions that drive me to experiment further.

Test firing is valuable on every artistic level, small scale as well as large scale.

Arctic Freeze from Advanced Glass Fusing Video

The project doesnโ€™t have to be bold or revolutionary for you to benefit from testing a new way of construction. When making a piece that would feature a decorative element cut from a combed glass slab, I wanted to include a second pattern that reinforced my color scheme. I fired a small test of the colors I selected. Later, I used that information to create a beautifully detailed pattern blank. The blank was the perfect complement to the combed component.

Fire Storm from Fun & Fanciful Fusing Video

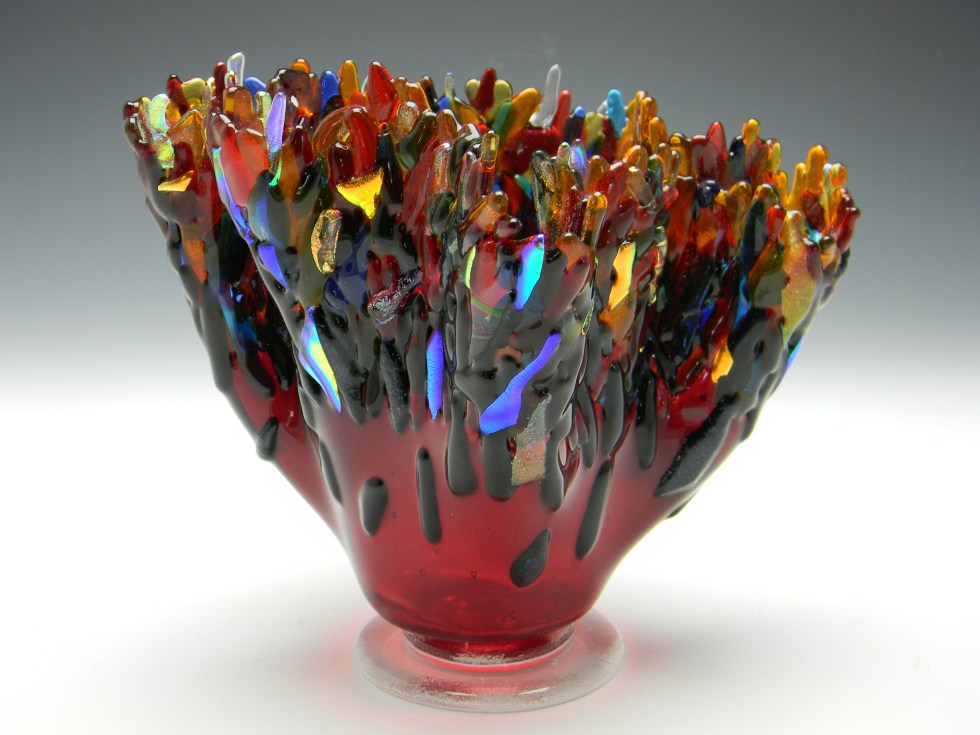
Before making Fire Storm for my new video, Fun & Fanciful Fusing I test fired tiny bits of glass. I wanted to determine which temperature would give me the best shiny edge quality, while retaining the irregular shapes I liked. As it turned out, I preferred the look of the pieces after being fired to a slump temperature, not the fire polish temperature.

Even failed tests have value.

A student in one of my classes made a project where they stacked a transparent amber glass on a transparent purple glass. The project was UGLY! But they created a beautiful, Winnie the Pooh brown. Now as a finished project, it was awful. But as a learning tool it was priceless. We now know how to make a rich, warm brown color on demand.

The takeaway is this; test firing is not a waste of time or materials. Itโ€™s an investment in the future of your artistic growth.

Happy Fusing!

Lisa & Niki

Follow my blog for weekly inspiration sent to your inbox! 

Artwear T’s by Lisa Vogt

Artwear Designed for Artists by Artists Tell them how you really feel with bold T-shirts, Eco-conscience tote bags and sassy mugs.

Artwear Eco-totes by Lisa Vogt

Artwear Mugs by Lisa Vogt

Downloadable instructional videos for every skill level.

Posted on Leave a comment

How to Make Fused Glass Pendant Lights

Design, fabrication and installation by Jake and Jessie Battin

I love to watch the dreamy reaction of visitors the first time they visit our home. They look around at my colorful dรฉcor like kids in a candy store. Then, wide eyed they say something akin to, โ€œThis is definitely an artistโ€™s house.โ€ They tell me theyโ€™re amazed how Iโ€™ve incorporated artistic details and functional art into our everyday lifestyle. In my opinion, thatโ€™s the best way to appreciate art, with daily enjoyment of its beauty and grace.  

You can imagine how excited I was when my daughter and son-in-law mentioned they wanted to integrate glass art into their decorating plans for their new house. Of course, they have their own style and color scheme which made the process of designing and fabricating their pendant lights even more fun and fulfilling.

Jessie and Jake have played in my glass studio in the past. But this time was different. They didnโ€™t want us to make the lights for them. Instead, they wanted to design and fabricate the lights themselves. I guided them along the way. We consulted about the size and shape the lights would take. But when it came time to cut the glass and assemble the pieces, they did the actual construction. It was fun to watch them process the cause and affect of the colors they chose and the design style they envisioned. Itโ€™s the same thrill I get when I teach hands-on classes and webinars. Itโ€™s as inspiring for me as it is for the students. I feed off their positive energy and enthusiasm for creating something thatโ€™s both beautiful and functional.

It was especially rewarding to watch them overcome obstacles as they occurred, and then not give up, but stick with the project to the end. Draping glass over a stainless-steel mold often delivers varying results. The size and shape of the glass, as well as the kiln you use all play a role in the outcome. Therefore, I suggested we make a test piece to ensure their glass colors and the finished shape matched their expectations. The test piece proved to be extremely valuable. We all concluded it was ugly, but still very valuable, as learning curves tend to be.

The test piece was even a bit of a surprise for me. Iโ€™ve been working with glass for more than 30 years. It continues to amaze me when the finished piece doesnโ€™t resemble my anticipated vision. Then again, thatโ€™s one of the traits I love about this medium, itโ€™s versatility, flexibility and promise of something new.

The test piece taught us so much. Jessie and Jake decided to eliminate some glass colors that the felt turned muddy after firing. We adjusted the tack fire schedule to give the accent pieces a softer look. And we also adjusted the drape temperature to ensure the pendant lights would have an organic, free form shape.

Yes, it took more time, and we used more material making the test piece. But it has a special significance because it paved the way to the pendant lights that turned out as planned.

The take-away here is simple. No matter how experienced you are, there is more to learn. Donโ€™t hesitate to make test pieces and take notes. Take before and after pictures. The information you gain is valuable. It will give you the confidence to try new ideas and make more advanced pieces of art, and that is priceless.      

Happy Fusing!

Lisa & Niki

Follow my blog for weekly inspiration sent to your inbox! 

Tell them how you really feel with sassy mugs, Eco-totes and bold T-shirts!

Downloadable instructional videos for every skill level.

Posted on Leave a comment

How to Tack and Slump Small Accent Pieces to Embellish Fused Glass Art

Knowledge – Confidence – Inspiration

Are you ready to add a fun new twist to your fused glass pieces? The simple application of 3-D components can dramatically increase the visual allure of your work. And best of all, this easy technique presents endless possibilities for you to create exciting and flashy new designs.

When making these decorative butterflies I use a single layer of 2mm thick glass. Using thin material produces lightweight delicate looking accent pieces that complement the finished piece of art without overpowering it.

How to make these butterflies.

Download and print the butterfly pattern. Make a second copy of the pattern to cut up. Glue the cut paper pattern pieces on 2mm clear dichroic glass. I used a variety of different dichroic patterns.

The dichroic coating on the glass can go up or face down. I have some butterflies with the coating up and others with the coating down for added interest. I suggest you be consistent and keep the coating orientation the same on each individual butterfly.

Using the pattern as a guide, cut the butterfly wings out of 2mm clear dichroic glass. Cut as close to the pattern as possible to achieve the most accurate shape. Use grozing pliers to remove any excess glass and clean up the edges.

Tip: I try not to grind dichroic glass as it chips the coating around the edge.

Use the pattern as a guide to cut the butterfly bodies out if 2mm dichroic on black glass.

Itโ€™s easy to find new uses for these winged beauties once theyโ€™re made. I suggest you make more than you plan to use, then great new ideas will definitely come to mind.

Assemble and tack fuse the butterflies.

Lay the butterfly wings out on a primed or fiber paper lined kiln shelf with the wing tips touching. Place the butterfly body on top so it overlaps the wings. Place the individual butterflies about ยฝ inch apart so they donโ€™t stick to each other. Fire the glass to a tack fuse temperate using the guide provided below.

Tip: Tack Fuse. At this temperature the glass is heated enough to polish the edges and stick together without distorting the shape.

Slump the assembles butterflies.

Carefully center each assembled butterfly in a round 5 inch ceramic slumping mold. You can substitute another mold if needed. Fire the kiln to the slump temperature using the guide provided below.

Tip: Slump. At this temperature the glass is heated enough to conform to the shape of the mold it rests on without shrinking.

Carefully, unload the kiln and enjoy your light and airy butterflies. Glue them on a piece of art with E6000 or other clear adhesive.

Let your imagination run wild, get carried away with fun ways to use these glistening garden friends.  

The story behind the sculpture titled, Flourishing.

A few years ago, I was in my glass studio day and night deep in the creative zone. I was making project after project for new instructional videos. When Iโ€™m in a whirl wind of producing I allow myself to wander outside my usual artistic boundaries to explore. On this one occasion my adventures produced a brightly colored, wildly active free flow. The resulting fused glass sheet had energetic movement and quiet chaos. Strangely, the piece spoke to me even though it was made with colors outside my personal color palette. I fell in love with the glass because it was a surprise whose unique radiance felt like home. I imagined the enthusiastic glass represented what my overactive mind would look like if we could take a peek inside.

My first and only self-portrait.

Right away, I knew how to use the glass. I drew a pattern from a photograph of my profile that included my wild hair. It took three wet saws, some grinding, and a lot of patience to cut the intricate outer shape. But I was determined to get it just right.

I then fire polished the cut glass to make the edge uniform and shiny. The custom stand is made from  clear glass with clear glass rods glued to the bottom. The simple stand gives the artwork a lift that allows light to pass through and illuminate the whimsical design. Then I made the butterflies and glued them in place, so they appear to be gracefully floating in space.  

What this artwork means to me.

The vibrant spiraling colors represent the ideas continually flowing through my mind. The butterflies represent the ideas being set free to become new artistic creations.

You can learn how to make your own self portrait in my Sculptural Fused Glass Video.

Whatโ€™s Free Flow?

Free flow is a technique I developed to make my own sheets of fused glass with custom color mixes.

You can learn how to make your own in my Go with the Flow video.   

For More Firing Guides Check out my FREE Tech Docs

Happy Fusing!

Lisa

Follow my blog for weekly inspiration sent to your inbox! 

For new videos Subscribe to my Premium Video Subscription Membership!

Tell them how you really feel with sassy mugs, Eco-totes and bold T-shirts!

Downloadable instructional videos for every skill level.

Posted on Leave a comment

Advanced Design-How to Create Impressive Backgrounds

When I open myself to inspiration and begin the design process for a new piece of art, my first consideration is the focal point. I ask myself, what key element do I want to include to drive the design direction? Once Iโ€™ve established the subject matter, I wonder, what can I do to enhance my focal point to  make my composition stronger?

I then imagine my subject in different settings. I tap into my mood that day? Do I envision my design going in a geometric direction with complex shapes or do I feel like building a tropical scene with lush foliage? Once I decide my path, I plan the best way to reach my destination.

Creating the subject is easy.

I know from the start what I want to make, so I begin construction with that. When it comes to establishing a background that creates a relevant setting for the subject, I have several fabrication options. I can surround the subject with a decorative border, leaves, or any other related shape. I select design elements that complement my subject and support my design vision. This type of design style is literal. The objects are recognizable and translate the artistโ€™s intention easily, which is great.

But sometimes I feel my design would benefit from a more subtle approach to the background. In that case, I create an entirely different complimentary design on the base layer. Itโ€™s fun, easy and an  extremely effective way to enhance a simple pattern. In effect, the base layer is no longer just mass or a platform to build on. With this easy to apply technique the base layer now offers the clever artist an opportunity to create a more intricate design with greater depth.      

Daisy Dish is a great example of the beauty of this multi-layer design technique. By applying this technique, we introduce color, create pattern, and present a lush setting in just a few easy steps.

How itโ€™s done.

This project is made with two design layers. The base layer is white. We sifted pastel powder frit over stencils to create a botanical background. The second clear layer is placed on top. Daisy flower petals are then arranged on a clear layer. The white flowers are detailed with yellow frit. Building this way, with parts of the design separated by the clear layer produces cool shadows and a greater sense of depth. This innovative technique has a lot of potential. Itโ€™s prefect for creative experimentation that ultimately illuminates pathways to exciting new design ideas.

Daisy Dish is the newest addition to my Premium Video Membership course. Members can assess this tutorial with their membership. Join today to enjoy this lovely project along with 16 other exciting, advanced glass fusing project videos and complimentary printable pattern eBooks.

Wherever you are on your journey youโ€™re doing great! Enjoy the journey. The destination will take care of itself.    

Watch the video here.

Follow my blog for weekly inspiration sent to your inbox! 

Happy Fusing!

Lisa & Niki

Premium Videos by Lisa


Get your Artwear!

Posted on 1 Comment

How to Be Take Seriously as an Artist

Itโ€™s Not a Hobby!

To this day, after 45 years as a teaching professional, people still donโ€™t take my job seriously. They think because I call myself an artist, I donโ€™t actually do any real work. Recently a distant aunt said, โ€œItโ€™s so nice youโ€™re doing something with your hobby.โ€ Sheโ€™s old, she meant well, and she lives far away. She doesnโ€™t get it. I understand. But I still felt compelled to validate my career choice by rattling off the numerous tasks I do to keep my business going and my career relevant.ย ย 

Iโ€™m guessing a lot of you have experienced the, deer in the headlight look from someone after revealing that youโ€™re an artist. โ€œOh. Thatโ€™s cool,โ€ they say. Then they panic and look for the easiest escape route. Then, while youโ€™re punching your password, they ditch you before you can prove your worth with the pictures stored on your phone. I get you. 

Weโ€™re artists. Weโ€™re proud. Weโ€™re a strong, viable community. And we work hard. 

Just because we love what we do doesnโ€™t mean weโ€™re not business minded. Our attitude about our trade is just more abstract. 

With our plight in mind, Iโ€™ve compiled some tips you might use to assert your profession.  

5 Tips: How to be Taken Serious as an Artist 

1 Wear flamboyant clothes. Billowy and bright make the best statement. Finding flashy garb is easy. Head to the back of the store; itโ€™s hanging on the deep, deep discount rack.  

2 Think like an indecisive squirrel crossing the road.In conversation, donโ€™t be shy. Speak your creative ideas and random thoughts freely, uncensored. Having two sentences follow the same train of thought is for geeks. (No offense to geeks; I respect their straightforward approach to fixing my computer.)  

3 Have crazy hair. The wilder the better. Let it go. Give your straight iron to your accountant. 

4 Explain to friends, in detail the deeper meaning of a wet lump of clay. 

5 Surround yourself with original art that speaks to you. Donโ€™t fall prey to mainstream home decor picked by an interior designer from a catalog for the masses. If you really want to make a statement and show how invested you are to your profession, display your own colorful art with pride.  

You got this!

Happy Fusing!

Lisa

Follow my blog for weekly inspiration sent to your inbox!