Knowledge – Confidence – Inspiration
Weave Bowl Project Video

Start with a unique oval shape.
The oval is an elegant shape traditionally associated with luxury and wealth. It’s a shape that’s easy to make in glass. I honestly don’t know why, we as high thinking creatives, don’t take advantage of its particular attraction more often.
I’ve used the weave technique many times to make square bowls and rectangular lanterns. The openness of the construction, and the playful overlap of colors combined with the fascinating texture all contribute to the charm of the finished piece. I thought to myself, how can I take this winning combination to the next level? The answer of course was to use this simple, but effective technique to make an unexpected oval shape.

Fabricate your piece with a distinctive glass weave technique.
My weave technique is super easy, surprisingly fun to use and produces very effective results. It’s simple. Pick a color palate and cut a series of ¼ inch wide strips of glass. Cut more strips than you think you’ll need to make your project. This way you have extra and won’t have to interrupt the assembly step to cut more glass. I used both transparent and opal glass, plus dichroic glass on clear.
Draw the oval shape on a primed or fiber paper covered kiln shelf. The weave is made with 4 layers of glass strips. I laid my strips out diagonally for added interest. Layout layer 1 leaving plenty of room between the strips for layer 3. Cut the pieces to size. I intentionally cut my pieces to create a fringe edge. Layout the strips for layer 2 in the opposite direction. Leave room between the strips for layer 4. Repeat with layer 3 and 4. Carefully load the kiln shelf and assembled project in the kiln. Fire to a Tack Fuse temperature.

Use the heat of your kiln to create your own custom results.
This project is tack fused together. At this temperature the resulting project retains the woven texture. The pieces are heated to the point where they stick together, and the bond is strong enough for the project to support its own weight. The attractive textural quality is both visual and physical which makes the piece more engaging. Consider using the tack fuse temperature to add details and accent pieces to fused glass art to introduce another facet of interest. Here, on this weave bowl the tack fuse option really increases the level of sophistication of this piece of art.

Slump your glass to give it a graceful profile.
Slumping adds elegance and a pleasing three dimensional quality to your fused glass art. The physical texture created by the weave is also greatly enhanced by the gradual curvature of the bowl shape.
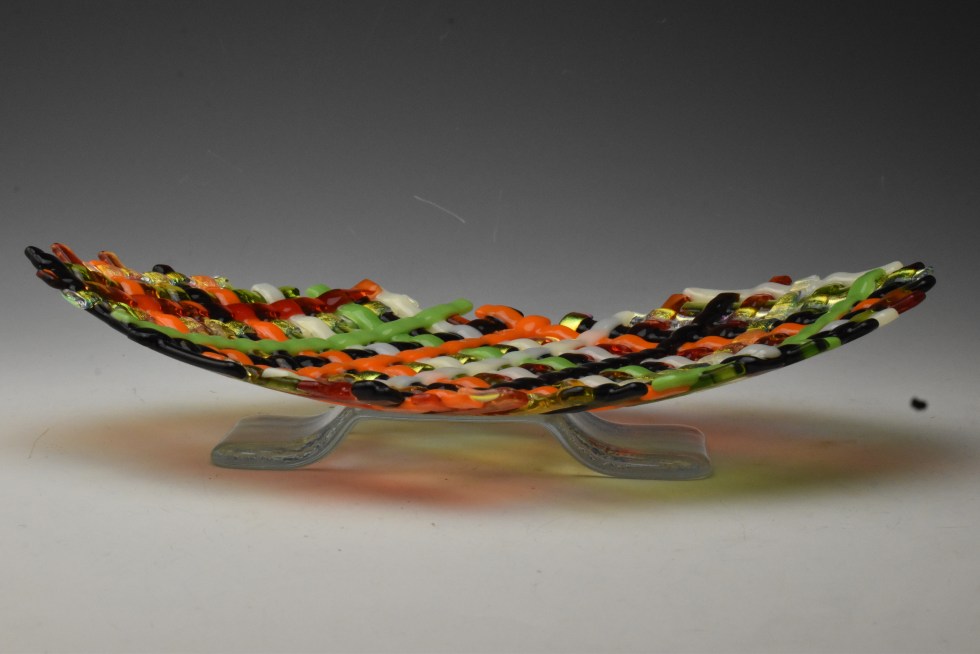
Finish with a custom base worthy of your exceptional artwork.
Making a custom stand or base is equally as exciting as making a striking piece of art. It’s rewarding to follow thorough to the natural completion of a project with a display that shows it off. A base gives the art lift which immediately increases the perceived value and visual intricacy of the finished piece. It also allows light to go through the glass and cast reflections that enlarge the overall impression of the art. Keep the stand or base simple. It should add to the art, not overpower it, or distract from it’s beauty.

Keep the dream alive!
One of the many things I love about working with glass is the endless design and fabrication options that are available to us. There are an abundance of exciting new approaches waiting for you to discover when you venture down the less traveled path of experimentation. Let’s go!
Happy Fusing!
Lisa & Niki
Follow my blog for weekly inspiration sent to your inbox!


Tell them how you really feel with sassy mugs, Eco-totes and bold T-shirts!


Downloadable instructional videos for every skill level.