Posted on Leave a comment

Holiday Cheer is a Warm Kiln

Christmas week is here! If you’re lucky, you have already made or purchased gifts for your family and friends. If not, I’m sure you’re busy preparing for your holiday get together. With that in mind, I’m sharing a bright, winter project to usher your creative spirit into the new year. This way, when the time comes to get back to your studio you’ll have a fun, easy project waiting for you to enjoy.

Cardinals are a bright, cheerful sight in the peaceful winter months. This colorful little fellow will bring joy to your home all season long. And you’ll love how fast and easy this delightful project is to make.

Let’s get started.

Cardinal in Pine Tree By Lisa Vogt 8 Inch x 10 Inch

Detailed projects like this one are easier to make if you work from a pattern. Preparing the pattern may seem tedious, but the increase in accuracy and fit really improve the overall quality of your finished project. Plus, patterns make more elaborate designs manageable, so even the most indicate design is still fun to build.

Make two copies of the pattern and then number the patterns. (Time-saver Tip: Number the pattern before making the copy. Don’t be like me and forget to do it before heading to the glass studio 🙂

To maintain consistency in the thickness of the finished art, this free-form shaped project is made with two layers of glass. Using the pattern as a guide, cut the base layer out of clear glass. Cut the oval shape first. Then cut clear pieces for the tips of the pine needles that extend outside the oval shape. Cutting these little pieces, and adding this extra step, ensures that the narrow pine needles will keep their shape during firing. Without the clear base, they’ll shrink dis-proportionality to the rest of the project and be fragile after fusing.

Now that the base is cut, let’s move on to the second layer. Cut blue glass for the sky to the same shape and size as the clear oval base. Grind the cut glass to remove any sharp edges and improve the shape.

Use scissors to cut one paper pattern into the free-form shape. Draw a line around the pattern on a primed kiln shelf, or on a fiber paper lined shelf. Arrange the clear base pieces on the shelf inside the pencil line.

Set the shelf and assembled glass aside.

Cardinal in Pine Tree

Here comes the fun part, cutting the pine needles and cardinal. Cut the pattern up. Glue the pine needle pieces on green glass with a glue stick. Cut around the pieces, cutting as close as possible to the edge without running into the paper. Remove the excess glass with pliers.

Glue the cardinal pattern pieces to red glass. Cut the cardinal out. Grind the cut glass to improve the shape and the fit of the pieces. Remove the wet pattern from the ground glass. Clean and dry the glass with a towel. Arrange the bird and pine needles on the spare pattern and set aside.

Cardinal in Pine Tree

For a fun added detail, use a paper punch to make snowflake shaped flurries. Press the snowflakes out of Thinfire fiber paper. Scatter the snowflakes on the clear base. Stack the blue on top sealing the snowflakes between layers. (FYI: I have not tried this encasing technique with other fiber papers. If you use a different paper your results may vary.)

Using the paper pattern and pencil line as a guide, stack the pine needles and cardinal on the glass. Hold the pieces in place with a small amount of fuser’s glue. This keeps the pieces from moving when you carry the kiln shelf and glass to the kiln. Spoon white frit on the pine needles to represent snow. Use a small paint brush to clean up the top edge of the snow. Sprinkle a little white frit on the blue sky. For a little sparkle, place white dichroic frit on top of the snow and on the sky.

Cardinal in Pine Tree

Fire the assembled glass to a full fuse temperature using the guide below.

I love the crisp, vibrant colors of the finished piece and the extra detail the encased fiber paper gives the sky. The Thinfire shrunk lightly during firing and left a delicate star shaped, snowflake pattern in the background. The sparkly dichroic frit adds a little magic to this winter wonderland.

This season when you’re feeling the icy chill of cold winter days, create your own warmth. Snuggle up to your kiln and make this cheery Cardinal and Pine Tree.

This pattern is just one of many seasonal delights you can make in the book Home for the Holidays now available as a download on my website https://lisajvogt.com/ 

Home for the Holidays eBook

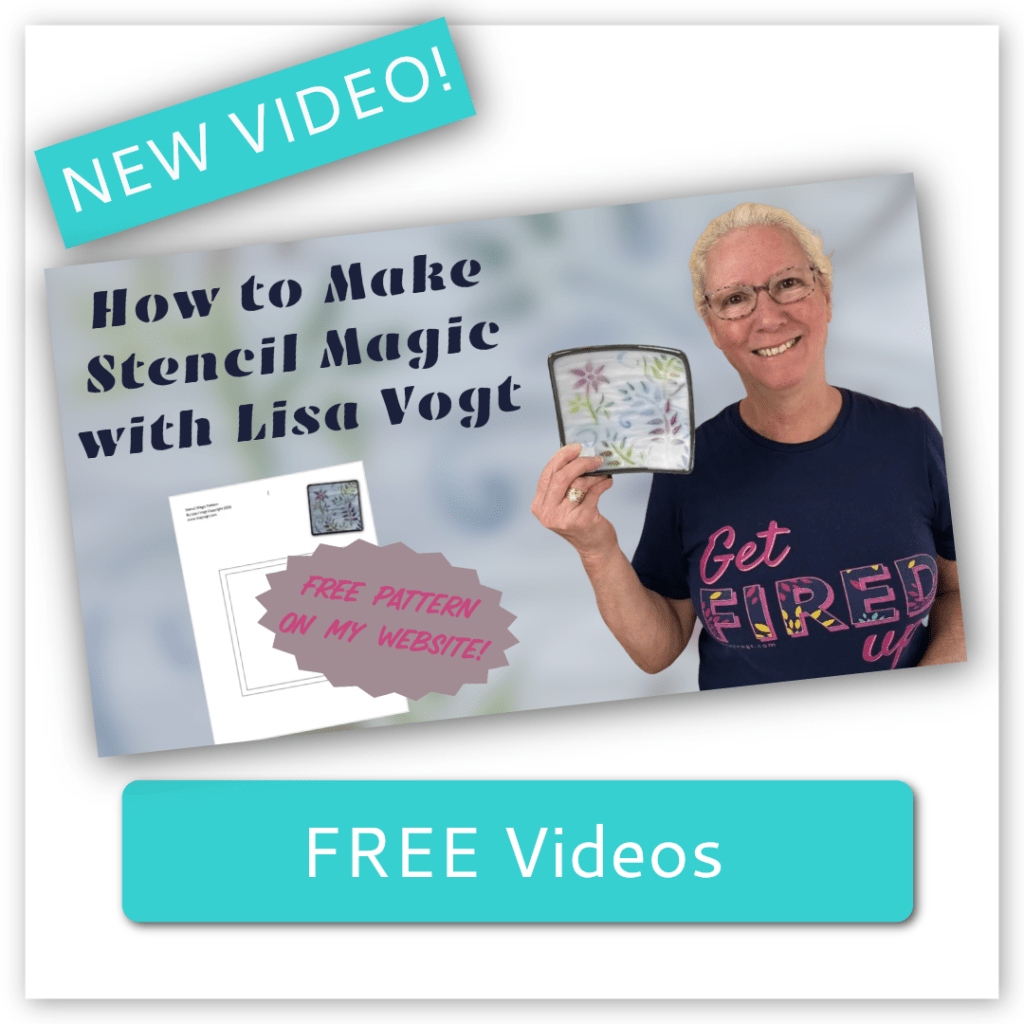
Watch the Cardinal in  Pine Tree video here https://youtu.be/i-EGOTEOUyA

Fusing Guide
NOTE: Kilns fire differently. Test fire these guides in your kiln and make adjustments as needed.

Segment 1: Ramp 300 F/hr to 1300 F and hold for 30 min.
Segment 2: Ramp 500 F/hr to 1465 F and hold for 10 min.
Segment 3: Ramp 9999 (AFAP*) to 960 F and hold for 40 min.
Segment 4: Let cool to room temperature.
*as fast as possible

System 96 by Oceanside Glasstile
100SF Clear for Base, 1 Sq. FT.
5331SF Sky Blue for Sky, 1 Sq. Ft.
60-602-96 Flame for Cardinal, Scrap
60-755-96 Fern for Pine Tree, Scrap
60-335-96 Marigold for Bird Beak, Scrap
F3-200-96-8 Medium White Frit for Snow
CBS Dichroic Frit for Snow, Rainbow 1 on White
Thinfire fiber paper scrap for snowflakes
Pencil, Scissors, Snowflake Paper Punch

Happy Holidays!
Lisa

Follow my blog for more tips and tricks!

Website www.LisaJVogt.com
YouTube http://www.youtube.com/watch?v=dhOifd7wukk
Facebook www.Facebook.com/LisaJVogt
Twitter https://twitter.com/lisajvogt
Instagram @lvogt_originalsinglass
NEW Instagram @through_the_artists_lens

Interwoven as seen in Fused Glass Sculptures Webinar

Upcoming Webinar
Fused Glass Sculptures January 14, 2021
Register here: https://www.glasspatterns.com/glass-patterns-quarterly-store/category/208-live-webinar-events.html

Creating striking sculptural fused glass forms is easy when you know the professional tips and tricks!

Join me in this comprehensive webinar and learn how easily you can put tried and true methods to use in unlikely ways, to create extraordinary sculptural art.

Enjoy the thrill of limitless possibilities.

In this in-depth webinar, you’ll learn pro tips and tricks for better glass cutting. See how to mix different fusible materials to make more elaborate designs.

You’ll be amazed how using standard slumping molds in unique ways can drastically improve the shape of your art.

You’ll be inspired by the innovative combination of ordinary techniques I share.

You’ll be confident to fuse glass after seeing how easy it is to load, program and fire a kiln.

Best of all, you’ll have an exclusive technical advantage with the advanced understanding of my dependable firing programs. And you’ll love the stunning three-dimensional results you can achieve by fusing all of these concepts together.

Beginner and advanced students alike will find inspiration, motivation and renewed artistic freedom from seeing the step-by-step construction of more than 5 sculptural projects in this webinar.

After this exciting webinar you’ll have the professional knowledge and increased confidence to incorporate these innovative methods in your new work.

In addition, you’ll have a working knowledge of kiln operation, custom firing guides, and a deeper understanding of sculptural glass fusing fabrication.

You’ll have the burning desire, and the cool self-confidence, to take your passion to greater heights.

Join me January 14, 2021 for fusing, fun and a welcome opportunity to fuse glass with other enthusiastic glass artists around the world.

Currents by Lisa Vogt

NEW DATE!

Sculptural Fused Glass, 4-Day, Hands-on Workshop April 27-30, 2021
Register today! 4 seat available. Register here!  
Wesley Chapel, Florida, 4-Day, Hands-on, Class size is limited.

This is the turning-point workshop you’ve been waiting for.

It’s hard to describe what it’s like when I’m feeling the creative flow. Time flies. Hours pass in what I thought were minutes. My naturally distracted mind is focused on what my hands are doing, and nothing else. I get lost in my own world. When I return to reality, I feel rejuvenated and spiritually uplifted. That’s why I like sharing my studio space with others. I try to give them that experience and hope they feel the same inspiration and fulfillment I do. -Lisa

 This class is for you! Any skill level can attend. Beginner, intermediate and advanced students alike will learn how to advance their glass fusing skills and expand their artistic style.

 Join me and I’ll show you all the pro tips and tricks I use to make stunning 3-dimnesional art. You’ll learn how to combine advanced techniques in new ways to create extraordinary sculptural pieces of art.

You’ll leave class with several completed glass sculptures, my custom firing guides and a deeper understanding of sculptural fused glass fabrication. You’ll have the knowledge, confidence, and inspiration you’ve been craving to take your artwork to the next level.

Materials are included, that’s a $150.00 value!

Here’s what the students from my recent November 2020 class are saying about the workshop.

“There is a wealth of material, tools and possible projects. Lisa is very motivating, informative, and supportive. The variety of materials is amazing. The number of projects we made in 4 days is beyond what I expected. The classroom set up was very well organized. I felt completely comfortable and safe with plenty of space and sanitizer. This class was beyond my expectations.” -Jane

 “My favorite thing was Lisa’s knowledge and wealth of information. I was surprised by how many projects we made. I was very comfortable with the classroom set up and loved everything about this class. I learned so much and it was fun. My least favorite part was Friday at 4:00 pm.” -Liz

 “My favorite thing about this class was the variety of glass and other materials. Unlimited dichroic! I was comfortable with the classroom set up; Lisa had lots of little personal touches that made it special. Thanks for the wonderful lunches!” -Gail

  Student comments from previous classes.

 “My favorite part about the class was the non-stop building and the generous amount of materials available. What surprised me about the class was how full the schedule was. Usually, you do 1 project. We did 5 in 4 days. Thank you so much for your generosity.”   -Christine 

 “My favorite part about the class was the variety of projects we made. What surprised me was the number of projects we completed. Awesome experience – will come again in the future.” -Monica

“Instruction was clear, help was always available, and Lisa’s explanation of the equipment was great.” -Sherry

“My favorite thing about the class was the friendly atmosphere that encouraged open thoughts and sharing ideas.” -Lyn

“I enjoyed making all the projects, especially the flow piece and the freedom to be creative with our work.”  -Joy

“My favorite thing about the class was the ability to see multiple pieces of art that originated from concepts taught.” -Vicki

“Lisa is very professional, knowledgeable and freakishly talented. House, art, mosaic, her work – really fun and beautiful.” -Lorna

 “Incredible class. Lisa shared her artistic knowledge of color flow and her technical knowledge of glass.” -Larry

 “I had so much fun! Lisa is a great teacher!” -Brenda

 NEW Artwear Designed for Artists by Artists Tell them how you really feel with bold T-shirts, Eco-conscience tote bags and sassy mugs.

Watch it NOW! Start fusing today!
 

Downloadable instructional videos for every skill level.
 

eBooks for every interest and skill level.

Check out my eBooks for elegant patterns and detailed fusing instructions. 

Posted on Leave a comment

Glitzy Ornament How-to

The magical thing about glass fusing is you can work with the same materials for years and all it takes to fascinate you again is the introduction of a new component. The round Christmas ornament is far from a unique design. But add a new twist, a little bling and amazingly you have a delightfully fresh version of an old favorite.

At this hectic time of year, we’re all looking for fast and flashy projects that make great gifts. These easy to make ornaments are your ticket to wonderfully productive studio time. What makes these simple pieces so attractive is the paring of traditional holiday colors along with lively patterns.

Making the Ornament Bowl

Begin by cutting a 9-inch circle of clear glass for the ornament base. Cut 2 clear pieces of glass to represent the bail of the ornament. Select your murrine and cut it into 1/8-inch-long bits with mosaic nippers. Choose your holiday colors and cut them into strips. Arrange the strips on the clear base. Separate the cut strips with twisted cane. For added interest, include a strip of murrine.

Ornament pre-fired.


Then, just for fun, rearrange your materials. Try different combinations until you have a pleasing pattern. I love this spontaneous type of assembly as it always produces a more dynamic design than I originally imagined.

Using a 9-inch round paper pattern as a guide, draw the circle shape on the strips and cane with a marker. Cut the strips and cane to fit neatly on the clear base glass. Cut clear dichroic to represent the bail of the ornament.

Cut narrow strips of dichroic on clear. Arrange the dichroic strips on the wide band of color to make the snowflakes. Be sure the dichroic coating side is down so it won’t scratch when the bowl is used.

Place the assembled glass in the kiln on a primed or shelf paper lined kiln shelf. Stack the 2 clear bails beside the circle. Overlap the white and the clear bails with the dichroic bail to bridge the parts when fused.

Making the Dichroic Ornaments

I plan to use these little beauties as festive spoon rests in the kitchen. The dichroic coating is fragile and will scratch if not protected by clear glass. When making functional art with dichroic glass, I assemble the projects differently. Unlike the first ornament, which was built on a clear base, the base of these small decorations will be made up of pieces. The pieces will then be capped with a single piece of clear glass to ramp up the dichroic colors and protect the coating from scratches.

Begin by cutting 4-inch circles out of clear glass. Cut 2 bails for each of the ornaments out of clear glass. Set the circles and bails aside. Cut a fun assortment of 4-inch squares of dichroic on black into strips. Rearrange the strips to make four unique ornament designs. Add a few twisted canes for a lacy effect. Turn any textured glass strips over. Using the clear circles as a guide, trace the circle shape on the back of the dichroic strips with a silver marker. Cut the glass and cane to match the circle. Turn the cut glass over and rearrange the strips and cane. Cut a bail for each ornament out of dichroic on clear.


Place the dichroic and cane layer in the kiln on a primed or shelf paper lined kiln shelf. Cap the dichroic glass with the 4-inch clear glass circles. Stack the 2 clear bails beside the glass. Overlap the clear cap and the clear bails with the dichroic bail to bridge the parts when fused.

Full fuse all five ornaments using the guide below.
If any of the circles are uneven, grind the edges as needed to improve the shapes.
Place the fused glass in slumping molds. Slump using the guide below.

I love including functional art in everyday life. And the kitchen, being the hub of family activity that it is, is a great place to enjoy personal, hand-made holiday decorations.

Check out the Glitzy Ornament Video Here!

Fusing Guide
Segment 1: Ramp 300 F/hr to 1300 and hold 30 min.
Segment 2: Ramp 500F/hr to 1465 and hold 10 min.
Segment 3: Ramp 9999(AFAP*) to 960 and hold 40 min.
Segment 4: Cool to room temperature.
*As fast as possible

Slumping Guide
Segment 1: Ramp 300 F/hr to 1265 and hold 10 min.
Segment 2: Ramp 9999(AFAP*) to 960 and hold 40 min.
Segment 3: Cool to room temperature.
*As fast as possible

NOTE: Kilns fire differently. Test fire these guides in your kiln, adjust as needed.
Here’s the glass I used to make these ornaments.
 Glitzy Ornament Bowl, 9 Inch Round

Oceanside Glasstile 96
Clear, 100SF, 1 Sq. Ft. for Base
White, 200SF, ½ Sq. Ft for Design
Dark Green, 220-76SF, ¼ Sq. Ft for Design
Flame 60-602-96, ½ Sq. Ft. for Design
Twisted Cane, Assorted colors, 17 for Design
Murine, Red, White & Green, 1 for Design
CBS Dichroic on Clear, Scrap

Glitzy Ornament Dishes, 4 Inch Round
CBS Dichroic on Black
Assorted colors, 4 – 4 Inch x 4 Inch for Base Layer
Clear, 100 SF, 1 Sq. Ft for Second Layer

Ceramic Slumping Molds
1 – 10 Inch x 10 Inch Square
4 – 4 Inch x 4 Inch, Square

Happy Holidays!
Lisa

Follow my blog for more tips and tricks!
Website www.LisaJVogt.com
YouTube http://www.youtube.com/watch?v=dhOifd7wukk
Facebook www.Facebook.com/LisaJVogt
Twitter https://twitter.com/lisajvogt
Instagram @lvogt_originalsinglass
Instagram @through_the_artists_lens

Upcoming Webinar

Interwoven as seen in Fused Glass Sculptures Webinar

Fused Glass Sculptures January 14, 2021

Register here: https://www.glasspatterns.com/glass-patterns-quarterly-store/category/208-live-webinar-events.html

Creating striking sculptural fused glass forms is easy when you know the professional tips and tricks!

Join me in this comprehensive webinar and learn how easily you can put tried and true methods to use in unlikely ways, to create extraordinary sculptural art.

Enjoy the thrill of limitless possibilities.

In this in-depth webinar, you’ll learn pro tips and tricks for better glass cutting. See how to mix different fusible materials to make more elaborate designs.

You’ll be amazed how using standard slumping molds in unique ways can drastically improve the shape of your art. You’ll be inspired by the innovative combination of ordinary techniques I share. You’ll be confident to fuse glass after seeing how easy it is to load, program and fire a kiln.

Best of all, you’ll have an exclusive technical advantage with the advanced understanding of my dependable firing programs. And you’ll love the stunning three-dimensional results you can achieve by fusing all of these concepts together.

Beginner and advanced students alike will find inspiration, motivation and renewed artistic freedom from seeing the step-by-step construction of more than 5 sculptural projects in this webinar.

After this exciting webinar you’ll have the professional knowledge and increased confidence to incorporate these innovative methods in your new work.

In addition, you’ll have a working knowledge of kiln operation, custom firing guides, and a deeper understanding of sculptural glass fusing fabrication.

You’ll have the burning desire, and the cool self-confidence, to take your passion to greater heights.

Join me January 14, 2021 for fusing, fun and a welcome opportunity to fuse glass with other enthusiastic glass artists around the world.
 

Currents by Lisa Vogt

NEW DATE!
Sculptural Fused Glass, 4-Day, Hands-on Workshop April 27-30, 2021
Register today! 4 seat available. Register here!  
Wesley Chapel, Florida, 4-Day, Hands-on, Class size is limited.
This is the turning-point workshop you’ve been waiting for.

It’s hard to describe what it’s like when I’m feeling the creative flow. Time flies. Hours pass in what I thought were minutes. My naturally distracted mind is focused on what my hands are doing, and nothing else. I get lost in my own world. When I return to reality, I feel rejuvenated and spiritually uplifted. That’s why I like sharing my studio space with others. I try to give them that experience and hope they feel the same inspiration and fulfillment I do. -Lisa
 
This class is for you! Any skill level can attend. Beginner, intermediate and advanced students alike will learn how to advance their glass fusing skills and expand their artistic style.
 
Join me and I’ll show you all the pro tips and tricks I use to make stunning 3-dimnesional art. You’ll learn how to combine advanced techniques in new ways to create extraordinary sculptural pieces of art.

You’ll leave class with several completed glass sculptures, my custom firing guides and a deeper understanding of sculptural fused glass fabrication. You’ll have the knowledge, confidence, and inspiration you’ve been craving to take your artwork to the next level.

Materials are included, that’s a $150.00 value!

Here’s what the students from my recent November 2020 class are saying about the workshop.
 
“There is a wealth of material, tools and possible projects. Lisa is very motivating, informative, and supportive. The variety of materials is amazing. The number of projects we made in 4 days is beyond what I expected. The classroom set up was very well organized. I felt completely comfortable and safe with plenty of space and sanitizer. This class was beyond my expectations.” -Jane

“My favorite thing was Lisa’s knowledge and wealth of information. I was surprised by how many projects we made. I was very comfortable with the classroom set up and loved everything about this class. I learned so much and it was fun. My least favorite part was Friday at 4:00 pm.” -Liz

“My favorite thing about this class was the variety of glass and other materials. Unlimited dichroic! I was comfortable with the classroom set up; Lisa had lots of little personal touches that made it special. Thanks for the wonderful lunches!” -Gail
 
Student comments from previous classes.
 
“My favorite part about the class was the non-stop building and the generous amount of materials available. What surprised me about the class was how full the schedule was. Usually, you do 1 project. We did 5 in 4 days. Thank you so much for your generosity.”   -Christine 
 
“My favorite part about the class was the variety of projects we made. What surprised me was the number of projects we completed. Awesome experience – will come again in the future.” -Monica

“Instruction was clear, help was always available, and Lisa’s explanation of the equipment was great.” -Sherry

“My favorite thing about the class was the friendly atmosphere that encouraged open thoughts and sharing ideas.” -Lyn

“I enjoyed making all the projects, especially the flow piece and the freedom to be creative with our work.”  -Joy
“My favorite thing about the class was the ability to see multiple pieces of art that originated from concepts taught.” -Vicki

“Lisa is very professional, knowledgeable and freakishly talented. House, art, mosaic, her work – really fun and beautiful.” -Lorna
 
“Incredible class. Lisa shared her artistic knowledge of color flow and her technical knowledge of glass.” -Larry
 
“I had so much fun! Lisa is a great teacher!” -Brenda

NEW Artwear Designed for Artists by Artists Tell them how you really feel with bold T-shirts, Eco-conscience tote bags and sassy mugs. Now available on my website.

Artwear designed by artists for artists.


Watch it NOW! Start fusing today!

Downloadable instructional videos for every skill level.  

eBooks for every interest and skill level.

Check out my eBooks for elegant patterns and detailed fusing instructions. 

Posted on Leave a comment

5 Quick Holiday Favorites to Brighten Your Home

Grinch

These darling plates are great for table decorations or for serving sweet treats. The dishes photographed here measure 10-inch by 10-inch. But these smart designs also look terrific in 12-inch or 8-inch sizes. Feel free to adjust the size to fit any slumping mold you may have.

Sweet treats for Santa

Cookies for Santa

At this over scheduled time of year, we’re all longing for the peace and tranquility we associate with more studio time. Well here’s your excuse to log in more hours with your glass cutter and kiln. Don’t let these charming projects fool you; these flashy little beauties are fun, fast and easy to make. Plus, they make great gifts for family and friends.

Celebrate the season.

Star of David

To make these seasonal plates, cut a 10-inch by 10-inch piece of clear fusible glass for the base layer. Select your design and glass colors. Cut the design layer using the specific pattern you selected as a guide. Glue the design layer on top of the base layer with a small amount of fusers glue, or another appropriate adhesive. Set the project aside to let the glue dry. (I like to use a tiny amount of white Elmer’s school glue and apply it with a tooth pick. This glue dries fast and when used in tiny amounts burns off without a trace.) Using the pattern as a guide, cut the accent pieces that make up the design you selected. Grind the cut accent pieces for a nice, clean fit. Clean the glass with water and then dry it with a towel. (I prefer to use water over detergents or other solvents that could leave reside that might burn onto the glass surface during fusing.) Glue the accent pieces to the design layer with fusers glue. Let the glue dry before moving to the next step.

Simple but beautiful!

Christmas Tree

For Cookies for Santa, Star of David and You’re a Mean One, select the appropriate power frit colors. Wearing a dust mask, sift your chosen powder evenly over the glass. Using a small dry paint brush or the tip of a pencil draw your message in the frit like you would draw in the sand. Remove any frit that might have fallen on the surrounding glass pieces with the dry paint brush.

Chill out with this friendly fellow.

Snowman

Chill out with this friendly winter visitor. This plate is fast and easy to make, no frit needed.

Full fuse and then slump your plates using the guides below.

Fusing Guide

Segment 1: Ramp 300 F/hr to 1300 and hold 30 min.
Segment 2: Ramp 500F/hr to 1465 and hold 10 min.
Segment 3: Ramp 9999(AFAP*) to 960 and hold 40 min.
Segment 4: Cool to room temperature.
*As fast as possible

Slumping Guide
Segment 1: Ramp 300 F/hr to 1265 and hold 10 min.
Segment 2: Ramp 9999(AFAP*) to 960 and hold 40 min.
Segment 3: Cool to room temperature.
*As fast as possible

NOTE: Kilns fire differently. Test fire these guides in your kiln and then adjust as needed.

Serve. Celebrate!

Cheers!

Lisa

Follow my blog for more tips and tricks!

Website www.LisaJVogt.com
YouTube http://www.youtube.com/watch?v=dhOifd7wukk
Facebook www.Facebook.com/LisaJVogt
Twitter https://twitter.com/lisajvogt
Instagram @lvogt_originalsinglass
NEW Instagram @through_the_artists_lens

 Upcoming Webinars

Glacier as seen in


Creative Slumping Webinar December 10, 2020

 Register here: https://www.glasspatterns.com/glass-patterns-quarterly-store/category/208-live-webinar-events.html

I’m back with my popular Webinar, Creative Slumping. In this detailed Webinar, I’ll reshape the way you slump and drape glass. See how thinking outside the box and using readymade molds in new ways offers numerous and exciting opportunities to produce unique forms. You’ll also learn how to make your own graceful, free-form shaped molds from readily available materials with no laborious measuring or messy mixes needed.

But I’m not finished there…

Taking you one step further, I’ll show you how to use these different approaches, in combination, to transform ordinary projects into inspiring, sculptural pieces of art!

Join me December 10, 2020 for fusing, fun and a welcome opportunity to fuse glass with other enthusiastic glass artists around the world.

Interwoven as seen in Fused Glass Sculptures Webinar


Fused Glass Sculptures Webinar January 14, 2021

 Register here: https://www.glasspatterns.com/glass-patterns-quarterly-store/category/208-live-webinar-events.html

Creating striking sculptural fused glass forms is easy when you know the professional tips and tricks!

Join me in this comprehensive webinar and learn how easily you can put tried and true methods to use in unlikely ways, to create extraordinary sculptural art.

Enjoy the thrill of limitless possibilities.

In this in-depth webinar, you’ll learn pro tips and tricks for better glass cutting. See how to mix different fusible materials to make more elaborate designs.

You’ll be amazed how using standard slumping molds in unique ways can drastically improve the shape of your art.

You’ll be inspired by the innovative combination of ordinary techniques I share.

You’ll be confident to fuse glass after seeing how easy it is to load, program and fire a kiln.

Best of all, you’ll have an exclusive technical advantage with the advanced understanding of my dependable firing programs. And you’ll love the stunning three-dimensional results you can achieve by fusing all of these concepts together.

Beginner and advanced students alike will find inspiration, motivation and renewed artistic freedom from seeing the step-by-step construction of more than 5 sculptural projects in this webinar.

After this exciting webinar you’ll have the professional knowledge and increased confidence to incorporate these innovative methods in your new work.

In addition, you’ll have a working knowledge of kiln operation, custom firing guides, and a deeper understanding of sculptural glass fusing fabrication.

You’ll have the burning desire, and the cool self-confidence, to take your passion to greater heights.

Join me January 14, 2021 for fusing, fun and a welcome opportunity to fuse glass with other enthusiastic glass artists around the world.

Currents by Lisa Vogt

NEW DATE!

Sculptural Fused Glass, 4-Day, Hands-on Workshop April 27-30, 2021

Register today! 4 seat available. Register here!  

Wesley Chapel, Florida, 4-Day, Hands-on, Class size is limited.

This is the turning-point workshop you’ve been waiting for.

It’s hard to describe what it’s like when I’m feeling the creative flow. Time flies. Hours pass in what I thought were minutes. My naturally distracted mind is focused on what my hands are doing, and nothing else. I get lost in my own world. When I return to reality, I feel rejuvenated and spiritually uplifted. That’s why I like sharing my studio space with others. I try to give them that experience and hope they feel the same inspiration and fulfillment I do. -Lisa

 This class is for you! Any skill level can attend. Beginner, intermediate and advanced students alike will learn how to advance their glass fusing skills and expand their artistic style.

 Join me and I’ll show you all the pro tips and tricks I use to make stunning 3-dimnesional art. You’ll learn how to combine advanced techniques in new ways to create extraordinary sculptural pieces of art.

You’ll leave class with several completed glass sculptures, my custom firing guides and a deeper understanding of sculptural fused glass fabrication. You’ll have the knowledge, confidence, and inspiration you’ve been craving to take your artwork to the next level.

Materials are included, that’s a $150.00 value!

Here’s what the students from my recent November 2020 class are saying about the workshop.

 “There is a wealth of material, tools and possible projects. Lisa is very motivating, informative, and supportive. The variety of materials is amazing. The number of projects we made in 4 days is beyond what I expected. The classroom set up was very well organized. I felt completely comfortable and safe with plenty of space and sanitizer. This class was beyond my expectations.” -Jane

 “My favorite thing was Lisa’s knowledge and wealth of information. I was surprised by how many projects we made. I was very comfortable with the classroom set up and loved everything about this class. I learned so much and it was fun. My least favorite part was Friday at 4:00 pm.” -Liz

 “My favorite thing about this class was the variety of glass and other materials. Unlimited dichroic! I was comfortable with the classroom set up; Lisa had lots of little personal touches that made it special. Thanks for the wonderful lunches!” -Gail

 Student comments from previous classes.

 “My favorite part about the class was the non-stop building and the generous amount of materials available. What surprised me about the class was how full the schedule was. Usually, you do 1 project. We did 5 in 4 days. Thank you so much for your generosity.”   -Christine 

 “My favorite part about the class was the variety of projects we made. What surprised me was the number of projects we completed. Awesome experience – will come again in the future.” -Monica

“Instruction was clear, help was always available, and Lisa’s explanation of the equipment was great.” -Sherry

“My favorite thing about the class was the friendly atmosphere that encouraged open thoughts and sharing ideas.” -Lyn

“I enjoyed making all the projects, especially the flow piece and the freedom to be creative with our work.”  -Joy

“My favorite thing about the class was the ability to see multiple pieces of art that originated from concepts taught.” -Vicki

“Lisa is very professional, knowledgeable and freakishly talented. House, art, mosaic, her work – really fun and beautiful.” -Lorna

 “Incredible class. Lisa shared her artistic knowledge of color flow and her technical knowledge of glass.” -Larry

 “I had so much fun! Lisa is a great teacher!” -Brenda

Watch it NOW! Start fusing today!


Video covers.
Glass Fusing Video Downloads

Downloadable instructional videos for every skill level.


eBooks for every interest and skill level.


Check out my eBooks for elegant patterns and detailed fusing instructions. 


Posted on Leave a comment

Brighten Your Day with Fused Glass Lanterns

Winter Wonderland

It’s always a thrill when I come up with a fun, new way to add dazzling art glass to my home, office, and yard. I’ve been busy in my glass studio designing, building and fusing a series of fused glass lanterns that bring a special brightness and cheerful joy to any setting.

I enjoy having soft accent lights around my home. So I thought, why not create a collection of pieces I could switch out seasonally to add a festive atmosphere to my rooms all year long. Designing such a wide variety of themes also kept the construction fresh and fun.

In my new video Lumin-Essence I share how to make 8 shimmering lanterns. The lanterns range in complexity, but anyone with a flare for fusing can easily make them all. I will tell you though, they will challenge your fabrication skills. But in a good, try something new way that you’ll love.

The Lake as seen in Lumin-Essence Video


The first lantern I designed is inspired by relaxing summer vacations spent on a serene lake. A sailboat glides over calm waters with a picturesque view of mountains and pine tress behind. The custom made glass base provides lift and an attractive pedestal to showcase the scenic setting. The front panel of the lantern bows out. The back panel bows in the opposite creating the perfect space for a candle or LED lights.

Fused Glass Lantern
Weave as seen in Lumin-Essence Video

Weave is an especially fun lantern to make. It looks complicated and fragile, when in reality it’s easy and sturdy once assembled. Plus, it’s a terrific size for adding a touch of light to small or confined spaces. The assembly is simple. You cut a bunch of strips, lay them out in 4 alternating layers and then tack the pieces together in your kiln. The 4 sides are then glued together around a clear glass base. I like to add dichroic glass strips to mine for that super shine that lights up the room. The best part is Weave looks amazingly beautiful when lit. The open construction and rich colors cast a rainbow of colors on the table and surrounding walls.

Winter Wonderland
Winter Wonderland as seen in Lumin-Essence Video


Winter Wonderland is my favorite lantern. The clear glass backdrop is the perfect complement to the white and dichroic snowflakes. This dazzling lantern requires extra steps as the snowflakes are tacked together and then tacked on the clear front and back panels. Let me tell you, this one is worth your time. Winter Wonderland is a spectacular, glistening addition to any room.

Dogwood as seen in Lumin-Essence Video

Dogwood reminds me of flower gardening and the rebirth of nature in the spring. I selected a crisp, clean, simple color palate for this lantern. I used clear glass for the lattice because I wanted this lantern to have structure, but also a light, airy feel. The flowers are fun to make. They’re tacked together and then slumped in small bowl molds to give them form. Dogwood is assembled it multiple easy steps. The lantern sides are glued around a clear base. After the glue is dry the flowers are glued on one side at a time. When lit, Dogwood makes a dazzling centerpiece.


Blue Mountains as seen in Lumin-Essence Video


Blue Mountains was inspired by the cool gradient colors of the Great Smoky Mountains. We all enjoy a refreshing trip to the mountains where stunning views and peaceful moments linger in our hearts. With this lantern you can relive those tranquil times every day. This lantern is super easy to make. You just layer several shades of blue. The beauty of Blue Mountains is in its simplicity of design and construction. You’ll love making this restful lantern.

Red Heart as seen in Lumin-Essence Video

Red Heart is a darling combination of vivid color and lacy pattern. The great thing about this lantern is the small, fused glass design combined with a ready-made candle shelter, make it quick and easy to make. You’ll definitely want one of these around come February. This dainty lantern is a perfect personalized gift to show family and friends they hold a special place in your heart.

Fall Leaf
Fall Leaf as Seen in my new Lumin-Essence video.

Fall Leaf is another quick and easy design you can make to bring a seasonal touch to your home. It’s organic shape and bright, cheery colors make it the perfect complement to your fall decorations.

Purple Heart as seen in Lumin-Essence Video


Purple Heart may be dainty, but it lights up the room with an impressive glow. It’s another quick and easy project that makes a great gift. Just fuse glass strips and then glue them on a ready-made candle shelter. It doesn’t get easier.

I hope this illuminating collection inspires you to be creative and celebrate family, friends, and all that we have to be thankful for.

Great News!

If you enjoy reading my blog, I have a new feature on my website you’ll like. From the home page click on any other page. On the side bar you can now read my Top 10 Blog Posts. The list updates every 48 hours so check back often.

Happy Fusing!

Lisa

Follow my blog for more tips and tricks!

Website www.LisaJVogt.com
YouTube http://www.youtube.com/watch?v=dhOifd7wukk
Facebook www.Facebook.com/LisaJVogt

Twitter https://twitter.com/lisajvogt

Instagram @lvogt_originalsinglass

NEW Instagram @through_the_artists_lens

Learn how to make 8 festive lanterns in this video.


Lumin-Essence glass fusing with Lisa Vogt Video Download

“The elegant new projects in this video are amazing! Lisa’s step-by-step instruction makes making these beautiful lanterns easy.” 

Brighten your day with dazzling fused glass lanterns for all occasions. In this comprehensive video I’ll show you how to make 8 shimmering artistic lamps. I’ll guide you step-by-step through the stages of construction, including pattern layout, glass cutting, project assembly, fusing, tacking, slumping and how to assemble these 3-dimensional pieces of functional art.

You’ll also learn how to make custom, gallery quality glass bases. In addition, I’ll show you how to use ready-made clear glass candle shelters for quick, easy, personalized gifts. Plus, I’ll share simple ways to light your beautiful creations. Along with in-depth instruction, you’ll receive my project specific firing guides.

Beginner, intermediate and advanced fusers alike will love the variety of unique shapes and stylish new patterns designed to brighten any decor with a seasonal flare. Celebrate year round with glowing, glass accents that make every day a special occasion.

PLUS, you get an 18-page eBook with full size project patterns AND materials list.

 Upcoming Webinars

Reshape the way you slump and drape glass.
Glacier as seen in Creative Slumping Webinar


 Creative Slumping Webinar December 10, 2020

Register here: https://www.glasspatterns.com/glass-patterns-quarterly-store/category/208-live-webinar-events.html

I’m back with my popular Webinar, Creative Slumping. In this detailed Webinar, I’ll reshape the way you slump and drape glass. See how thinking outside the box and using readymade molds in new ways offers numerous and exciting opportunities to produce unique forms. You’ll also learn how to make your own graceful, free-form shaped molds from readily available materials with no laborious measuring or messy mixes needed.

But I’m not finished there…

Taking you one step further, I’ll show you how to use these different approaches, in combination, to transform ordinary projects into inspiring, sculptural pieces of art!

Join me December 10, 2020 for fusing, fun and a welcome opportunity to fuse glass with other enthusiastic glass artists around the world.

Interwoven as seen in Fused Glass Sculptures Webinar


Fused Glass Sculptures Webinar January 14, 2021

Register here: https://www.glasspatterns.com/glass-patterns-quarterly-store/category/208-live-webinar-events.html

Creating striking sculptural fused glass forms is easy when you know the professional tips and tricks!

Join me in this comprehensive webinar and learn how easily you can put tried and true methods to use in unlikely ways, to create extraordinary sculptural art.

Enjoy the thrill of limitless possibilities.

In this in-depth webinar, you’ll learn pro tips and tricks for better glass cutting. See how to mix different fusible materials to make more elaborate designs.

You’ll be amazed how using standard slumping molds in unique ways can drastically improve the shape of your art.

You’ll be inspired by the innovative combination of ordinary techniques I share.

You’ll be confident to fuse glass after seeing how easy it is to load, program and fire a kiln.

Best of all, you’ll have an exclusive technical advantage with the advanced understanding of my dependable firing programs. And you’ll love the stunning three-dimensional results you can achieve by fusing all of these concepts together.

Beginner and advanced students alike will find inspiration, motivation and renewed artistic freedom from seeing the step-by-step construction of more than 5 sculptural projects in this webinar.

After this exciting webinar you’ll have the professional knowledge and increased confidence to incorporate these innovative methods in your new work.

In addition, you’ll have a working knowledge of kiln operation, custom firing guides, and a deeper understanding of sculptural glass fusing fabrication.

You’ll have the burning desire, and the cool self-confidence, to take your passion to greater heights.

Join me January 14, 2021 for fusing, fun and a welcome opportunity to fuse glass with other enthusiastic glass artists around the world.

Currents by Lisa Vogt

NEW DATE!

Sculptural Fused Glass, 4-Day, Hands-on Workshop April 27-30, 2021

Register today! 4 seat available. Register here!  

Wesley Chapel, Florida, 4-Day, Hands-on, Class size is limited.

This is the turning-point workshop you’ve been waiting for.

It’s hard to describe what it’s like when I’m feeling the creative flow. Time flies. Hours pass in what I thought were minutes. My naturally distracted mind is focused on what my hands are doing, and nothing else. I get lost in my own world. When I return to reality, I feel rejuvenated and spiritually uplifted. That’s why I like sharing my studio space with others. I try to give them that experience and hope they feel the same inspiration and fulfillment I do. -Lisa

 This class is for you! Any skill level can attend. Beginner, intermediate and advanced students alike will learn how to advance their glass fusing skills and expand their artistic style.

 Join me and I’ll show you all the pro tips and tricks I use to make stunning 3-dimnesional art. You’ll learn how to combine advanced techniques in new ways to create extraordinary sculptural pieces of art.

You’ll leave class with several completed glass sculptures, my custom firing guides and a deeper understanding of sculptural fused glass fabrication. You’ll have the knowledge, confidence, and inspiration you’ve been craving to take your artwork to the next level.

Materials are included, that’s a $150.00 value!

Here’s what the students from my recent November 2020 class are saying about the workshop.

 “There is a wealth of material, tools and possible projects. Lisa is very motivating, informative, and supportive. The variety of materials is amazing. The number of projects we made in 4 days is beyond what I expected. The classroom set up was very well organized. I felt completely comfortable and safe with plenty of space and sanitizer. This class was beyond my expectations.” -Jane

 “My favorite thing was Lisa’s knowledge and wealth of information. I was surprised by how many projects we made. I was very comfortable with the classroom set up and loved everything about this class. I learned so much and it was fun. My least favorite part was Friday at 4:00 pm.” -Liz

“My favorite thing about this class was the variety of glass and other materials. Unlimited dichroic! I was comfortable with the classroom set up; Lisa had lots of little personal touches that made it special. Thanks for the wonderful lunches!” -Gail

Student comments from previous classes.

 “My favorite part about the class was the non-stop building and the generous amount of materials available. What surprised me about the class was how full the schedule was. Usually, you do 1 project. We did 5 in 4 days. Thank you so much for your generosity.”   -Christine 

 “My favorite part about the class was the variety of projects we made. What surprised me was the number of projects we completed. Awesome experience – will come again in the future.” -Monica

“Instruction was clear, help was always available, and Lisa’s explanation of the equipment was great.” -Sherry

“My favorite thing about the class was the friendly atmosphere that encouraged open thoughts and sharing ideas.” -Lyn

“I enjoyed making all the projects, especially the flow piece and the freedom to be creative with our work.”  -Joy

“My favorite thing about the class was the ability to see multiple pieces of art that originated from concepts taught.” -Vicki

“Lisa is very professional, knowledgeable and freakishly talented. House, art, mosaic, her work – really fun and beautiful.” -Lorna

 “Incredible class. Lisa shared her artistic knowledge of color flow and her technical knowledge of glass.” -Larry

 “I had so much fun! Lisa is a great teacher!” -Brenda

Watch it NOW! Start fusing today!

Video covers.
Glass Fusing Video Downloads


 Downloadable instructional videos for every skill level.

eBooks for every interest and skill level.


Check out my eBooks for elegant patterns and detailed fusing instructions.