Posted on 1 Comment

Turkey Candle Shelter or Flower Vase How-To


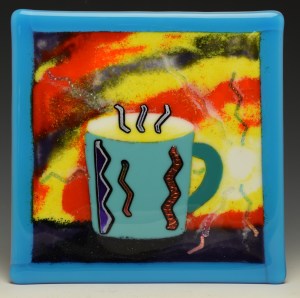
 Let the festivities begin! Fall is a season for celebrating family, friends and feasting. At my house, the dining room table is the center of attention at this time of year. Accordingly, I like to decorate the table with a special piece of art that brings cheerful energy to our gatherings. This brightly colored turkey is the perfect adornment for such joyous occasions. It may look complicated, but it’s actually fast and easy to make.

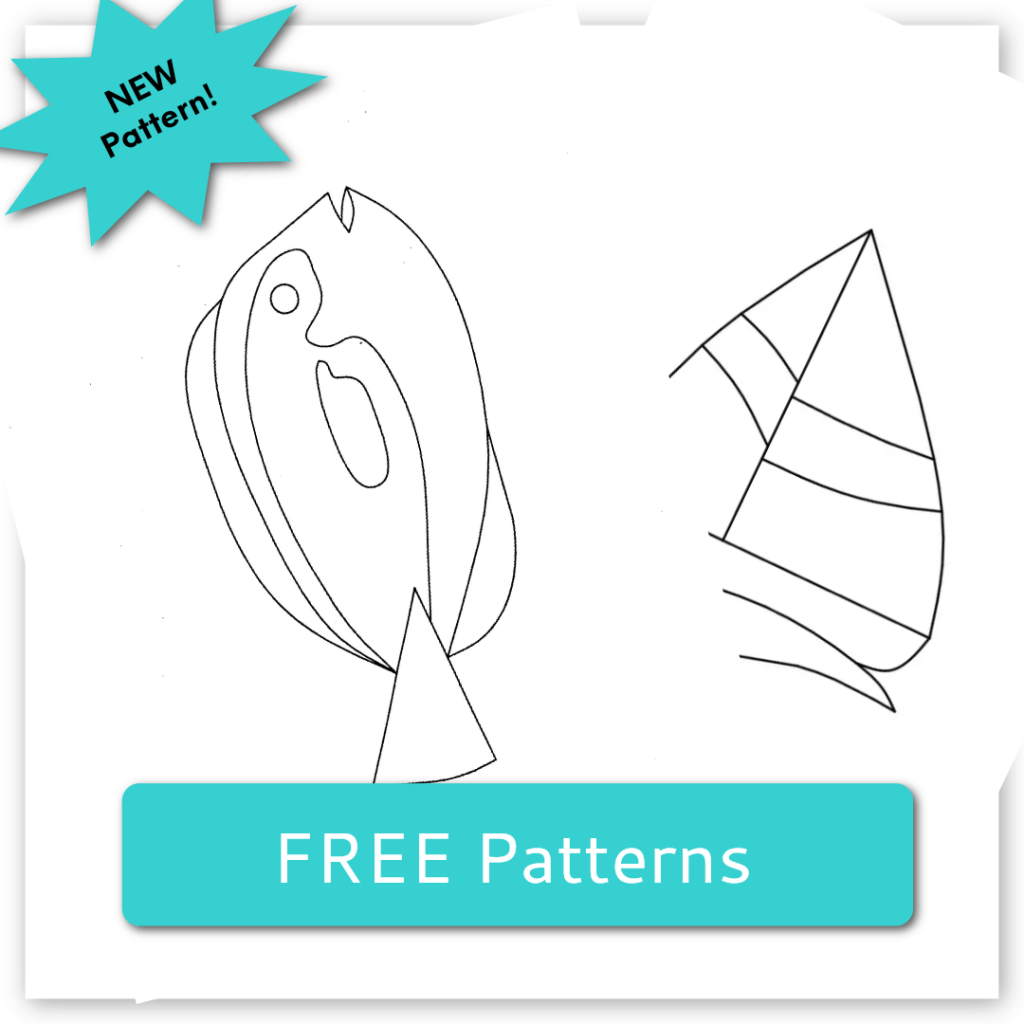
To get started, cut out the paper pattern with scissors. To make the base, trace the turkey shape on clear glass with a marker. Cut as much of the clear glass as possible by hand. Use a glass saw to detail the inside cuts. The clear base layer can be made up of pieces if you don’t have access to a saw. Grind the clear glass to remove sharp edges and improve the shape.

For the colorful design layer, cut the pattern up with scissors. Affix the paper pieces to the appropriate colored glass with a glue stick. Cut the pieces as closely to the paper as possible. Cut a second turkey body out of patterned dichroic on clear. Then grind the cut glass pieces to improve the shapes and remove any sharp edges.

Place the clear base on a second pattern. Apply a small amount of fuser’s glue to the clear base and then assemble the colorful design layer on top. Stack the dichroic body on top. Allow the glue to dry until the pieces are secure. If you move to the next step too soon, the glass pieces will slide around when you apply the frit. This causes blurred edges that I feel distract from the design.

Using a spoon, pour a small amount of fine frit onto the turkey. Work the frit down into any gaps with a paint brush. This step gives the finished artwork a nice added detail. I selected a complimentary yellow to highlight this bold color palate. When using this technique, I intentionally pick fine frit instead of powder. The excess fine frit is easier to clean off the surface of the project than powder which tends to stick.

Next add a dichroic dot for an eye and a yellow triangle for a beak. Now for a little bling. Nip wavy Firestrips to size and place them on the turkey’s feathers for a flashy zinger.

The assembled turkey is fused and then slumped over a barrel shaped mold. The slumped turkey is then glued to the front of the clear candle shelter. Colored fused glass strips cover the remainder of the clear candle shelter to give it a festive flare all the way around.

Using a strip cutter cut 16 strips total ½” wide, 5 7/8” long out of red, orange and green glass. Cut 16 strips of iridized clear the same size. Stack the clear iridized strips on the color strips.

Fuse the turkey and strips to a full fuse temperature using the guide below.

Slump the fused turkey over the ceramic mold.

Glue the slumped turkey to the clear candle shelter with E6000 adhesive. Tape the fused glass to the clear shelter to ensure it doesn’t slide off. Let the glue dry overnight.

Glue the fused glass strips to the remainder of the clear shelter. Tape them in place. Let the glue dry overnight.

Double duty. This fancy turkey project can be used as a candle holder or a flower vase. Either way, it’s a beautiful seasonal addition to any décor.


Fusing Guide

Segment 1: Ramp 300 F/hr to 1300 and hold 30 min.

Segment 2: Ramp 500F/hr to 1465 and hold 10 min.

Segment 3: Ramp 9999(AFAP*) to 960 and hold 40 min.

Segment 4: Cool to room temperature.

*As fast as possible

Slumping Guide

Segment 1: Ramp 300 F/hr to 1265 and hold 10 min.

Segment 2: Ramp 9999(AFAP*) to 960 and hold 40 min.

Segment 3: Cool to room temperature.

*As fast as possible

NOTE: Kilns fire differently. Test fire these guides in your kiln and then make adjustments as needed.

 Oceanside 96 Glass

100SF Clear for the turkey base layer, ½ Sq. Ft.

Oceanside 96 Glass

60-2700-96 Orange/Clear for turkey and strips, ½ Sq. Ft.

60-6120-96 Grenadine/Clear for turkey and strips, ½ Sq. Ft.

60-7550-96-4 Fern Green/Clear for strips, ¼ Sq. Ft.

61-00-96-IR-4 Clear Thin Iridized for strips, 1 Sq. Ft.

F2-2602-96-8 Yellow Opal Frit, Fine

CBS System 96 Dichroic Glass

Pebbles Pattern on Clear 4” x 4”

Wavy “Firestrips”, 2 – 14-inch-long pieces

Approximate finished candle holder dimensions 6” x 8.5”

Tools and Materials

Ceramic Slumping Mold 10 ½” x 9” x 4”

Clear Candle Shelter 6” Tall, 4” Wide, 12” Around

Fuser’s Glue, Marker, Glue Stick, E6000 Adhesive, Masking Tape

Pillar Candle or Flowers

Happy Thanksgiving!

Lisa

Follow my blog for more tips and tricks!

Website www.LisaJVogt.com
YouTube http://www.youtube.com/watch?v=dhOifd7wukk
Facebook www.Facebook.com/LisaJVogt

Twitter https://twitter.com/lisajvogt

Instagram @lvogt_originalsinglass

NEW Instagram @through_the_artists_lens

NEW WEBINAR!

 Lustrous Lanterns Webinar November 17, 2020

 Register here: https://www.glasspatterns.com/glass-patterns-quarterly-store/product/1499-lustrous-lanterns-with-lisa-vogt-november-17-2020.html

Light up with me! Create colorful luminaries to brighten your home, office, porch, or anywhere else you’d enjoy the comforting glow of a dazzling accent light.

In this comprehensive live event, I’ll show you how to make 6 sparkling fused glass lanterns. You’ll learn how easily you can construct and build stunning 3-D lamps. I’ll guide you step-by-step through the many stages of construction, including pattern preparation, glass cutting, project assembly, fusing, slumping, and how to “cold fuse” the lanterns together.

You’ll also be shown how to finish the lanterns with custom, professional quality glass display bases. In addition, I’ll share how to utilize ready-made clear glass candle shelters to make fast and easy pick-me-ups. I’ll also show several quick and simple methods for lighting your beautiful new creations. Along with detailed instruction, you’ll receive 6 full-size lantern patterns, my project-specific firing guides, and supply list.

Beginner, intermediate, and advanced glass fusers alike will love the wide variety of unique shapes and elegant new patterns, custom designed to enrich any décor. Join me to rekindle your creative spark with lustrous lanterns designed to set your artistic imagination aglow.

New Class Date! 

 Sculptural Fused Glass, 4-Day, Hands-on Workshop February 9-12, 2021

Register today! 2 seats available. Register here!  

Wesley Chapel, Florida, 4-Day, Hands-on, Class size is limited.

This is the turning-point workshop you’ve been waiting for.

It’s hard to describe what it’s like when I’m feeling the creative flow. Time flies. Hours pass in what I thought were minutes. My naturally distracted mind is focused on what my hands are doing, and nothing else. I get lost in my own world. When I return to reality, I feel rejuvenated and spiritually uplifted. That’s why I like sharing my studio space with others. I try to give them that experience and hope they feel the same inspiration and fulfillment I do. -Lisa

 This class is for you! Any skill level can attend. Beginner, intermediate and advanced students alike will learn how to advance their glass fusing skills and expand their artistic style.

 Join me and I’ll show you all the pro tips and tricks I use to make stunning 3-dimnesional art. You’ll learn how to combine advanced techniques in new ways to create extraordinary sculptural pieces of art.

You’ll leave class with several completed glass sculptures, my custom firing guides and a deeper understanding of sculptural fused glass fabrication. You’ll have the knowledge, confidence, and inspiration you’ve been craving to take your artwork to the next level.

Materials are included, that’s a $150.00 value!

Here’s what the students from my recent September 2020 class are saying about the workshop.

 “My favorite part about the class was the non-stop building and the generous amount of materials available.”  -Christine 

“My favorite part about the class was the variety of projects we made.” -Monica

 “What surprised me about the class was how full the schedule was. Usually, you do 1 project. We did 5 in 4 days.” -Christine

“What surprised me was the number of projects we completed.” -Monica

 “Thank you so much for your generosity.” – Christine

 “Awesome experience – will come again in the future.” Monica

Did you feel comfortable with the classroom setup and the cleanliness of the studio?

“Yes, super.” Christine

 “Yes! – Monica

 Student comments from previous classes.

“Instruction was clear, help was always available, and Lisa’s explanation of the equipment was great.” -Sherry

“My favorite thing about the class was the friendly atmosphere that encouraged open thoughts and sharing ideas.” -Lyn

“I enjoyed making all the projects, especially the flow piece and the freedom to be creative with our work.”  -Joy

“My favorite thing about the class was the ability to see multiple pieces of art that originated from concepts taught.” -Vicki

“Lisa is very professional, knowledgeable and freakishly talented. House, art, mosaic, her work – really fun and beautiful.” -Lorna

“Incredible class. Lisa shared her artistic knowledge of color flow and her technical knowledge of glass.” -Larry

“I had so much fun! Lisa is a great teacher!” -Brenda

Watch it NOW! Start fusing today!

Downloadable instructional videos for every skill level.

Check out my eBooks for elegant patterns and detailed fusing instructions. 

Posted on 2 Comments

Be the Reason Someone Smiles

Fall is for Fusing!

Autumn is officially here! It’s time to start thinking about making hand-made gifts for the holidays. This year it is especially important to get out into your studio and create personalized presents that let family and friends know you care and you’re thinking about them.

Your gifts don’t have to be elaborate, large or expensive, to make someone’s day. I get a thrill out of seeing my art on display in friend’s homes. Imagine the pleasure they get from enjoying a hand-crafted piece of art made just for them. Plus, the creative process is a wonderful energy boost for your mental and physical well being. Everyone wins.

Not sure what to make? Here is inspiration.

Keep it simple and fun. Work with a variety of materials to keep the design fresh.

These easy 8 inch by 8 inch designs from my Simple Pleasures video are fast and fun to make. I’m sharing patterns that have a broad appeal for both the artist and the receiver. You can use my color palates or go wild and select colors of your own.


Get Fired Up!

Fusing Guide

Segment 1: Ramp 300 F/hr to 1300 hold 30 min.

Segment 2: Ramp 500F/hr to 1465 hold 10 min.

Segment 3: Ramp 9999(AFAP*) to 960 hold 40 min.

Segment 4: Cool to room temperature.

*As fast as possible

Slumping Guide incase you decide to slump your pieces

Segment 1: Ramp 300 F/hr to 1265 hold 10 min.

Segment 2: Ramp 9999(AFAP*) to 960 hold 40 min.

Segment 3: Cool to room temperature.

*As fast as possible

NOTE: Kilns fire differently. Test fire these guides in your kiln and then adjust as needed.

 Happy fusing!

Lisa

Follow my blog for more tips and tricks!

Website www.LisaJVogt.com
YouTube http://www.youtube.com/watch?v=dhOifd7wukk
Facebook www.Facebook.com/LisaJVogt

Twitter https://twitter.com/lisajvogt

Instagram @lvogt_originalsinglass

NEW Instagram @through_the_artists_lens

 NEW WEBINAR!

 Lustrous Lanterns Webinar November 17, 2020

Register here: https://www.glasspatterns.com/glass-patterns-quarterly-store/product/1499-lustrous-lanterns-with-lisa-vogt-november-17-2020.html

Light up with me! Create colorful luminaries to brighten your home, office, porch, or anywhere else you’d enjoy the comforting glow of a dazzling accent light.

In this comprehensive live event, I’ll show you how to make 6 sparkling fused glass lanterns. You’ll learn how easily you can construct and build stunning 3-D lamps. I’ll guide you step-by-step through the many stages of construction, including pattern preparation, glass cutting, project assembly, fusing, slumping, and how to “cold fuse” the lanterns together.

You’ll also be shown how to finish the lanterns with custom, professional quality glass display bases. In addition, I’ll share how to utilize ready-made clear glass candle shelters to make fast and easy pick-me-ups. I’ll also show several quick and simple methods for lighting your beautiful new creations. Along with detailed instruction, you’ll receive 6 full-size lantern patterns, my project-specific firing guides, and supply list.

 Beginner, intermediate, and advanced glass fusers alike will love the wide variety of unique shapes and elegant new patterns, custom designed to enrich any décor. Join me to rekindle your creative spark with lustrous lanterns designed to set your artistic imagination aglow.

New Class Date! 

 Sculptural Fused Glass, 4-Day, Hands-on Workshop February 9-12, 2021

Register today! 2 seats available. Register here!  

Wesley Chapel, Florida, 4-Day, Hands-on, Class size is limited.

This is the turning-point workshop you’ve been waiting for.

It’s hard to describe what it’s like when I’m feeling the creative flow. Time flies. Hours pass in what I thought were minutes. My naturally distracted mind is focused on what my hands are doing, and nothing else. I get lost in my own world. When I return to reality, I feel rejuvenated and spiritually uplifted. That’s why I like sharing my studio space with others. I try to give them that experience and hope they feel the same inspiration and fulfillment I do. -Lisa

 This class is for you! Any skill level can attend. Beginner, intermediate and advanced students alike will learn how to advance their glass fusing skills and expand their artistic style.

 Join me and I’ll show you all the pro tips and tricks I use to make stunning 3-dimnesional art. You’ll learn how to combine advanced techniques in new ways to create extraordinary sculptural pieces of art.

You’ll leave class with several completed glass sculptures, my custom firing guides and a deeper understanding of sculptural fused glass fabrication. You’ll have the knowledge, confidence, and inspiration you’ve been craving to take your artwork to the next level.

Materials are included, that’s a $150.00 value!

Here’s what the students from my recent September 2020 class are saying about the workshop.

 “My favorite part about the class was the non-stop building and the generous amount of materials available.”  -Christine 

 “My favorite part about the class was the variety of projects we made.” -Monica

 “What surprised me about the class was how full the schedule was. Usually, you do 1 project. We did 5 in 4 days.” -Christine

 “What surprised me was the number of projects we completed.” -Monica

 “Thank you so much for your generosity.” – Christine

 “Awesome experience – will come again in the future.” Monica

 Did you feel comfortable with the classroom setup and the cleanliness of the studio?

 “Yes, super.” Christine

 “Yes! – Monica

 Student comments from previous classes.

“Instruction was clear, help was always available, and Lisa’s explanation of the equipment was great.” -Sherry

“My favorite thing about the class was the friendly atmosphere that encouraged open thoughts and sharing ideas.” -Lyn

“I enjoyed making all the projects, especially the flow piece and the freedom to be creative with our work.”  -Joy

“My favorite thing about the class was the ability to see multiple pieces of art that originated from concepts taught.” -Vicki

“Lisa is very professional, knowledgeable and freakishly talented. House, art, mosaic, her work – really fun and beautiful.” -Lorna

 “Incredible class. Lisa shared her artistic knowledge of color flow and her technical knowledge of glass.” -Larry

“I had so much fun! Lisa is a great teacher!” -Brenda

Watch it NOW! Start fusing today!


Downloadable instructional videos for every skill level.

Check out my eBooks for elegant patterns and detailed fusing instructions. 

Posted on Leave a comment

Hugs and Kisses From Your Mummy

Halloween is lurking right around the corner. Invite this lively mummy plate into your home and you’ll have the perfect addition to your spooky decor. In my home, our Mummy offers the family a sweet reminder that they’re loved with, Hershey’s Hugs and Kisses.

It’s so simple, but this whimsical mummy plate is one of my favorite pieces of fused glass art. I love the construction simplicity and the freedom to create on a whim.

I made this mummy at a time when I was in the middle of several intense projects that required a lot of attention. One particular day I went out to my studio with the intention of working on a laborious commission. My creative spirit took flight and suddenly I was cutting a sheet of white glass into random scrap pieces. It was as if I was possessed by a need to just have fun and rekindle the joy and peacefulness that come with spontaneous creating. You could say I was haunted by my empty kiln. Or, you could say I was procrastinating. Both are likely true. Whatever the spark, on that crisp autumn day I sang while I cut glass, and a happy artist is always a wonderful thing.

Make your season cheerful. I hope making this seasonal dish brings you unbridled joy. The same thrill it brought me that year, and the pleasure it brings again this year.

How to make the Mummy plate.

Cut the black base glass to 7 in x 14 inch and set aside. Cut several 8 to 9 inch long wedge shaped strips out of white glass. Make some of the strips wide and some narrow for a nice variety of shapes to pick from when you’re assembling the mummy.

Make the mummy’s eyes.

Cut 2 small ¼ inch size squares of white glass. Cut 2 small 1/8 inch size squares of dichroic on black glass. Stack the dichroic on the white. Fire the 2 pieces to a full fuse temperature using the guide below. The small pieces will ball up when fired giving you 2 bright round eyes for your mummy.

Arrange the white strips on the black base. It’s okay if you have narrow gaps. The black glass will show through adding extra detail to the finished plate. It’s also okay if the white strips hang over the black base. Just arrange the pieces to make a pleasing random pattern.

Decide where you want to place the mummy’s eyes. Cut a piece of clear glass to cover the black base in that area. Arrange the white strips around the clear glass. continue to place white strips on the black base until it’s covered.

Once the base is covered lay a ruler along one edge. Using a maker, draw a line to indicate where to cut the excess white glass away. Cut the excess glass off the first side. Then draw a line on the opposite side and cut the excess glass off so the white strips match the size and shape of the black base glass below.

For a festive pop of color, cut opal orange stringers to size and then tuck them between the white strips.

Make the spider.

Using a candle, bend black stingers to make the spider’s legs. Cut a small pear shaped spider body out of dichroic glass on black. Nip the  bent stringers to size. Arrange the spider legs and body on the white glass. Hold the spider pieces in place with a tiny bit of fuser’s glue.

Fire the assembled project to a full fuse temperature using the guide below.

Slump the fused project in a shallow plate mold using the guide below.

Hugs and Kisses from Your Mummy Glass & Materials

7 x 14 Inch Plate

Black glass, 1 1/2 sq. ft., for base layer

White glass, 1 ½ sq. ft., for mummy

Clear glass, scrap for eyes

Dichroic eyes

Orange opal stringers, for accents

Black stringers, for spider legs

Dichroic scrap, for spider

7 ½ inch x 15 inch slumping mold

Fuser’s glue

Fusing Guide

Segment 1: Ramp 300 F/hr to 1300 hold 30 min.

Segment 2: Ramp 500F/hr to 1465 hold 10 min.

Segment 3: Ramp 9999(AFAP*) to 960 hold 40 min.

Segment 4: Cool to room temperature.

*As fast as possible

Slumping Guide

Segment 1: Ramp 300 F/hr to 1265 hold 10 min.

Segment 2: Ramp 9999(AFAP*) to 960 hold 40 min.

Segment 3: Cool to room temperature.

*As fast as possible

NOTE: Kilns fire differently. Test fire these guides in your kiln and then adjust as needed.

 Watch the New Hugs and Kisses From Your Mummy video here https://youtu.be/ZUccNVy7hIw


 Lay out your candy carrying Mummy proudly. Display it in a place of prominence where it’s spooky presence reminds you to have fun and enjoy the unbridled joy of creating with glass.

 Happy Halloween!

Lisa

Follow my blog for more tips and tricks!

Website www.LisaJVogt.com
YouTube http://www.youtube.com/watch?v=dhOifd7wukk
Facebook www.Facebook.com/LisaJVogt

Twitter https://twitter.com/lisajvogt

Instagram @lvogt_originalsinglass

NEW Instagram @through_the_artists_lens

NEW WEBINAR!

 Lustrous Lanterns Webinar November 17, 2020

 Register here: https://www.glasspatterns.com/glass-patterns-quarterly-store/product/1499-lustrous-lanterns-with-lisa-vogt-november-17-2020.html

Light up with me! Create colorful luminaries to brighten your home, office, porch, or anywhere else you’d enjoy the comforting glow of a dazzling accent light.

In this comprehensive live event, I’ll show you how to make 6 sparkling fused glass lanterns. You’ll learn how easily you can construct and build stunning 3-D lamps. I’ll guide you step-by-step through the many stages of construction, including pattern preparation, glass cutting, project assembly, fusing, slumping, and how to “cold fuse” the lanterns together.

You’ll also be shown how to finish the lanterns with custom, professional quality glass display bases. In addition, I’ll share how to utilize ready-made clear glass candle shelters to make fast and easy pick-me-ups. I’ll also show several quick and simple methods for lighting your beautiful new creations. Along with detailed instruction, you’ll receive 6 full-size lantern patterns, my project-specific firing guides, and supply list.

 Beginner, intermediate, and advanced glass fusers alike will love the wide variety of unique shapes and elegant new patterns, custom designed to enrich any décor. Join me to rekindle your creative spark with lustrous lanterns designed to set your artistic imagination aglow.

New Class Date! 

 Sculptural Fused Glass, 4-Day, Hands-on Workshop February 9-12, 2021

Register today! 2 seats available. Register here!  

Wesley Chapel, Florida, 4-Day, Hands-on, Class size is limited.

This is the turning-point workshop you’ve been waiting for.

It’s hard to describe what it’s like when I’m feeling the creative flow. Time flies. Hours pass in what I thought were minutes. My naturally distracted mind is focused on what my hands are doing, and nothing else. I get lost in my own world. When I return to reality, I feel rejuvenated and spiritually uplifted. That’s why I like sharing my studio space with others. I try to give them that experience and hope they feel the same inspiration and fulfillment I do. -Lisa

This class is for you! Any skill level can attend. Beginner, intermediate and advanced students alike will learn how to advance their glass fusing skills and expand their artistic style.

 Join me and I’ll show you all the pro tips and tricks I use to make stunning 3-dimnesional art. You’ll learn how to combine advanced techniques in new ways to create extraordinary sculptural pieces of art.

You’ll leave class with several completed glass sculptures, my custom firing guides and a deeper understanding of sculptural fused glass fabrication. You’ll have the knowledge, confidence, and inspiration you’ve been craving to take your artwork to the next level.

Materials are included, that’s a $150.00 value!

Here’s what the students from my recent September 2020 class are saying about the workshop.

 “My favorite part about the class was the non-stop building and the generous amount of materials available.”  -Christine 

“My favorite part about the class was the variety of projects we made.” -Monica

 “What surprised me about the class was how full the schedule was. Usually, you do 1 project. We did 5 in 4 days.” -Christine

 “What surprised me was the number of projects we completed.” -Monica

 “Thank you so much for your generosity.” – Christine

 “Awesome experience – will come again in the future.” Monica

 Did you feel comfortable with the classroom setup and the cleanliness of the studio?

 “Yes, super.” Christine

 “Yes! – Monica

 Student comments from previous classes.

“Instruction was clear, help was always available, and Lisa’s explanation of the equipment was great.” -Sherry

“My favorite thing about the class was the friendly atmosphere that encouraged open thoughts and sharing ideas.” -Lyn

“I enjoyed making all the projects, especially the flow piece and the freedom to be creative with our work.”  -Joy

“My favorite thing about the class was the ability to see multiple pieces of art that originated from concepts taught.” -Vicki

“Lisa is very professional, knowledgeable and freakishly talented. House, art, mosaic, her work – really fun and beautiful.” -Lorna

 “Incredible class. Lisa shared her artistic knowledge of color flow and her technical knowledge of glass.” -Larry

 “I had so much fun! Lisa is a great teacher!” -Brenda

Watch it NOW! Start fusing today!

Downloadable instructional videos for every skill level.


Check out my eBooks for elegant patterns and detailed fusing instructions.