Posted on Leave a comment

How Glass Reacts to Heat

You have choices when it comes to how to fire your projects. Different temperatures will result in different project characteristics. My goal here is to give you the tools to make educated decisions when selecting your firing method so you have greater control and more satisfying results. 

Fusing Defined

Fuse: To heat glass pieces in a kiln until they melt together into one piece.

Glass Fusing Process Temperatures

Full Fuse

Full Fuse

Full Fuse 96 COE 1465°F (796°C) 90 COE 1480°F (804°C). Full fuse is the most common firing method. At this temperature the assembled glass project pieces melt together to form one smooth piece with visible, but not tactile, seams. The project has a smooth surface and round, shiny edges. I choose this temperature when I’m making decorative and functional artwork where I want a smooth, uniform surface.

Contour Fuse

Contour Fuse

Contour Fuse: 96 COE 1425°F (774°C), 90 COE 1400°F (760°C). A contour fuse is a fired look between full fuse and tack fuse. At this temperature the glass layers are fused, and the edges are soft and rounded. The project surface has both visible and physical texture. I use this temperature when I want to create a decorative project with physical texture that increases the surface area to reflect more light.

Tack Fuse

Tack Fuse

Tack Fuse 96 & 90 COE 1365°F (742°C). At this temperature, the glass pieces stick together. The project edges will be square and shiny. Design elements will retain their texture but are generally not sharp to touch. This is a great temperature for suncatchers and other ornaments where you want a light firing that really sparkles.

Combine Techniques

You can fire a project to a full fuse for the smooth rounded edge quality. Then refire it to a contour or tack fuse temperature with additional design elements on top for a unique and dazzling look.

My Building Process 

Most of my work is assembled with the two layers, plus accent method. I refer to the bottom layer as the base and the second as the design layer. The base layer and design layer are the same shape and size. The base layer is often a single piece of clear, but not always; sometimes it’s made up of cut pieces. The second design layer can be a single piece of glass, but often, its pieces fit together to make a specific pattern or design. The third accent layer is minimal, and it usually consists of small fusible elements that enhance the design theme. I choose to build this way because I get consistent results time after time. The finished size and shape of the artwork is predictable. The pieces come out of the kiln with beautiful, rounded edges and a consistent thickness that is both attractive and durable.   

It’s All Good   

Keep in mind, there’s no single right or wrong way to make any project. Personal preference, design style and function should all play a role in helping you decide which approach is best. The objective is to consciously choose your firing temperature based on a solid understanding of the results.  

Excerpt from Glass Fusing Terms as seen on my website.

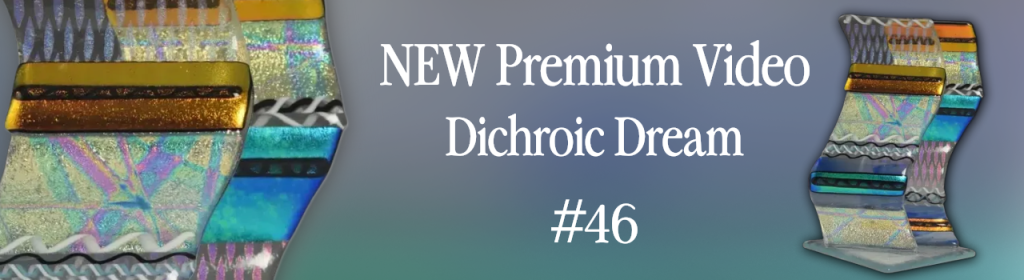
For more in-depth instruction check out my videos.

Follow my blog for weekly inspiration sent to your inbox! 

Happy Fusing!

Lisa

NEW Premium Video Course by Lisa


Posted on Leave a comment

Good to Know

We’re always looking for ways to excite, motivate and inspire you. Niki and I love helping you achieve your glass fusing goals. We strive to make your artistic journey fast, easy and fun. I asked glass fusers to suggest topics and ideas for new blogs and videos that would be relevant and valuable to you.   

Glass artists presented me with a terrific list of suggestions. Topics included are: what is devitrification, why does it occur and how to prevent or fix it? Is fused glass food safe? Can you microwave fused glass and is it dishwasher safe?  How to paint on glass was another topic. They also included fresh project ideas that we’re looking forward to making and sharing with you in the coming weeks.

We’re here to help.

We’ve covered some of the topics mentioned above in previous blogs and YouTube videos. We understand you’re busy and it’s hard to keep up with all the material we post. I thought this would be an excellent opportunity to point out where you can find answers to some of the great questions listed above.  

Learn more about devitrification here:

Blog: Glass Fusing Terms for Beginners

Learn more about devit here.

YouTube video: Glass Fusing Terms for Beginners with Lisa Vogt

Learn more about devit here.

YouTube Video: What’s the Difference Between COE 90 & COE 96 with Lisa Vogt

Find a complete list of Glass Fusing Terms here:  

Learn more about Food Safety here:

Blog: Is Glass Food Safe

YouTube Video: Is Fused Glass Food Safe

Learn how to paint on glass here:

YouTube Video: How to Paint on Glass with Lisa Vogt

Thank you Mary for the great ideas.

If you have suggestions, we’d love to hear them.

Follow my blog for weekly inspiration sent to your inbox! 

Happy Fusing!

Lisa

NEW Premium Video Course by Lisa


Posted on Leave a comment

Brilliant Gift Ideas for the Holidays

Brighten Your Day with Fused Glass Lanterns

It’s always a thrill when I come up with a fun, way to add dazzling art glass to my home, office, and yard. I’ve designed a series of fused glass lanterns that bring a special brightness and cheerful joy to any setting.

I enjoy having soft accent lights around my home. So, I thought, why not create a collection of pieces I could switch out seasonally to add a festive atmosphere to my rooms all year long. Designing such a wide variety of themes also kept the construction fresh and fun.

In my video Lumin-Essence I share how to make 8 shimmering lanterns. The lanterns range in complexity, but anyone with a flair for fusing can easily make them all. I will tell you though, they will challenge your fabrication skills. But in a good way by trying something new that you’ll love.  

The first lantern I designed is inspired by relaxing summer vacations spent on a serene lake. A sailboat glides over calm waters with a picturesque view of mountains and pine trees behind. The custom-made glass base provides a lift and an attractive pedestal to showcase the scenic setting. The front panel of the lantern bows out. The back panel bows in the opposite creating the perfect space for a candle or LED lights.

Weave is an especially fun lantern to make. It looks complicated and fragile, when it’s easy and sturdy once assembled. Plus, it’s a terrific size for adding a touch of light to small or confined spaces. The assembly is simple. You cut a bunch of strips, lay them out in 4 alternating layers and then tack the pieces together in your kiln. The 4 sides are then glued together around a clear glass base. I like to add dichroic glass strips to mine for that super shine that lights up the room. The best part is Weave looks amazingly beautiful when lit. The open construction and rich colors cast a rainbow of colors on the table and surrounding walls.

Winter Wonderland is my favorite lantern. The clear glass backdrop is the perfect complement to the white and dichroic snowflakes. This dazzling lantern requires extra steps as the snowflakes are tacked together and then tacked on the clear front and back panels. Let me tell you, this one is worth your time. Winter Wonderland is a spectacular, glistening addition to any room.

Dogwood reminds me of flower gardening and the rebirth of nature in the spring. I selected a crisp, clean, simple color palate for this lantern. I used clear glass for the lattice because I wanted this lantern to have structure, but also a light, airy feel. The flowers are fun to make. They’re tacked together and then slumped in small bowl molds to give them form. Dogwood is assembled it multiple easy steps. The lantern sides are glued around a clear base. After the glue is dry the flowers are glued on one side at a time. When lit, Dogwood makes a dazzling centerpiece.   

Blue Mountains were inspired by the cool gradient colors of the Great Smoky Mountains. We all enjoy a refreshing trip to the mountains where stunning views and peaceful moments linger in our hearts. With this lantern you can relive those tranquil times every day. This lantern is super easy to make. You just layer several shades of blue. The beauty of Blue Mountains is in its simplicity of design and construction. You’ll love making this restful lantern.     

Red Heart is a darling combination of vivid color and lacy pattern. The great thing about this lantern is the small, fused glass design combined with a ready-made candle shelter, make it quick and easy to make. You’ll definitely want one of these around come February. This dainty lantern is a perfect personalized gift to show family and friends they hold a special place in your heart.

Fall Leaf is another quick and easy design you can make to bring a seasonal touch to your home. Its organic shape and bright, cheery colors make it the perfect complement to your fall decorations.

Purple Heart may be dainty, but it lights up the room with an impressive glow. It’s another quick and easy project that makes a great gift. Just fuse glass strips and then glue them on a ready-made candle shelter. It doesn’t get easier.    

I hope this illuminating collection inspires you to be creative and celebrate family, friends, and all that we have to be thankful for.  

Follow my blog for weekly inspiration sent to your inbox! 

Happy Fusing!

Lisa

NEW Premium Video Course by Lisa


Posted on Leave a comment

Turkey Candle Shelter or Flower Vase How-To

6” x 8.5”

Let the festivities begin!

Fall is the season for celebrating family, friends and feasting. At my house, the dining room table is the center of attention at this time of year. Accordingly, I like to decorate the table with a special piece of art that brings cheerful energy to our gatherings. This brightly colored turkey is the perfect adornment for such joyous occasions. It may look complicated, but it’s actually fast and easy to make.

To get started, cut out the paper pattern with scissors. To make the base, trace the turkey shape on clear glass with a marker. Cut as much of the clear glass as possible by hand. Use a glass saw to detail the inside cuts. The clear base layer can be made up of pieces if you don’t have access to a saw. Grind the clear glass to remove sharp edges and improve the shape.

Add color.

For the colorful design layer, cut the pattern up with scissors. Affix the paper pieces to the appropriate colored glass with a glue stick. Cut the pieces as closely to the paper as possible. Cut a second turkey body out of patterned dichroic on clear. Then grind the cut glass pieces to improve the shapes and remove any sharp edges.

Place the clear base on a second pattern. Apply a small amount of fuser’s glue to the clear base and then assemble the colorful design layer on top. Stack the dichroic body on top. Allow the glue to dry until the pieces are secure. If you move to the next step too soon, the glass pieces will slide around when you apply the frit. This causes blurred edges that I feel distract from the design.

Add detail.

Using a spoon, pour a small amount of fine frit onto the turkey. Work the frit down into any gaps with a paint brush. This step gives the finished artwork a nice added detail. I selected a complimentary yellow to highlight this bold color palate. When using this technique, I intentionally pick fine frit instead of powder. The excess fine frit is easier to clean off the surface of the project than powder which tends to stick.

Next add a dichroic dot for an eye and a yellow triangle for a beak. Now for a little bling. Nip wavy Firestrips to size and place them on the turkey’s feathers for a flashy zinger.

Assembly.

The assembled turkey is fused and then slumped over a barrel shaped mold. The slumped turkey is then glued to the front of the clear candle shelter. Colored fused glass strips cover the remainder of the clear candle shelter to give it a festive flare all the way around.

Using a strip cutter cut 16 strips total ½” wide, 5 7/8” long out of red, orange and green glass. Cut 16 strips of iridized clear the same size. Stack the clear iridized strips on the color strips.

Fire.

Fuse the turkey and strips to a full fuse temperature using the guide on my website. See the FREE Fusing Guides button below.

Slump the fused turkey over the ceramic mold. See the FREE Fusing Guides button below.

Glue the slumped turkey to the clear candle shelter with E6000 adhesive. Tape the fused glass to the clear shelter to ensure it doesn’t slide off. Let the glue dry overnight.

Glue the fused glass strips to the remainder of the clear shelter. Tape them in place. Let the glue dry overnight.

Enjoy!

Double duty. This fancy turkey project can be used as a candle holder or a flower vase. Either way, it’s a beautiful seasonal addition to any décor.

This Turkey pattern is available FREE on my website.

Follow my blog for weekly inspiration sent to your inbox! 

Happy Fusing!

Lisa

NEW Premium Video Course by Lisa