Posted on 1 Comment

Secrets to Making Stand Out Art Revealed

Excerpt from Breaking Through-Making Exhibition Quality Art Video by Lisa Vogt

Are you ready to take your work to the next level?

I’m sure you’ve noticed the dramatic increase in outstanding, professional quality fused glass artwork being made by your fellow artists. You admire their originality and the advanced skills it takes to produce such striking art. But then you find yourself wondering what makes them so special. Why aren’t your pieces getting noticed?

What’s missing?

To answer that question, we first have to consider what makes artwork stand out. There are two key features that make artwork exceptional. The two elements are unique form and dramatic imagery. Design your projects with these basic concepts in mind and you’ll immediately see an increase in the desirability of your work.

Unique Form

Sculptural Fused Glass Video

Shape up! Move away from the simple square, rectangle, and circle. These shapes are tired. They have their place when making a production series where minimizing material, fabrication, and labor costs is essential for profit.

But if you want your work to rise to gallery status, give your artwork an unexpected or brand new shape. This elevates your fused glass from a practical or functional container, to a glamorous, three dimensional, fine art sculpture.

Get creative, combine slumping molds to make one-of-a-kind shapes. Use fiber paper or fiber board to change the profile of your fused glass. You’ll quickly find, the possibilities are endless. 

Dramatic Imagery

Painting with Frit Video

What makes a painting memorable? They’re generally rectangular in shape, so what makes one unforgettable? It’s the subject matter, of course. Taken a step further, it’s the artist’s distinctive composition, their unique way of interpreting the focal point and the special way the scene in rendered. Give the viewer a fresh look at something familiar and they’re hooked.  

There are several ways to engage the viewer and hold their attention longer with your subject matter. Render a recognizable subject in a surprising way. Use unexpected colors or add props, like a hat on a dog or a tutu on a cat. Include an interesting background that enhances the subject. Place your focal point in an unusual setting. Put a flower on the moon. Or, put the moon on a flower. Visualize a composition that extends beyond the rectangular limits of your glass canvas. And then build it with  enthusiasm that shows.

The Winning Combination

Go with the Flow Video


Combine both unique form and dramatic imagery and your work will rise above the rest and get noticed. It’s easy. Start simple with the basic shapes and add your own twist. Put notches in a square, put curves in the straight edges of a rectangle, give your circle a free form shape. Then reshape the fused glass by slumping or draping it on a combination of molds and other kiln furniture. There are no rules. Just make it your own and you’ll come out a winner. 

Once you integrate these design concepts into your work, you’ll be amazed how quickly your work rises to a higher level of sophistication. And in the process, thinking in a broader scope will open the door to all new, exciting possibilities.

Happy Fusing!

Lisa & Niki

Follow my blog for weekly inspiration sent to your inbox! 

The content of this post is an excerpt from my video Breaking Through-Making Exhibition Quality Art.

Artwear T’s by Lisa Vogt

Artwear Designed for Artists by Artists Tell them how you really feel with bold T-shirts, Eco-conscience tote bags and sassy mugs.

Artwear Eco-totes by Lisa Vogt

Artwear Mugs by Lisa Vogt

Downloadable instructional videos for every skill level.

Posted on 1 Comment

How to Fire Glass and Identify When You’ve Achieved the Best Artistic Results

 Firing your own projects is exciting. It empowers you to make your own decisions and gives you the freedom to try new advanced techniques. The best way to gain confidence in your fusing is to build consistency into your firings. You want to get to know how your particular kiln works and define the results you want to achieve. At first, you’ll make mistakes and have varying results. That’s okay. You’ll learn something valuable from every firing. Plus, you’ll gain experience and learn to trust your process.    

Start with project assembly.  

How projects are assembled has a direct effect on the durability and, “look” of the finished piece. Most of my projects are assembled using two full layers of glass.

Glass settles at a thickness of ¼ inch when it’s heated to the full fuse temperature. By assembling with two layers of glass, I maintain control over the size and shape of my finished piece.

Fusing one layer of glass will cause the project to shrink. And it will have a fragile, sharp, irregular edge. While fusing three layers of glass will result in the project growing in size, which changes the original shape considerably.

Since two layers is my go-to type of assembly, the projects I made for these comparisons are made with the 2 layers of glass. If your go-to is a different type of assembly, you’ll want to duplicate that for the following firing comparisons.

I fired several 6” x 6” square projects made with 2 layers of glass for these comparisons.

Characteristics of a terrific full fuse firing.

The full fused glass retains its shape and original size. It also has a uniform thickness, smooth surface, rounded edges, and a clean back side. The design accent details melt into the top layer giving the project a shiny, smooth surface. 

Characteristics of an under-fired full fuse firing.  

An under fired project will retain its rigid shape and its original size. The edges are hard, angular, and sometimes sharp. Since the two layers are not completely fused together, a seam may appear on the edge showing how the layers were stacked. The back side of the project is clean and smooth. Design details, like frit have texture and are not fully melted into the top layer.

The solution to an under fired project is to re-fire it a little hotter. To get more heat results, I usually add ten degrees to the target temperature. The target temperature is the temperature that gives me the desired results.

Firing Target Temperatures for 96 COE & 90 COE.

Full Fuse: 96 COE 1465°F (796°C), 90 COE 1480°F (804°C), hold 10 minutes

Tack Fuse: 96 COE 1365°F (741°C), 90 COE 1385°F (752°C), hole 10 minutes

Slump: 96 COE 1265°F (685°C), 90 COE 1265°F (685°C), hold 10 minutes

Characteristics of an over-fired full fuse firing.

An over fired project will grow in size. The outside edges will round out. The glass will lose its square shape and be larger than the original 6 inch by 6 inch size. Kiln wash may stick to the backside and may be difficult to remove. The design details, like frit will be completely fired in giving the project a smooth shiny surface.

The solution for an over fired project might be to grind the edges to regain the square shape. Or you can remake and re-fire the project at a lower temperature.

Characteristics of a successful slump.

A successfully slumped glass project conforms to the shape of the mold. It also retains a clean shape and the sides of the project retain their height.

Characteristics of an under-slumped project.

An under-slumped project does not conform to the mold. The glass project doesn’t have enough drop and so the piece is shallow. The piece may also wobble on the table because it didn’t come in contact with the flat bottom of the mold like it should have.

The solution is to re-fire the glass in the mold and hold it at the target temperature a little longer than the first time. I usually add 10 minutes hold to the original program.   

Characteristics of an over-slumped project.

The backside of an over-slumped project will pick up unwanted texture from the mold. It also loses some of its shape because the sides slide down into the mold. The result is an uneven top edge or rim. The solution is to call it something new or remake the project.

Tack fusing test.

I made three different size nuggets to make a bowl that would look like it was made out of rocks. I cut a bunch of round shapes out a grey glass. Then I cut matching pieces out of clear glass. I capped the grey with the clear and fired the stacked glass nuggets to a full fuse temperature. The pieces came out great.

Don’t hesitate to customize your programs.

Then I arranged the fused glass nuggets on a kiln shelf to make a circular design. I tried using the Auto Mode on my kiln and set the controller to tack fuse the glass together. The finished project looked great, but the pieces didn’t stick together. In Auto Mode the kiln didn’t fire hot enough to tack the glass pieces together while they were resting next to each other.  The lower temperature was intended to tack fuse glass pieces stacked on top of each other.

The solution was to enter my own program in the kiln controller and re-fire the glass to a hotter temperature. It worked! I then slumped the tacked piece to make a shallow bowl. The finished art was a beautiful success!

Take notes.

I recommend taking notes outlining how you assemble your pieces and on your firing steps. This way you can easily reproduce your successes and learn from the pieces that didn’t come out as you expected.

You can do it. I believe in you!

It takes a time to get comfortable firing a kiln on your own. The upside is you’ll learn new and exciting things every step of the way. Relax and enjoy your process. No matter what your results are be grateful for your creative development. And take advantage of the opportunity to make your own personalized pieces of art. 

Happy Fusing!

Lisa & Niki

Follow my blog for weekly inspiration sent to your inbox! 

Artwear T’s by Lisa Vogt

Artwear Designed for Artists by Artists Tell them how you really feel with bold T-shirts, Eco-conscience tote bags and sassy mugs.

Artwear Eco-totes by Lisa Vogt

Artwear Mugs by Lisa Vogt

Downloadable instructional videos for every skill level.

Posted on Leave a comment

How to Use a Kiln

Getting a new glass fusing kiln is very exciting. But it can also be a little scary to be responsible for your own firings. Students tell me all the time that they purchased a kiln weeks, months, even years ago and it’s still in the box! If you’re one of those tortured glass artists with a burning desire to fire glass, but the thought of being on your own sends icy chills down your spine, this is the nudge you’ve been waiting for.

I’m here to help.

Let me start by saying, you will have varying results. That’s okay. Initially, your goal is to build a relationship with your new equipment. You want to get to know how your particular kiln works and define the results you want to achieve. Yes, it takes a few test firings. Yes, you will ruin some glass. The great news is you will definitely learn something valuable from every firing. And you’ll gain experience while building confidence. It’s a win, win. Now, open that box and set your kiln up. This is going to be fun!

For those of you who are already making awesome projects, you’re likely wondering why I chose this entry-level topic, knowing most of you have experience. A lot of fusers rely on studios and workshops to fire their glass. In those situations, you’re not directly involved with kiln operation. This article will give you insight into what you’re missing.

If you are firing your own artwork, good for you. Consider this a refresher course on kiln operation. I firmly believe that we can all benefit from other artist’s experience. We’re inclined to absorb information, even information we’re already familiar with, at every stage of our artistic growth. The following guides might clarify techniques you’re already using. Or they may shed light on new methods worth trying.

Setting up your new kiln.

Safety is extremely important! Remember, you’ll be firing glass at high temperatures, and you don’t want to create a fire hazard. Reference the owner’s manual and follow the manufacturer’s suggestions on where to place your kiln. They’ll offer recommendations on the type of flooring your kiln should rest on, as well as distance-from-the-wall measurements. Set your kiln up accordingly.

Carefully vacuum the inside of your new kiln to remove any material that might have come lose during shipping. Then coat the kiln bottom, inside the firing chamber with kiln wash or shelf primer. Follow the directions on the kiln wash container and apply two or three even coats. This preventive step will protect the kiln floor if glass accidentally ends up on the bottom. If you have a new kiln shelf, you’ll want to coat it with kiln wash as well. Let the shelf dry completely before using it. Then plug your kiln in, and let the firing begin.

Test firing your new kiln.

I recommend making a quick, easy project to test the firing temperature and effect that temperature has on your glass. For fast results, you can fire two layers of scrap glass together. Personally, that overly simplified approach causes my artistic soul pain. I like to make something with every firing. So, I came up with a very simple project that I was willing to risk coming out poorly, for the sake of getting to know how my new kiln fired.

But first, a little bit about project assembly.

How projects are assembled has a direct effect on the durability and, “look” of the finished piece. Most of my projects are assembled using two full layers of glass.

Glass seeks a level of ¼ inch thick when it’s heated to the full fuse temperature of 1465 degrees. (I’m using COE 96, but this temperature works equally as well on COE 90.) By assembling with two layers of glass, I maintain control over the size and shape of my finished piece.

Fusing one layer of glass will cause the project to shrink. And it will have a fragile, sharp, irregular edge. While fusing three layers of glass will result in the project growing in size, which changes the original shape considerably.

Since two layers is my go-to type of assembly, I made my test piece with this fabrication method. If your go-to is a different type of assembly, you’ll want to duplicate that for your test piece.

I cut a 6 inch by 6 inch square of white glass for the base of my project. Then I cut a 6 inch by 6 inch square of transparent color to stack on the white base. This simple combination was too plain for my artsy heart to handle. So, I used plastic stencils to give the plain glass a little pizazz. I quickly sifted green opal, powder frit over the stencil on the white base layer. I sifted yellow opal, powder frit over the stencil on the top color layer giving the project a subtle pattern. On the white base layer, I used a leaf pattern stencil. On the color layer, I used a flower pattern stencil to create delicate variations on the two layers. I intentionally applied in a higher concentration of frit on the left side of the base layer. On the color layer, I applied a higher concentration of frit on the right side. This way, you’d see each pattern independently and the two patterns overlapping in the middle of the square.

Loading your new kiln.

Place 3 or 4 short kiln posts on the floor of the kiln. Position the primed, or fiber paper lined, ceramic kiln shelf on the posts. Placing the ceramic shelf on posts makes it easier to load and unload the shelf. It also allows air to circulate around the shelf when the kiln is firing.

Important note about the position of your kiln shelf inside your kiln.

I use short posts on purpose to make sure the ceramic kiln shelf is positioned low inside the kiln. The posts are necessary for air flow around the ceramic shelf, so don’t skip them. But we also want to keep the glass project, assembled on the shelf as far away from the heating coils, in the lid as possible. You want a minimum of 5 to 6 inches between the glass project and the heating coils. If the glass is too close to the coils the glass can break due to thermal shock which is a result of heating too quickly.

The same applies for slumping molds.

It’s important to apply this same idea when placing a fused project on a slumping mold. In my smaller kilns, I remove the kiln shelf and place the slumping mold directly on the kiln floor to ensure that the glass is as far away from the heating coils as possible.   

Be careful not to bump or bend the probe inside the kiln when loading the kiln shelf. The probe is a thermocouple that transmits the interior temperature of your kiln to the kiln’s controller.

Fiber board kiln shelves are different.

I place fiber board kiln shelves directly on the floor of my kilns without using any kiln posts. The fiber material is porous. Therefore, air circulates through the shelf ensuring even heating. 

Glass fusing test fire.

I fired the assembled glass to a full fuse temperature on a primed ceramic kiln shelf. I used Auto Mode and the preset Full Fuse program in my Firebox 14 kiln controller. I was happy with the results.

Characteristics of a terrific full fuse firing.

The fused glass retained its square shape and original size of 6 inch by 6 inch. It also had uniform thickness, smooth surface, rounded edges and a clean back side. The frit design details melted into the top layer giving the project a shiny, smooth surface. 

Characteristics of an under-fired full fuse firing.  

An under-fired project will retain its square shape and its original size of 6 inch by 6 inch. The edges are hard, angular and sometimes sharp. Since the two layers are not completely fused together, a seam may appear on the edge showing how the layers were stacked. The back side of the project is clean and smooth. Design details, like frit may have texture and might not be fully melted into the top layer.

The solution to an under-fired project is to re-fire it a little hotter. To get more heat results, I usually add ten degrees to the target temperature. The target temperature is the temperature that gives you the desired results.

For full fuse results I fire the glass to 1465 degrees and hold it there for ten minutes. For tack fuse results I fire the glass to 1365 degrees and hold it there for 10 minutes. For slumping results, I fire the glass to 1265 degrees and hold it there for 10 minutes. (These temps are for COE 96 glass, but they will work equally as well in COE 90 glass.) 

Characteristics of an over-fired full fuse firing.

An over-fired project will grow in size. The outside edges will round out. The glass will lose its square shape and be larger than the original 6 inch by 6 inch size. Kiln wash may stick to the backside and may be difficult to remove. The design details, like frit will be completely fired in giving the project a smooth shiny surface.

The solution for an over-fired project might be to grind the edges to regain the square shape. Or you can remake and re-fire the project at a lower temperature.

Glass slumping test fire.  

To test how my new kiln slumped glass I placed a square ceramic mold in the kiln and positioned the fused glass on top. Using the controller and Auto Mode I set the kiln firing speed to fast and the process to slump. I was happy with the results.

Characteristics of a successful slump.

A successfully slumped glass project conforms to the shape of the mold. It also retains a clean shape and height of the sides of the project.

Characteristics of an under-slumped project.

An under-slumped project does not conform to the mold. The glass project doesn’t have enough drop and so the piece is shallow. The piece may also wobble on the table because it didn’t come in contact with the flat bottom of the mold like it should have.

The solution is to re-fire the glass in the mold and hold it at the target temperature a little longer than the first time. I usually add 10 minutes hold to the original program.   

Characteristics of an over-slumped project.

An over-slumped project picks up a lot of texture from the mold. It also loses some of its shape because the sides slide down into the mold. The result is an uneven top edge or rim. The solution is to call it something new or remake the project.

Take notes.

I recommend taking notes on how you assemble your pieces and on your firing steps. This way you can easily reproduce your successes and learn from the pieces that didn’t come out as you expected.

Be brave. You can do it.

It takes a little time to become familiar with your new kiln. The good news is you’ll learn new and exciting things every step of the way. Don’t hesitate to jump in and start firing. No matter what your results are you’ll enjoy the creative process and making your own personalized pieces of art. 

I believe in you!

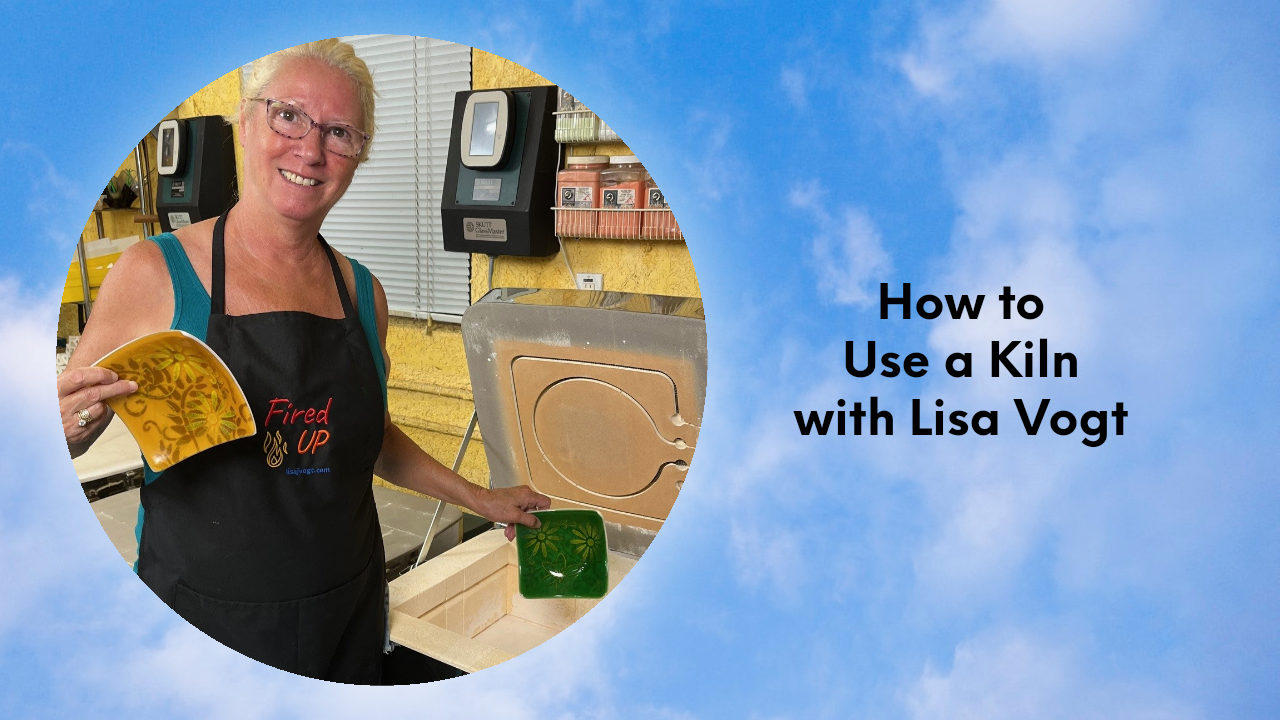
Check out my video to see how to use a kiln.

Follow my blog for weekly inspiration sent to your inbox! 

Happy Fusing!

Lisa & Niki


Premium Video Courses by Lisa


Posted on Leave a comment

4 Ways to Develop Your Own Design Style

6

Glass fusing is more popular than ever. The originality and quality of work I’m seeing in galleries, on websites and in our fusing groups is amazing. With so many enticing techniques to try it’s tempting to copy other artist’s work.

We all want guarantees that our limited time, hard work and expensive materials will produce dependable, beautiful results every time. And so, we play it safe and continually make the same reliable projects. Or we take the easy route and reproduce other’s work that we find attractive. But, it doesn’t have to be that way. You can develop your own individual design style. By applying a few simple concepts, your finished work and the time spent creating it will be more rewarding and exciting.

  1. Be Original!

It’s all been done before you argue. How can I be original, you ask? Yes, it’s all been done. But even the simplest techniques seen through your special artist’s lens and executed with your skilled hands can produce all new results.

To advance beyond routine projects begin by examining art that you admire. When you see a piece of art that really speaks to you, study it. Reduce your admiration down to the most basic attribute of the art. What really captures your interest? Is it the color, the shape or the imagery? Take that feature, hold on to it, then put it aside temporarily. Look at another piece of art. Identify the specific characteristic that you find attractive and put that feature aside temporarily. Do this for a third piece of art. Study it until you know exactly what trait appeals to you. Then take those three characteristics and combine them and you’re guaranteed to design your own original art.

1

  1. Shape Up!

One of the fastest and easiest things you can do to make your art stand out is to give it a unique shape.

The most common shape for fused glass projects is the square. Primarily, because it’s economical, there’s no waste. And, because there’s very little cutting, it enables you to get right to the fun stuff, building the design. It’s also popular with beginners and hobbyists with basic cutting skills. By moving away for the square, you immediately increase the visual value of your work.

The rectangle is popular for the same reasons. If you change the shape of your square or rectangle, even slightly, you’re sure to engage the viewer longer.

The circle is traditionally a very pleasing shape. It requires a higher skill level to cut and therefore is more unique. But it also benefits from innovative thinking and a fresh approach to the perimeter shape.

1

How do you come up with new shapes?

I like to draw quick, no obligation sketches on note book pages. I resist the urge to self-edit or limit the creative flow. The pencil just glides over the paper making a mess of the previously clean white space. The first few sketches usually resemble familiar, safe shapes and designs. But once those are out of my head, suddenly there’s room to be more creative. All new shapes begin to develop.

During these exercises I’m free to draw the impossible.

I then take bits and pieces from the shapes that I find interesting and remix them to create my own new, project profiles. And sometimes, if I’m lucky, I even manage to figure out how to build the impossible ones.

IMG_8209

  1. Combine Fusible Techniques

Exceptional glass artwork is never made with one step or one technique. Really exciting pieces are designed with substantial planning that brings an unexpected pairing of components together. Combining different techniques adds depth to the visual complexity of the art which further engages the viewer.

Putting it into practice.

The beauty of this approach is the techniques don’t have to be super difficult to have a positive impact on your new work. We all have our favorite, trusted, go-to techniques. Start there.

Using a complimentary color scheme, make three individual pieces, using three different methods. Cut the pieces up. Reinvent their roles in your art. Move them around. Change the composition a few times. If nothing thrills you, set them aside and let your creative subconscious have a turn.

Don’t force the grouping. I find that once I relieve the pressure to solidify a design, one presents itself. And the new composition is usually one that I otherwise would never have thought of. In cases like this, I believe the physical, ready made pieces guide and influence the discovery of innovative designs. Try it. You’ll be amazed how this abstract assembly opens your mind to fresh ideas.

11

  1. Trust yourself.

Design with confidence. Resist the impulse to compare yourself or your work to others. Instead, blaze your own trail and don’t look back. Take pride in your individuality and what you contribute to the craft.

Take risks to further develop your personal design style. Nurture your unique artistic perspective and your creative spirit will flourish.

Happy Fusing!

Lisa & Niki 

Follow my blog for more tips and tricks!

Video covers - Copy

Watch it NOW! Start fusing today! Downloadable instructional videos for every skill level.

Book covers

GET it NOW! Start fusing today! Check out my eBooks for elegant patterns and detailed fusing instructions. 


Posted on 3 Comments

Inspire Your Creativity Beyond Basic!

What makes my Premium Video Subscription different?

My premium videos are comprehensive project specific fused glass courses. My artist designed artwork is intended to inspire your creativity well beyond the introductory stack and fuse level. In my premium videos I show how easy it is to use advanced techniques with guided step-by-step video instruction. I include pro tips and suggestions to improve your workflow. You also receive my custom developed firing guides, a glass list and material list.

PLUS, each video comes complete with a complimentary 8.5 x 11-inch printable pattern eBook that includes color images, full size project pattern, firing guides and pro tips.

These video releases contain exclusive content that is only available to Premium Video Members and as paid project singles. They’re not available to the public on YouTube.

What makes my YouTube videos different?

My YouTube videos are short video trailers that briefly cover topics of interest. These free posts are my way of giving back and supporting the art glass community by inspiring continued creativity. They’re also opportunities for new fusers to become familiar with my teaching style and receive a personal invitation to join my premium video membership.     

Why join my Premium Video Membership?

As a member you support my creative lifestyle. You afford me the freedom to develop innovative pieces of art designed to excite your creative spirit.

Over the past two months, Niki and I have met our editorial goals. Each month we produced and published 2 new premium videos, 4 YouTube Vlog videos, 4 YouTube how-to videos, 4 blogs and 4 newsletters.

We have no intention of slowing down.

I would not be able to bring this amount of fun content to you without Niki’s dedicated help. Your monthly, monthly plus and premium annual membership makes it possible for us to work together. Your membership provides funds for glass, electricity, my website, design programs, lunch, cookies for our hungry pups, hay for Niki’s horses and shoes for my adorable grand babies.  

With your help and support we will meet our goals again in August, and the rest of this year.

Watch the Premium Video Membership Video Here!

Follow my blog for weekly inspiration sent to your inbox! 

Happy Fusing!

Lisa


Premium Videos by Lisa


Get your Artwear!