The idea of programing your own kiln can be frightening, intimidating and possibly the reason you haven’t fired up your new baby yet. I’m here to help you move past your crippling fears. Let me guide you to the empowering realm of control where you’ll enjoy the thrills of blissful creativity. It’s a magical place where time stands still for you and dichroic unicorns do exist.
To start, what type of kiln are you using?
Glass kilns come in many shapes and sizes handmade by skilled manufacturers.
There are many types of awesome kilns out there that can help bring your vision to life. There are small, table top kilns that can be used virtually anywhere and large industrial sized kilns like my “Big Blue” that can take up half your work space! Invest in a kiln that fits you and your space!
But first you have to understand the foundation of glass fusing programs.
A firing guide is a step-by-step schedule to fire glass of a certain size and thickness to achieve a specific result. Firing guides are carried out in steps called segments. Larger, thicker projects have more conservative firing guides with more segments. The rate per hour indicates how quickly the kiln should change temperature in an hour. Temperature is the target temperature the kiln will be taken to for a specific purpose. The hold time indicates how long the kiln will remain at a certain temperature to achieve the desired results.
Kiln controllers.
Note. Not all kiln controllers work the same. This is intended to simplify the overall theory for you. It’s best to refer to your kiln manufacturer’s owner’s manual for specific instructions on how to operate your kiln.
When programing a kiln you’ll enter several pieces of information in order to write a program. Controllers can hold and retain several programs. Therefore, the first number the kiln will request is the program number. Then it will request the number of segments you want to use. It will then ask for the rate, the temperature increase you want per hour. Next it will request the hold time, how long you want the kiln to stay at that temperature to achieve the desired results.
If you have entered more than one segment you repeat the above steps for every segment in your program.
The great thing about having a controller is it retains your information to use again in the future. In my studio, I have several kilns of varying sizes. To avoid confusion and mistakes, I hang a list of the programs in each kiln next to the kiln. Then when I fire glass, I can quickly find the appropriate program and access it with confidence.
To help clarify the kiln programing process and steps I’ve included my three most common programs here.
Make no mistake, you’re brave to enter the creative and mysterious world of glass fusing. Therefore, I know you have what it takes to program your own kiln. You got this!
Wherever you are in your journey you’re doing great! Keep learning. Keep sharing. Keep creating beautiful pieces of art.
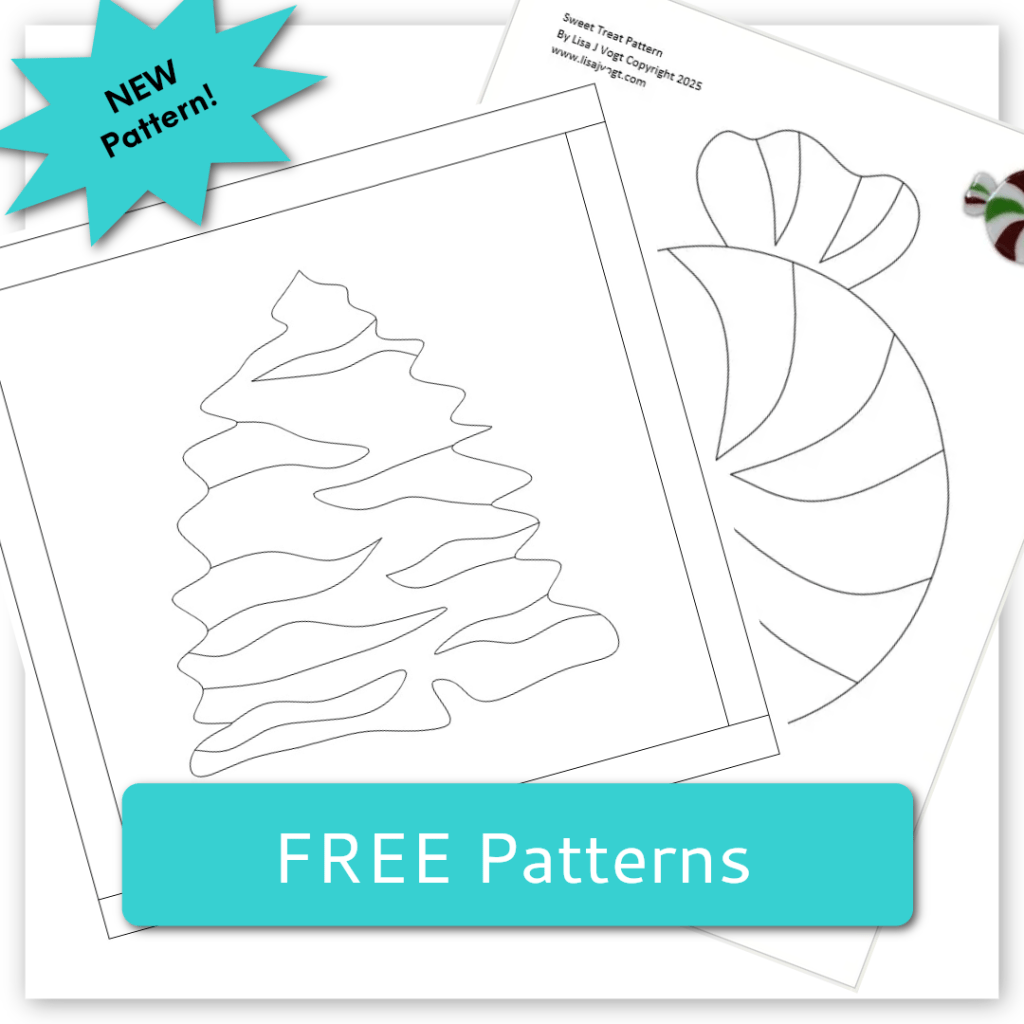
What better way to keep the warm, carefree days of summer flowing than with a fancy tropical fish plate. The cool thing about this brightly colored reef dweller is it combines easy cutting techniques along with a freestyle approach to assembly that make it fast, easy and fun to make.
Here’s how
Fish Plate How-To 12” x 9”
Using the pattern as a guide cut a base out of clear glass. Cut as much as possible by hand. Use a wet saw to cut the deep inside curves. If you don’t have access to a saw, the base can be made up of pieces. Grind the base to remove sharp edges and improve the shape.
Cut ¼” wide strips of color glass for the fish body. I used both opal and transparent glass. Spread the glass out to create an interesting color arrangement.
Use the pattern as a guide to cut the head and tail out of opal glass. Cut the fins out of transparent glass. Grind the glass as needed.
Arrange the strips on the paper pattern between the head and tail pieces. Include a few pieces of twisted cane between the glass strips for a trendy detail. Mark the glass strips and cut them to size.
Bend stringer in a candle for a fun wavy pattern.
Stack the head, tail and fins on the base layer. Glue the cut glass to the base with fuser’s glue. Add the eye and side fin.
Detail the fish with an assortment of black and clear dichroic scrap and wavy stingers.
Fire the fish to a full fuse temperature.
Slump the fish into a shallow mold.
Enjoy!
Fish Plate Pattern
Fusing Guide
Segment 1: Ramp 300 F/hr to 1300 and hold 30 min.
Segment 2: Ramp 500 F/hr to 1465 and hold 10 min.
Segment 3: Ramp 9999(AFAP*) to 960 and hold 40 min.
Segment 4: Cool to room temperature.
*As fast as possible
Slumping Guide
Segment 1: Ramp 300 F/hr to 1265 and hold 10 min.
Segment 2: Ramp 9999(AFAP*) to 960 and hold 40 min.
Segment 3: Cool to room temperature.
*As fast as possible.
NOTE: Kilns fire differently. Test fire these guides in your kiln and then make adjustments as needed.
Fish Plate as seen in my Fun and Fanciful Fusing video.
Fun and Fanciful Fusingwith Lisa Vogt. “I LOVE the creative projects and use of color in this video. So inspiring!” This exciting video is all about having fun! It’s about working with vibrant glass colors, making new project shapes, and getting excited about glass fusing again!
Happy Fusing!
Lisa & Niki
Follow my blog for weekly inspiration sent to your inbox!
Fusing glass is amazing. We fusers cut glass and super heat it to make cool designs all our own. Solid colors make bold projects, but once you start playing with frit and see all the new and exciting possibilities, you’ll be eager to add this small material to all your big projects.
Frit is crushed fusible glass. Oceanside Compatible frit comes in 5 grain sizes: powder, fine, medium, course and mosaic. Each size is available in 8.5 oz. and 4 lb. jars. Each frit size has unique visual characteristics that you can push to ramp up your fused glass projects. Let’s go over the many possibilities one size at a time.
Party Animals by Lisa Vogt
Powder
Powder has the silky consistency of confectioners’ sugar. It appears smooth and has uniform color coverage after fusing. Powders can be used as filler between cut glass pieces, to add shading, to add patterns and even as a repair tool. I use powder when I want super strong color saturation along with multiple color blends.
Shere Power is a great example. Wherever I wanted tight control over my line quality and solid color saturation, I used cut glass to represent the design. The cut glass was fixed to a clear base glass with fuser’s glue. The glue keeps the pieces from moving when applying the frit. Once the glue was dry, I poured powder frit between the pieces and blended the colors with a wide, dry paint brush and a palate knife. The blended powders give the art a beautiful painterly quality that dramatically contrasts the solid color fields surrounding it.
Other fun uses include using powder to add shadows to a solid base color. Apply medium and dark green powder on top of light green glass to add shading to your design. Or sift the powder over a stencil to add a crisp and intricate pattern to your project.
One of my favorite uses for powder is to fill inconvenient gaps between my cut glass pieces. Think of it like grouting tile. It’s easy and effective. Work a small amount of powder into the gaps with a narrow paint brush. For added pop, use a bright color that contrasts your design’s color palate.
Powder Pros: It’s fast and easy to create subtle or dramatic color blends that support your specific creative vision. Adding shading and pattern is a snap.
Powder Cons: Cleanup is time consuming. The powder requires meticulous cleanup to ensure the surrounding solid glass color isn’t muddied. After removing any excess power with a brush, I go over the surface of the glass with the corner of a damp towel or a damp Q-tip depending upon the size of the surface area being cleaned.
Tips for working with powder
Don’t be skimpy when you use powder frit. For bright vivid colors, it’s necessary to fill the space between your cut glass pieces to the top edge, in effect making the frit 1/8 inch thick.
Be daring and use high contrast colors, they display better in the finished piece.
Opal glass colors tend to give a more dramatic effect than transparent colors.
Know your glass colors. Powder frit specifically, looks lighter in the jar than the actual glass color. Light blue and dark blue look the same just as transparent light green and opal dark green look the same. If you’re not sure of the intensity or opacity of a powder, look at a larger size frit like, medium or course. Or find a piece of sheet glass with the same color code number, compare it to the frit and the frit color and shade will be obvious. Powder in high concentration, like in a casting mold, looks milky after fusing. If you want to use powder in a mold, layer it with clear in medium, course or mosaic size frit. Using this technique will improve the transparency of the cast glass project.
Fine Frit
Fine frit has the consistency of granulated sugar. It appears grainy, like small uniform dots after fusing. Like powder, fine can be used to fill gaps between cut pieces of glass. The larger grain size makes it faster and easier to clean up than powder. Fine is also great for shading when you want a slight textural look to the shadows.
Fine Pros: Cleanup is fast and easy. In the same application, it takes less material to do the same job with fine than it does with powder. Fine is a great filler to use between larger frit. It gives you complete color coverage and prevents the base glass from peeking through.
Fine Cons: Color blends within this same size have a grainy appearance after fusing.
Tips for working with Fine
Use both transparent and opal glasses together for greater visual depth and to create shading.
Use fine frit together with other frit sizes to produce visual textures.
Medium Frit
Medium frit has the texture of course sand. When fused, medium frit retains the sand-like visual appearance. I use this size frit when I want to fill in larger areas with strong color quickly. It can also be used to create shading and color blends provided you welcome variations in the coverage which depend on how much frit or how little frit is applied.
Medium Pros: Medium frit provides you with quick, easy coverage of large areas with strong color saturation.
Medium Cons: This frit has a grainy look, and the base glass may peek through the frit unless your layer is thick.
Tips for working with Medium
Use both transparent and opal glasses in combination for greater visual depth and to create shading.
Use medium and fine frit together for new color blends and to add visual texture.
Course Frit
Course frit has the consistency of small pebbles. The pebble look remains after fusing. This frit is great for filling large areas where you want visual texture to contrast solid fields elsewhere in the project.
Course Pros: Course frit covers a lot of area fast, and it leaves an appealing pattern behind after firing.
Course Cons: The base glass will be visible between this larger size grain.I fill in around course with both medium and fine frit to intensify the color and hide the base.
Tips for working with Course
Use both transparent and opal glasses in combination for greater visual depth and to create shading.
Use fine and medium frit together with course to produce pleasing textures.
Mosaic Frit
Mosaic has a wide variety of glass shapes and sizes within the jar. This frit leaves a vein-like impression after fusing. I use mosaic when I have a lot of space to fill and when I want to create an organic pattern.
Tips for working with Mosaic
Clear glass layered on top of a color dilutes the color below. It’s like adding water to paint. I like to put clear mosaic pieces on top of select elements in my work to create subtle, lighter variations in the original glass color.
During assembly, glue the mosaic pieces down with fusers glue so they don’t move when you fill in the spaces in between.
Use both transparent and opal glasses in combination for greater visual depth and to build interest.
Use fine, medium and course frit to fill gaps and produce interesting color combinations and exciting textures.
Put it all Together
Frit is a terrific medium for making landscapes or other images where you want to create an engaging depth of field. In nature, objects in the distance are lighter in color, and they visually have less detail. When making landscapes, I use the different frit sizes to emphasize those subtle differences.
I use powder to render the sky because I can get smooth, gradual color changes. I use fine frit to create the tree line and other filler foliage in the distance. The grain size stands out in front of the powder and yet doesn’t compete with the foreground. Medium frit works well for the mid-range elements that require more intricate detail, like bushes or flowers. Course frit is well suited for objects in the foreground, such as flowering plants or sweeping trees. These design elements carry more visual weight and tie the design together. Mosaic frit is great for specific up-close subject matter like a path or bridge. Such solid, recognizable focal points lure the viewer into the design.
Oceanside Compatiblefrit comes packed in 8.5 oz. and 4 lb. jars. For the larger sizes like course and mosaic you may consider crushing your own frit. The advantage to working from the jars though, is you have uniform sizes within the jars and one single color throughout. Plus, there’s no risk of contaminants like dirt or metal shavings that are present when you crush your own glass. Personally, I prefer to jump right into the design and fabrication phases rather than spend time swinging a hammer and sifting glass.
I hope this round-up entices you to start incorporating frit in your new work. It’s such a versatile and easy to apply material. You’ll love the creative flexibility if affords.
Want to learn more?
Join my Premium Video Membership for full project courses.
Don’t miss this exciting opportunity to SEE how you can use frit to jazz up your artwork. Join me and I’ll show you how to work with frit and many other glass supplies to creat stunning works of art!
Talent is a wonderful gift. I believe everyone excels in some area. It’s outwardly obvious in some people like athletes, actors and artists. While talent is quieter in mathematicians, literary types and scientists. But everyone has a special area of interest where they shine.
You might be the most talented glass artist in the world. But if you’re creating art alone in a closet, you’ll never be recognized for your incredible work beyond your front door. If you’re content creating for yourself, hurray for you. Carry on. Enjoy!
But if you crave a wider audience for your creations, it takes more than talent to be successful in today’s marketplace. You must bring the whole package.
Soft Skills
Soft skills are your personality in action. They’re the dynamic energy and presence you bring to the room.
Are you happy, friendly and outgoing? Do you engage others with the intention of making them feel comfortable? Do you include everyone? Do you treat everyone, from the trash collector to the CEO, with the same courtesy and respect? Do you openly smile and offer a handshake? These traits make you a person, more than just a contact, co-worker or hired help.
Soft skills will take your farther than anything else. This is not to say you don’t need to know your craft and your business, you do. But your ability to engage, get along and communicate with others is paramount. How you treat others, how you work with others and how you handle unexpected problems all contribute to becoming a valuable, sought after artist.
No one wants to work with a prima donna artist for long. Sure, she’s entertaining for a while, but the unpredictability is exhausting and unprofessional.
If you’re shy, you can develop a stronger presence. Start with eye contact and a sincere smile.
Patience and Perseverance
You may not know this, but my glass roots are grounded in stained glass. This year I celebrate 36 years of glass crafting. My husband and I owned and operated two art glass studios for 20 years. At that time, we sold 500 different pattern book titles in our stores. I wanted to be a pattern book author, so I approached a publisher. I was rejected because my drawings were immature.
At first, I was disappointed, then angry. And then I was driven to prove to myself I had what it took to be published, and to sell. It took a few years before I tried again, this time with a different publisher. My first book, Tropical Teasers came out in 1999. I was basking in the glow of my first title when a customer told me, anyone can be a flash in the pan. Over the next 12 years I went on to publish 14 books. This flash is still sizzling!
The biggest dream killer is stagnant waters.
I make a plan, then outline the steps needed to accomplish my objective. I try to make tiny steps toward my goal every week. Any forward momentum is better than no progress at all. When I’m overwhelmed and frustrated that nothing is getting done, I make a list of recently completed projects. I’m always amazed how much actually has been accomplished. Don’t give up. The journey is part of the adventure.
Self-Promotion
Don’t run away screaming. This is not an evil topic and it’s easier to implement a strategy than you think.
Invest time in an artist website. It doesn’t have to be fancy or expensive to be effective. There are free host sites that work well. Simple, clean, and clear is powerful. The point is to be easily accessible. Include an artist’s bio with your picture, contact info, pictures of your artwork, and any other relevant information. Make the site as unique and colorful as you are.
Have professional quality pictures taken of your art. Or invest in a camera, photo cube, and lights to take your own. Quality images sell your art. This is not the place to skimp.
Participate in one or two social media venues. Think quality over quantity. You’ll be more effective and enjoy the conversation more if you keep a tight rein on your online commitment. Contribute to topics, share ideas, help others when possible.
Get out there. It’s not easy to promote ourselves or our art. We’re artists not salespeople. But it’s important to be able to sell when appropriate. Put yourself in a position that makes you comfortable to talk about your art.
I was invited to be a guest on a local cable show. It terrified me. I went anyway, not knowing what to expect. It was a cheesy late-night show no one watched. It would be good experience if I was ever asked to be on a “real” show. Just before I went on stage my legs froze from the knees down. I couldn’t feel my feet. I was afraid I’d topple over like a bowling pin. I always thought that was just a stage fright myth. Nope. It really happens.
This is what I learned. It’s the host’s show. It’s all about the host, and 15 seconds about them talking about you. They only ask you questions about what you’re passionate about. For me it’s glass. I can talk about glass all day, comfortably and confidently. That was easy. If you’re slow to reply or stumble the host jumps in because dead air is lethal. And as we now know, it’s all about them.
The takeaway here is this: a very scary situation is not scary at all if you’re sharing your expertise and your love of your art. This is how I prime myself for public speaking engagements. I remind myself I’m talking about glass. That’s easy and fun. Take chances and put yourself out there.
I’ve been interviewed on live TV several times since. My legs don’t freeze anymore.
Wherever you are in your artistic journey you’re doing great. Keep learning and pushing forward. You have talent. I believe in you!
As a life-long learner myself, I know it sometimes takes a change of scenery, a challenging new educational experience and the encouragement of an experienced instructor to advance my skills and help me grow.
Are you ready to grow? Become a Premium Video Member Today and gain access to over 30+ Full length project courses with new courses added monthly!
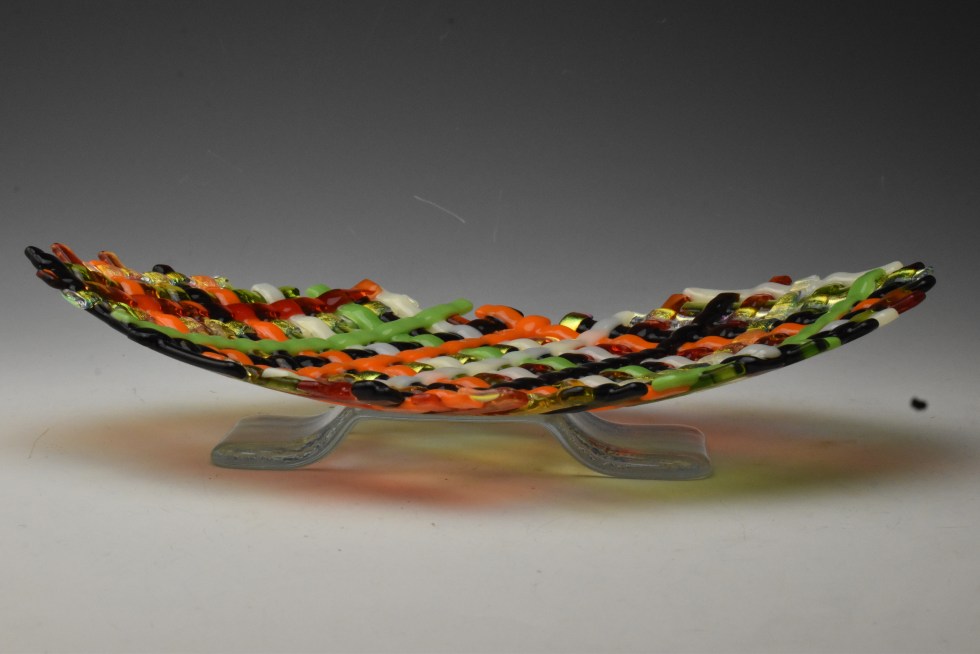
The oval is an elegant shape traditionally associated with luxury and wealth. It’s a shape that’s easy to make in glass. I honestly don’t know why, we as high thinking creatives, don’t take advantage of its particular attraction more often.
I’ve used the weave technique many times to make square bowls and rectangular lanterns. The openness of the construction, and the playful overlap of colors combined with the fascinating texture all contribute to the charm of the finished piece. I thought to myself, how can I take this winning combination to the next level? The answer of course was to use this simple, but effective technique to make an unexpected oval shape.
Fabricate your piece with a distinctive glass weave technique.
My weave technique is super easy, surprisingly fun to use and produces very effective results. It’s simple. Pick a color palate and cut a series of ¼ inch wide strips of glass. Cut more strips than you think you’ll need to make your project. This way you have extra and won’t have to interrupt the assembly step to cut more glass. I used both transparent and opal glass, plus dichroic glass on clear.
Draw the oval shape on a primed or fiber paper covered kiln shelf. The weave is made with 4 layers of glass strips. I laid my strips out diagonally for added interest. Layout layer 1 leaving plenty of room between the strips for layer 3. Cut the pieces to size. I intentionally cut my pieces to create a fringe edge. Layout the strips for layer 2 in the opposite direction. Leave room between the strips for layer 4. Repeat with layer 3 and 4. Carefully load the kiln shelf and assembled project in the kiln. Fire to a Tack Fuse temperature.
Use the heat of your kiln to create your own custom results.
This project is tack fused together. At this temperature the resulting project retains the woven texture. The pieces are heated to the point where they stick together, and the bond is strong enough for the project to support its own weight. The attractive textural quality is both visual and physical which makes the piece more engaging. Consider using the tack fuse temperature to add details and accent pieces to fused glass art to introduce another facet of interest. Here, on this weave bowl the tack fuse option really increases the level of sophistication of this piece of art.
Slump your glass to give it a graceful profile.
Slumping adds elegance and a pleasing three dimensional quality to your fused glass art. The physical texture created by the weave is also greatly enhanced by the gradual curvature of the bowl shape.
Finish with a custom base worthy of your exceptional artwork.
Making a custom stand or base is equally as exciting as making a striking piece of art. It’s rewarding to follow thorough to the natural completion of a project with a display that shows it off. A base gives the art lift which immediately increases the perceived value and visual intricacy of the finished piece. It also allows light to go through the glass and cast reflections that enlarge the overall impression of the art. Keep the stand or base simple. It should add to the art, not overpower it, or distract from it’s beauty.
Keep the dream alive!
One of the many things I love about working with glass is the endless design and fabrication options that are available to us. There are an abundance of exciting new approaches waiting for you to discover when you venture down the less traveled path of experimentation. Let’s go!