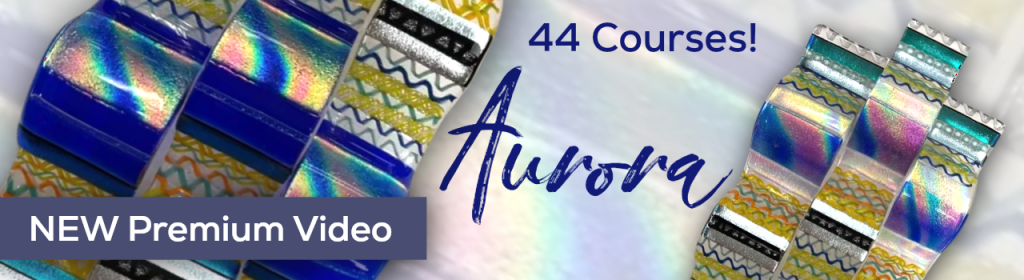
What makes my Premium Video Subscription different?
My premium videos are comprehensive project specific fused glass courses. My artist designed artwork is intended to inspire your creativity well beyond the introductory stack and fuse level. In my premium videos I show how easy it is to use advanced techniques with guided step-by-step video instruction. I include pro tips and suggestions to improve your workflow. You also receive my custom developed firing guides, a glass list and material list.
PLUS, each video comes complete with a complimentary 8.5 x 11-inch printable pattern eBook that includes color images, full size project pattern, firing guides and pro tips.
These video releases contain exclusive content that is only available to Premium Video Members and as paid project singles. They’re not available to the public on YouTube.
What makes my YouTube videos different?
My YouTube videos are short video trailers that briefly cover topics of interest. These free posts are my way of giving back and supporting the art glass community by inspiring continued creativity. They’re also opportunities for new fusers to become familiar with my teaching style and receive a personal invitation to join my premium video membership.
Why join my Premium Video Membership?
As a member you support my creative lifestyle. You afford me the freedom to develop innovative pieces of art designed to excite your creative spirit.
Over the past two months, Niki and I have met our editorial goals. Each month we produced and published 2 new premium videos, 4 YouTube Vlog videos, 4 YouTube how-to videos, 4 blogs and 4 newsletters.
We have no intention of slowing down.
I would not be able to bring this amount of fun content to you without Niki’s dedicated help. Your monthly, monthly plus and premium annual membership makes it possible for us to work together. Your membership provides funds for glass, electricity, my website, design programs, lunch, cookies for our hungry pups, hay for Niki’s horses and shoes for my adorable grand babies.
With your help and support we will meet our goals again in August, and the rest of this year.
Excerpt from my, How to Think like an Artist Lecture.
You’re artistic, crafty, gifted, talented, whatever title you favor, like me, you’re a hands-on creative who loves making exciting art. Being a veteran member of this inspired group, it’s likely you already apply some of these design concepts in your work and in your everyday life. My intention here is to bring to light the increased value of purposefully incorporating these ideas in all of your artistic endeavors.
Stand-out glass art is the result of careful planning and mindful execution. Yes, it takes forethought. But once you see the incredible benefits a little preparation can bring, you’ll actually enjoy the process as much as I do.
Elements of good design that’ll take your glass artwork to the next level.
1. Rule of thirds.
This rule refers to the way the artistic composition of a piece of art is planned and laid out. Begin by dividing the project shape into three even pieces vertically and horizontally. Think of it like the lines of an imaginary tic-tact-toe board are superimposed over the project. Then place design elements along the imaginary lines, or better yet where two lines intersect. This placement creates desirable tension that engages the viewer and therefore holds their attention much longer.
Unless the design is geometric, avoid placing design elements in the center of the artwork. This type of symmetry creates a calming setting that’s easily ignored.
Rule of thirds.
2. Work in odd numbers.
When designing your pattern include an odd number of design elements. If you’re drawing flowers, have 3, 5 or 7 blossoms. This pleasing setup meets the viewer’s expectation, plus it amps up the tension and the repeat adds continuity to the overall design.
Work in odd numbers.
3. Include a focal point.
Every design can benefit from having a focal point. The focal point can be literal and pictorial like a bird or tree. Or it can be abstract like a specific design element, an unexpected shape, a field of contrasting color or an unusual texture. Focal points anchor the viewer to the art. They lure them in and invite them to stay awhile and look around to see how the focal point relates to the remainder of the artwork.
Include a focal point.
4. Place design elements in a triangular fashion.
Placing design elements in a triangular pattern creates a visual flow that encourages the viewer’s eyes to move around the design. Your artist guidance, in the form of strategically placed design elements, is a personal invitation to interact and communicate with the viewer. That’s powerful stuff!
Place elements in a triangle.
5. Repeat shapes, elements, and patterns.
If you use a shape, design element or pattern in one place consider repeating it two more times. For example, if a circle appears in one place, add two more. This level of planning shows your commitment to your design and the confidence you have in your work. Plus, it adds continuity that raises the sophistication level of the work as a whole.
6. Repeat colors.
Repeat colors.
Color plays an important role in the visual impact of art. It sets the tone and mood for the work. It also unifies the piece. You can increase the dramatic impact of your work by repeating colors at least three times. This adds continuity and shows the artist’s higher level of seriousness and commitment to the art.
When selecting colors plan to use multiple shades of the same color, like yellow, sunflower yellow, light amber, medium amber and dark amber in combination to create shading and add contrast.
Small changes have a BIG impact!
When you stop to think about it, it’s likely you’re using many of these concepts every day. When you decorate the coffee table you arrange three candles in a corner, not in the middle. The candles are likely three different heights that visually forms a triangle. You selected candle colors that are repeated in your decor.
Now, put it all together. Purposely apply these simple design tips when making your glass art and you’ll see a wonderful increase in the beauty and desirability of your finished artwork.
Want to learn more? Join my Premium Video Membership!
Summer is a wonderful time to enjoy outdoor activities and breath in the beauty of nature. It’s refreshing to be away from my glass studio in environments rich with color, pattern and new scenes. I cherish time cooling off on the water and the exhilaration of hiking in the woods. The outings clear my mind of old design themes, they rejuvenate my spirit and inspire new design ideas.
I may be off work, but my creative subconscious is on duty collecting tidbits that’ll later be integral parts of my new art. I seek exciting new compositions by studying tiny details like the delicate curled shoots of ferns. I imagine the extreme color combinations studying the broad strokes of a spectacular, cotton candy pink sunset. Even familiar settings, seen with renewed artistic curiosity, offer new appeal.
Fairy Tale Forest as seen in Painting with Frit with Lisa Vogt Video
Fairy Tale Forest was inspired by a path I frequently walk in the woods. It’s an enchanted place with specked shade, inviting curves that promise adventure and the musical sounds of nature alive in the brush. Tall pines and century old oaks form a canopy overhead. The cathedral like tunnel makes me feel small, at ease and safe. It’s as if the trees are guarding me with the wisdom of their age. It’s such a magical place, I half expect to see a white unicorn trotting around palmetto bushes.
The truth is the path doesn’t really look like my design. I exercised my artistic license. I designed the art to convey the way I feel, the comfort and joy I have when I’m strolling down the leaf blanketed trail.
I never would have stretched my artistic vision to that extent without the actual experience of walking down that path.
Paradise Palm as seen in Painting with Frit Video
Paradise Palm was inspired by a favorite lagoon on the coast. Again, the artwork loosely represents the landscape. It’s really a representation of good times and fond memories of time spent with my family.
River Bottom as seen in Fusing for the Adventurous Webinar with Lisa Vogt
River Bottom was inspired by the ditch that lines my street. Really. I was walking one morning and noticed the sunlight shining on the water in the retention ditch on my road. The sun pierced through the clear water down to the bottom where it lit up the tiny green leaves of mossy plants. They sparkled like glitter covered light bulbs. It was so captivating I then noticed some lacy tree leaves suspended in time, and the striking shadows of tree trunks stretching across the placid surface of the water. I thought, this is a beautiful scene, how can I render this in glass?
The project looks simple. You have to see it in person, after hearing the story to really appreciate the true beauty and depth of River Bottom. The take away, the invaluable lesson, is that beauty is all around us. We just have to look for it and then let it inspire us to be creative.
Take it outside!
This summer while you’re exploring beaches, mountains and cities open yourself to discovery. Then, when the artistic spark flares, you’ll have an exciting collection of new ideas to fuel what you fire.
Painting with Frit with Lisa Vogt Video, 6 amazing projects!
Get fired up for advanced design techniques that invigorate your artistic spirit. You’ve loved making all the simple projects. Now experience the thrill of breaking away from familiar shapes to create striking free form fused glass designs.
The fastest and easiest way to make free form project profiles is to reinvent the square, rectangle, and circle. Start simple with the basic shapes and add your own twist. Put notches in a square, put curves in the straight edges of a rectangle, give your circle a free form shape. Using exciting new shapes will elevate your fused glass from functional to fine art.
Take it a step farther and get creative combining slumping molds to make one-of-a-kind bowls and vases. Design your projects with these concepts in mind and you’ll immediately see an increase in the visual intricacy of your artwork. The possibilities are endless.
A Winning Combination
Combine different unique shapes and your work will go from ordinary to extraordinary. Then reshape the fused glass by slumping or draping it on a combination of molds and other kiln furniture. There are no rules. Just make it your own and you’ll come out a winner.
Once you integrate these design concepts into your work, you’ll be amazed how quickly your work rises to a higher level of sophistication. And in the process, thinking in a broader scope will open the door to all new, exciting possibilities.
Follow my blog for weekly inspiration sent to your inbox!
You may know, I studied fine art in college. Art classes were the only classes I excelled in and so I filled my schedule with everything from art history to weaving. Art history was an 8:00 am class I slept through more than I should have. While my oil painting class in the afternoon always had my full attention. To this day, I love the smell of paint and the limitless possibilities of a dripping brush in my hand.
Now, I apply the art theory principles I learned all those years ago in my painting class to the development of my fused glass artwork.
You can too! It’s easy.
You just have to put purposeful thought into how you approach your glass work.
There are several design tips I consider using when I start a project. Creating a light source is ideal for patterns with realistic subject matter like this octopus. As you can see, the addition of highlights and dark shadows opposite them really bring this exotic ocean dweller to life. So, how do you achieve this level of sophistication?
One step at a time.
Frit is an amazing tool for glass artists who want to give their pieces gradual color changes that produce one-of-a-kind designs with a painterly quality.
I drew this octopus design for a large mosaic project. It turned out beautifully. The stretching image was so powerful I knew I had to find another use for this whimsical pattern.
This specific design is also a great example of how easily you can repurpose a pattern. You can make the pattern smaller and use a different glass assembly technique to get further enjoyment out of a favorite design.
At first glance, this design looks busy and difficult to make. But if you break down the stages into steps, the creative process is manageable and even fun.
When deciding exactly how to build this design, it made sense to cut the blue background out of sheet glass. This would give the design a pleasing solid field of color that would enhance the fluid movement of my focal point, the octopus.
It would have been time consuming and difficult to cut sheet glass for the octopus tentacles and body. I decided the fastest, easiest, and most visually exciting way to render these areas would be with the application of frit. With frit I could create shading and visual texture that would beautifully contrast and pop out from the sharp confines of the blue water background. This piece is made using two layers of fusible glass. The base layer is white. I cut the second, blue glass layer with a wet saw. The cut blue layer is then stacked on the white base layer and held in place with a small amount of fuser’s glue. Once dry, the glue prevents the blue glass pieces from moving. This is an important step as it ensures you have clean edges and strong line quality around the octopus body and tentacles.
Applying the frit.
My daughter did a fabulous job applying the frit. We started with a course orange opal frit on the right side of the octopus’s body and tentacles. Moving to the left, we gradually added a fine orange opal followed by a fine marigold yellow opal frit. We then added fine bright yellow opal, concentrating it on the left side of the tentacles and the upper left side of the octopus’s head. This bright yellow established the direction of the light source in the upper left hand corner of the design. The use of different shades of color and different frit sizes increases the visual depth and fullness of this design.
Now for the shadows.
Highlights like these are stronger and more effective when contrasted by deep shadows. We applied fine dark red opal frit on the right side of the tentacles and where the tentacles join the body. Fine purple frit was used to create darker shadows where the tentacles overlap and where they disappear behind the octopus’s body.
This artwork was full fused. The completed piece was glued into a 15 inch metal serving tray. This pattern can easily be made smaller, and you will have the same great results.
Tips for working with frit.
Apply larger size frit first then fill in the gaps with smaller frit of different color.
Start with a small amount. You can always add more as needed.
Apply the frit with purpose. Plan your direction and the way the colors will transition from one to another.
Create color gradients using different shades of the same color frit.
Mix colors for added interest.
Don’t be skimpy. Apply a thick layer to hide the white glass base layer below.
Take your time and enjoy watching your colorful design develop.
Be bold. Have fun!
You got this!
I hope this artistic insight empowers you to work with frit and create striking original pieces of art.
Happy Fusing!
Lisa & Niki
Follow my blog for weekly inspiration sent to your inbox!