Hey glass fusers, I have exciting news. I’m working hard on a new glass fusing eBook. There’s a lot of helpful information out there on glass fusing, and I’m thankful to the skilled artists who generously share their knowledge. But I thought, wouldn’t it be great to have updated information consolidated into one big comprehensive eBook? A single all-inclusive resource guide for glass fusers of all skill levels.
The following is an excerpt from my new eBook. The complete list is more comprehensive and considerably longer. Here I included the terms students ask about most. I hope you enjoy it.
Anneal – Oceanside 96 – 960°F (516°C): Super heating glass, like we do in a kiln, creates stress in the glass. We alleviate the stress, anneal the glass, by holding it a specific temperature for a designated amount of time. How long is determined by the size and thickness of the project. The larger the project the longer the hold time.
Note: Each family of fusing material has its own temperature range and recommended hold time. Consult the manufactures published guides for specifics.
C.O.E. – Coefficient of Expansion: This refers to the rate at which a specific family of fusing compatible materials expands and contracts when heated and cooled. Glasses must be of the same C.O.E. to be fusing “compatible”. Oceanside 96 glass is “tested compatible,” that is, it has been formulated and tested for fusing compatibility, and is thus labeled. All products with the Oceanside 96 label are compatible with each other.
Color Shift: Some glass colors will “strike” change color, usually become darker when heated. This is especially true of reds, yellows, and oranges. It’s a good idea to test-fire small pieces so you’ll know what to expect.
Drape 1175°F – 1200°F (635°C – 649°C): In this process the glass is placed over the outside of a mold and heated until it falls loosely around the mold.
Embossing: To create an impression, pattern, or design on the backside of a fused glass project by fusing the assembled project on 1/8-inch-thick (3mm) fiber paper cutouts.
Firing Cycle: The specific set of times and temperatures a given project will experience during heating, annealing, and cooling in a kiln.
Firing Guide: This is a step-by-step schedule to fire glass of a certain size and thickness to achieve a specific result.
Hold / Soak: At certain times during the firing process we hold, also sometimes called soak, the glass at a specific temperature for a designated amount of time to get the desired results.
Quick Cool: To open the kiln for the purpose of cooling the hot glass to prevent it from changing further. Always occurs above 1100°F (593°C) because glass is extremely sensitive to rapid temperature change below 1000°F (538°C). Also called “flash vent” or “rapid cool.”
Segments: Firing guides are carried out in steps called segments. Larger, thicker projects usually have more conservative firing guides and therefore a greater number of segments.
Slumping Mold: Usually made of ceramic or stainless steel. Used to give the flat fused glass a 3-dimensioal shape or sculptural form. Most be primed before first use.
Soak: To hold the kiln temperature steady for a period of time. It allows the glass to slowly react to the heat and conform to the desired shape.
Target Temperature: This is the temperature the glass will be taken to for a specific look or effect.
Thermal Shock: Glass breakage do to rapid temperature change. Glass is sensitive to temperature change between room temperature and 1000°F (538°C) during the heating and cooling phased of the firing. To prevent thermal shock, we heat the glass slowly from room temperature to 1000°F (538°C). Once the glass and kiln are above 1000°F (538°C) the glass can be heated as fast as possible to the target temperature. When the desired result is achieved, the glass can be cooled as fast as possible down to 1000°F (538°C). At that point the glass is fragile and should be cooled slowly down to room temperature. How slowly depends on the size and thickness of the project. Larger and thicker projects are fired slower than small projects. For example, a 4-inch square tile can be fired faster than a 12-inch square bowl.
Safety First: It’s important to note that the materials like glass and supplies like shelf paper that we put inside the kiln are special high-refractory materials designed to withstand excessive heat and are purchased at your art glass supplier specifically for kiln work.
Excerpt from the resource guide: Glass Fusing Terms by Lisa Vogt
Happy Fusing!
Lisa
Follow my blog for weekly inspiration sent to your inbox!
Join me and see how thinking outside the box and using ready made molds in new ways offers numerous and exciting opportunities to produce unique forms.
I’ll challenge and motivate you to transform your ordinary projects into inspiring, sculptural pieces of art!
I’m back with my popular Webinar, Creative Slumping. In this detailed Webinar, I’ll reshape the way you slump and drape glass. See how thinking differently and using ready-made molds in new ways offers numerous and exciting opportunities to produce unique forms. You’ll also learn how to make your own graceful, free-form shaped molds from readily available materials with no laborious measuring or messy mixes needed.
But we aren’t finished there…
Taking you one step further, I’ll show you how to use these different approaches, in combination, to transform ordinary projects into inspiring, sculptural pieces of art!
Don’t miss this opportunity! Webinars are a great way to get together and share the craft we love with enthusiastic artists around the world. I hope you’ll join me!
Artwear T’s by Lisa Vogt
Artwear Designed for Artists by Artists Tell them how you really feel with bold T-shirts, Eco-conscience tote bags and sassy mugs.
Enjoy summer’s sunny, fun filled days with this shimmering tropical fish tray.
The most wonderful characteristic of glass is its generous nature. If you open yourself up to discovery, glass continuously offers the curious artist brand new opportunities to be creative. I’ve been working with this medium for more than 30 years now! And it still amazes me that a simple, new twist on old techniques can still give me a huge thrill and excite me as much as a carefree kid on summer vacation.
Due to the number of projects I make, I have a lot of scrap glass. So, when I find a new, clever way to make something beautiful with left over material, I get fired up. And best of all, the reliable techniques used here are fun and easy to apply. It’s the unusual pairing of multiple design methods that makes this tropical fish tray so attractive and enjoyable to build.
Don’t let the complex looking design scare you. The different techniques I used to create this bright reef dweller are broken down into easy, manageable steps.
Tropical Fish Tray by Lisa Vogt
Let’s get started.
Use the pattern as a guide to cut the base layer out of clear glass. Grind the glass to improve the shape and remove any sharp edges. Clean the glass with water and then dry it with a towel. Set the clear base aside.
Number the pattern pieces on 2 copies of the fish pattern. This will simplify the assembly later. Cut the pattern up with scissors. Use a glue stick to hold the paper pattern pieces on the glass. Cut the glass as close to the pattern as possible. Remove the excess glass with running pliers and grozing pliers. Use the same method to cut and shape the fish scales.
Save your scrap pieces to make the open and airy background pieces of the tray.
Grind the cut fish pieces to remove any sharp edges. Clean the ground glass with water and then dry the pieces with a towel. Arrange the ground fish pieces on the clear base layer. Glue the pieces to the base with fuser’s glue. Let the glue dry before moving to the next step. Otherwise, the glass will slide around when you apply the frit.
Using a spoon, pour fine Cobalt blue frit on the fish. Gently sweep it into the gaps with a small paint brush. This adds contrast and detail to the design. Run a line of frit down the top and bottom fins. Use a narrow paint brush to make a scalloped design in the frit. Remove any excess frit with the brush.
Tropical Fish Tray by Lisa Vogt
Sift medium blue opal powder frit on the fish head, tail and small fin. Clean up the edges and make them crisp with a small brush. Sprinkle medium white frit on the head and tail. Place a small scrap of black on the head to make the mouth. Arrange a premade dot on the head for the eye.
Making eyes. I have a little container full of fused glass dots that I pull from when making projects that have eyes. To make dots I cut ¼ inch squares out of white glass. I cut 1/8 inch squares out of a black backed dichroic glass. The small dichroic square is stacked on the white glass and glass is fired to a full fuse temperature using the guide below. The small pieces plump and ball-up during firing. They make super cute, expressive eyes for a variety of projects.
Cut the border base layer out of clear glass. Cut a second layer out of white glass. Stack the white strips on the clear strips.
Cut ¼ inch wide strips of glass out of clear glass and colors that complement the fish colors. Using mosaic nippers trim the strips into small squares.
Arrange the glass border and the assembled fish on a primed, or a fiber paper lined kiln shelf. Place the cut squares and scrap on the kiln shelf around the border and fish. For nice, individual round shapes make sure there’s adequate space between each of the little pieces. (If they, touch you’ll end up with ovals and wiggly worms.) Note: It’s not necessary to grind the scrap before firing. The organic shapes they create add softness to the design.
Tropical Fish Tray by Lisa Vogt
Yes, laying out all of these tiny pieces is tedious. Tough it out. The dots and dashes made from the scrap are worth the extra effort. I promise you’ll love the variety of shapes and increased selection you have to choose from when you assemble the tray background. Plus, you can use the extras dots and dashes in future projects.
Tropical Fish Tray by Lisa Vogt
Fire the glass to a full fuse temperature using the guide below.
Place the fused fish inside the fused border on a primed or fiber paper lined kiln shelf. Fill in the open background space with the dots and dashes made from scrap. Make sure the pieces are in contact with each other, the border and the fish to connect the entire project together.
Tropical Fish Tray by Lisa Vogt
Dots and Dashes bowl bonus project. This adorable bowl was inspired by the fun, organic shapes made by fusing the randomly shaped scraps left over from cutting the fish. I had so much fun laying out the fish background, I couldn’t stop myself from doing more. This little gem is so simple and super fun. Just draw a 6 inch circle on shelf paper. Arrange leftover dots and dashes inside the pencil line. Fill the space. Make sure the pieces of glass are in contact with each other to connect the whole circle.
Tropical Fish Tray by Lisa Vogt
Fire the assembled pieces to a tack fuse temperature using the guide below.
Carefully place the tacked fish tray on a ceramic mold. Place the small bowl on a ceramic mold. Slump the tray and bowl using the project specific guide below. This gentle slumping guide works well for pieces that are delicate and have open spaces in the background. The temperature is lower than usual, and the hold is longer. This conservative slump guide ensures these glass projects retain their size and shape, without stretching, during heating and slumping.
This project evolved as I went along. I started with the free-form fish design. Then I liked the idea of incorporating an open background that mimicked bubbles. I was concerned, strength wise that the tacked dots might not be strong enough to support the weight of the fish. That’s when the border idea came to me. The border would give the project a nice visual frame and add support to the overall tray.
In the end, I’m happy with the unexpected mix of techniques and the way the tray came out. Design wise, I like how the clean straight lines of the white border contrast the bright, fluid background. And I’m pleased with the way the stylized fish brings uplifting, aquatic summertime activities and memories to my mind. I hope you have as much fun as I did making a Tropical Fish Tray of your own.
Tropical Fish Tray as seen in Glass Patterns Quarterly Summer 2019
Fusing Guide
Segment 1: Ramp 300 F/hr to 1300 and hold 30 min.
Segment 2: Ramp 500 F/hr to 1465 and hold 10 min.
Segment 3: Ramp 9999(AFAP*) to 960 and hold 40 min.
Segment 4: Cool to room temperature.
*As fast as possible
Tack Fuse Guide
Segment 1: Ramp 300 F/hr to 1365 and hold 10 min.
Segment 2: Ramp 9999(AFAP*) to 960 and hold 40 min.
Segment 3: Cool to room temperature.
*As fast as possible
Gentle Slumping Guide
Segment 1: Ramp 300 F/hr to 1200 and hold 20 min.
Segment 2: Ramp 9999(AFAP*) to 960 and hold 40 min.
Segment 3: Cool to room temperature.
*As fast as possible.
NOTE: Kilns fire differently. Test fire these guides in your kiln and then make adjustments as needed.
In this comprehensive Webinar, I’ll guide you step by step through the time-tested processes I use to make large-scale, functional vessels.
You’ll learn safe handling techniques for cutting oversized circles, how to fuse and slump thick pieces to retain consistent bowl height, plus trade-secrets for worry free drilling.
In addition to fabrication know-how, you’ll receive a complete supply list, specifics on kiln requirements, source information for the slumping mold and drill kit, as well as helpful installation tips.
With all the professional tricks revealed, you’ll gain the confidence and knowledge needed to make your own dazzling beauty.
In addition, I’ll demonstrates how to make a glittering dichroic sink. I’ll show you how to make a cast glass sink from nipped glass pieces, dichroic bits and frit. Plus, you’ll be guided through the various cold-working steps I use to finish the cast glass sink edge to a glamorous, professional, quality polish.
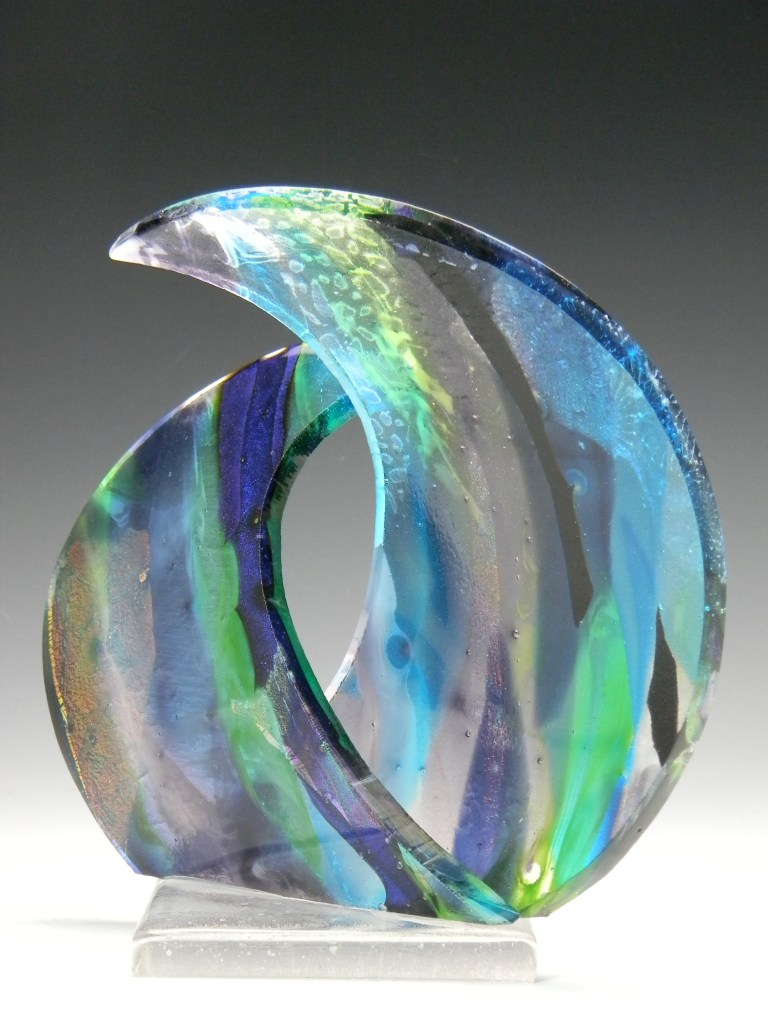
Currents as seen In Sculptural Fused Glass with Lisa Vogt
This is the turning-point workshop you’ve been waiting for.
It’s hard to describe what it’s like when I’m feeling the creative flow. Time flies. Hours pass in what I thought were minutes. My naturally distracted mind is focused on what my hands are doing, and nothing else. I get lost in my own world. When I return to reality, I feel rejuvenated and spiritually uplifted. That’s why I like sharing my studio space with others. I try to give them that experience and hope they feel the same inspiration and fulfillment I do. -Lisa
This class is for you! Any skill level can attend. Beginner, intermediate and advanced students alike will learn how to advance their glass fusing skills and expand their artistic style.
Join me and I’ll show you all the pro tips and tricks I use to make stunning 3-dimnesional art. You’ll learn how to combine advanced techniques in new ways to create extraordinary sculptural pieces of art.
You’ll leave class with several completed glass sculptures, my custom firing guides and a deeper understanding of sculptural fused glass fabrication. You’ll have the knowledge, confidence, and inspiration you’ve been craving to take your artwork to the next level.
Materials are included, that’s a $150.00 value!
May 2021 Student Testimonials
“My favorite thing about the class was the creative freedom – we were not required to make the same thing the same way. I was surprised by the variety and number items we made and the flexibility we had to go our own way with our projects. The glass studio was very comfortable and very clean with plenty of room.” -Ron
“My favorite thing about the class was the projects were tailored to our interests with user specific glass choices and design options. This makes the best type of learning environment. I loved the continued technical information that was used in daily discussions. Loved the amount of space we had for working and the use of top-quality tools and the hands-on assistance Lisa gave each one of us. You will hear and see me again. Thank you for your time and talent.” – Donna
“My favorite thing about the class was the creativity – putting things together in new ways – using different materials – and how welcome I felt. I was surprised how much we were able to get done and by Lisa’s ability to coach those of us on different levels. My least favorite part was that the class ended. The classroom setup was excellent – well organized. I really feel like Lisa gave me the tools to advance to a new level. It was worth the cost of the workshop, airfare, B&B, animal care and house sitting! Can’t wait to put what I leaned into practice and return for another workshop.” -Sue
Read more student testimonials on my website.
Artwear by Lisa J Vogt
Artwear Designed for Artists by Artists Tell them how you really feel with bold T-shirts, Eco-conscience tote bags and sassy mugs.
Watch it NOW! Start fusing today!
Glass Fusing Videos by Lisa Vogt
Downloadable instructional videos for every skill level.
eBooks by Lisa Vogt
Check out my eBooks for elegant patterns and detailed fusing instructions.
I can’t thank you enough for your constant support and encouragement!
Artists truly are the most generous, giving, positive people I know. I’ve been a working professional for more than 30 years. I’m continually impressed by the increasing level of thoughtfulness and support I receive from fellow artists around the world. It’s your kind encouragement that inspires me to try advanced techniques, design new projects and share my processes with you. When you take the time to write me short notes about your trials and successes it may feel like a small gesture to you. But it’s a huge thrill for me to be included in your artistic journey and share in your creative excitement.
I’m so excited to tell you, I reached 5000+ subscribers on my YouTube channel! In some markets that’s a tiny number. For me it’s a huge number! I’m more interested in quality than quantity. For me 5000+ subscribers is confirmation that our art glass community is alive, strong, growing, and hungry for more fun and informative material.
I’m also excited to tell you, I reached 2000+ subscribers on my Art Adventure Blog! Again, for some that’s a tiny number. For me it’s huge! Over 2000 glass artists enjoy getting weekly encouragement in the form of how-to articles, tips for better work practices and regular updates on what’s happening here in my glass studio. I appreciate all the demands on your attention and on your time. In my blog I strive to bring your relevant information you can use to improve all aspects of your artistic life.
Visits to my website have also increased. In response to your growing interest I’m implementing new tools to make your experience on my website more rewarding. In the top banner under the Studio News tab you’ll quickly find current information on my upcoming events, webinars, and classes. Under the new Testimonials tab you can read my students’ class experiences. On the right-hand sidebar, I’ve added a Top Blog Posts category so you can easily access the most popular posts. The list is updated every two days so check back often. If you prefer to read my blogs in chronological order, there’s a Recent Blog Posts list of quick links located on the bottom of the right-hand sidebar. I recently added two new photo categories to the sidebar, Fused Glass Art Gallery and Leaded Glass Doors. I hope you enjoy browsing the vibrant images and comparing the many different design styles.
More exciting news! I’ve added several new, super fun Artwear designs to my website store. I designed these lively T-shirts, Eco-tote bags and sassy mugs with YOU in mind. There’s no shortage of color or pizazz here. There’s something for everyone. As artists, we love to inspire creativity and spread happiness. With these energetic Artwear designs you can spark imaginations outside your studio. Consider yourself an art ambassador. Show and share your passion for glass with the world every day.
My thank-you gift to you for your love and support is this Sparkling Heart tutorial. Happy fusing!
Sparkling Heart how-to.
Stainless steel cookie cutters are great molds for fun, fast and easy fused glass projects. You can find a variety of styles and shapes online. I’m particularly fond of the heart shape because of it’s universal message of hope and love. With a little prep you can make one of these dazzling hearts in just a few minutes.
An important thing to remember when using a stainless steel mold is that during the cooling phase of the firing the stainless steel mold will cool faster than the glass. In effect, the stainless steel with contract sooner than the hot glass. Without proper padding the stainless steel mold will break the fused glass as it cools. It’s easy to prevent breakage by lining the inside of the metal mold with 1/8 in thick fiber paper. This barrier is a cushion that protects the fused glass. I then add a second liner of Thinfire fiber paper. The Thinfire reduces glass dragging and the formation of pointy edges. With the Thinfire you’ll have a beautiful, smooth, round finished looking heart edge.
Let’s get started.
Sparkling Heart by Lisa Vogt
The prep.
Line the inside of the stainless steel cookie cutter with the 1/8 in. thick fiber paper. Cut the paper to size with a scissor. Butt the ends together. Don’t overlap the 1/8 in. thick fiber paper or it will alter the shape of the heart. Line the inside of the 1/8 in thick fiber paper with a strip of Thinfire fiber paper. Cut the Thinfire to size with a scissor. It’s okay to overlap the Thinfire a little. Hold the two fiber paper liners in place with a few strips of clear tape.
Place the lined stainless steel mold on a small, kiln washed, or fiber paper covered kiln shelf.
Sparkling Heart by Lisa Vogt
Fill the mold.
Place a layer of clear mosaic size glass pieces in the bottom of the mold. It’s not necessary to completely cover the bottom with the clear glass. As the glass melts it will fill any holes. Sprinkle a few pinches of Mardi gras confetti glass on top of the clear glass. Add another layer of clear glass. Drop a few pieces of gold pink confetti glass into the mold. Add a few pieces of dichroic glass. Repeat the clear layer, pink layer and dichroic layers until the mold is full to the top of the fiber paper liner.
Full fuse the glass using the guide below. Let the glass and mold cool to room temperature before removing them from the kiln. Grind the tip of the heart flat. Glue the heart on to a glass base with E6000. Enjoy!
Sparkling Heart by Lisa Vogt
Quick tips for bright shinny hearts.
Use more clear glass than color glass to ensure you have adequate transparency that enhances the beauty and thickness of the heart.
Use dichroic glass sparingly. A little sparkle goes a long way. Too much dichroic glass makes the heart dark and muddy.
Don’t overfill the mold past the fiber paper liner or the glass may stick to the stainless steel mold and cause breakage.
Use dark glass colors in moderation or the light won’t shine through the heart.
Allow the fused glass heart to cool completely before removing it from the kiln. The kiln controller may register a low temperature, but the internal temperature of the thick glass is hotter. Be patient. I promise, it’s worth the wait.
Sparkling Heart by Lisa Vogt
Full Fuse Firing Guide for projects smaller than 12 in.
Segment Rate Temp Hold
Segment 1 300 1300 45
Segment 2 500 1465 10
Segment 3 500 960 40
Let cool to room temperature.
*Kilns fire differently. Test fire this guide and make adjustments if needed.
**Temperatures are in degrees.
I used Oceanside Compatible COE 96 glass to make this heart.
Sparkling Heart on Mirror Base
Sparkling Heart by Lisa Vogt
Materials List
Heart shaped stainless steel cookie cutter 3 ½ in. x 3 ¾ in. x 1 1/8 in.
1/8 in. thick fiber paper strip cut 1 in. wide by 12 in. long
Thinfire fiber paper strip cut 1 in. wide by 12 in. long
Mardi Gras Mini Confetti Glass bits
Gold Pink Confetti Glass bits
Clear glass scrap cut into mosaic size pieces
Dichroic glass on clear scrap
Clear tape
Scissors
2 in. x 2 in. base glass either clear or mirror backed.
E6000 adhesive
In this comprehensive Webinar, I’ll guide you step by step through the time-tested processes I use to make large-scale, functional vessels.
You’ll learn safe handling techniques for cutting oversized circles, how to fuse and slump thick pieces to retain consistent bowl height, plus trade-secrets for worry free drilling.
In addition to fabrication know-how, you’ll receive a complete supply list, specifics on kiln requirements, source information for the slumping mold and drill kit, as well as helpful installation tips.
With all the professional tricks revealed, you’ll gain the confidence and knowledge needed to make your own dazzling beauty.
In addition, I’ll demonstrates how to make a glittering dichroic sink. I’ll show you how to make a cast glass sink from nipped glass pieces, dichroic bits and frit. Plus, you’ll be guided through the various cold-working steps I use to finish the cast glass sink edge to a glamorous, professional, quality polish.
Currents as seen In Sculptural Fused Glass with Lisa Vogt
This is the turning-point workshop you’ve been waiting for.
It’s hard to describe what it’s like when I’m feeling the creative flow. Time flies. Hours pass in what I thought were minutes. My naturally distracted mind is focused on what my hands are doing, and nothing else. I get lost in my own world. When I return to reality, I feel rejuvenated and spiritually uplifted. That’s why I like sharing my studio space with others. I try to give them that experience and hope they feel the same inspiration and fulfillment I do. -Lisa
This class is for you! Any skill level can attend. Beginner, intermediate and advanced students alike will learn how to advance their glass fusing skills and expand their artistic style.
Join me and I’ll show you all the pro tips and tricks I use to make stunning 3-dimnesional art. You’ll learn how to combine advanced techniques in new ways to create extraordinary sculptural pieces of art.
You’ll leave class with several completed glass sculptures, my custom firing guides and a deeper understanding of sculptural fused glass fabrication. You’ll have the knowledge, confidence, and inspiration you’ve been craving to take your artwork to the next level.
Materials are included, that’s a $150.00 value! May 2021 Student Testimonials
“My favorite thing about the class was the creative freedom – we were not required to make the same thing the same way. I was surprised by the variety and number items we made and the flexibility we had to go our own way with our projects. The glass studio was very comfortable and very clean with plenty of room.” -Ron
“My favorite thing about the class was the projects were tailored to our interests with user specific glass choices and design options. This makes the best type of learning environment. I loved the continued technical information that was used in daily discussions. Loved the amount of space we had for working and the use of top-quality tools and the hands-on assistance Lisa gave each one of us. You will hear and see me again. Thank you for your time and talent.” – Donna
“My favorite thing about the class was the creativity – putting things together in new ways – using different materials – and how welcome I felt. I was surprised how much we were able to get done and by Lisa’s ability to coach those of us on different levels. My least favorite part was that the class ended. The classroom setup was excellent – well organized. I really feel like Lisa gave me the tools to advance to a new level. It was worth the cost of the workshop, airfare, B&B, animal care and house sitting! Can’t wait to put what I leaned into practice and return for another workshop.” -Sue
Read more student testimonials on my website.
Video Sale
Artwear Designed for Artists by Artists Tell them how you really feel with bold T-shirts, Eco-conscience tote bags and sassy mugs.
Artwear Eco-Totes by Lisa Vogt
Watch it NOW! Start fusing today!
Glass Fusing Videos by Lisa Vogt
Downloadable instructional videos for every skill level.
Inspiration is here. ebooks for all skill levels.
Check out my eBooks for elegant patterns and detailed fusing instructions.
In this comprehensive Webinar, I’ll guide you step by step through the time-tested processes I use to make large-scale, functional vessels.
You’ll learn safe handling techniques for cutting oversized circles, how to fuse and slump thick pieces to retain consistent bowl height, plus trade-secrets for worry free drilling.
In addition to fabrication know-how, you’ll receive a complete supply list, specifics on kiln requirements, source information for the slumping mold and drill kit, as well as helpful installation tips.
With all the professional tricks revealed, you’ll gain the confidence and knowledge needed to make your own dazzling beauty.
In addition, I’ll demonstrates how to make a glittering dichroic sink. I’ll show you how to make a cast glass sink from nipped glass pieces, dichroic bits and frit. Plus, you’ll be guided through the various cold-working steps I use to finish the cast glass sink edge to a glamorous, professional, quality polish.
Currents as seen In Sculptural Fused Glass with Lisa Vogt
Sculptural Fused Glass, 4-Day, Hands-on Workshop October 19-22, 2021
This is the turning-point workshop you’ve been waiting for. It’s hard to describe what it’s like when I’m feeling the creative flow. Time flies. Hours pass in what I thought were minutes. My naturally distracted mind is focused on what my hands are doing, and nothing else. I get lost in my own world. When I return to reality, I feel rejuvenated and spiritually uplifted. That’s why I like sharing my studio space with others. I try to give them that experience and hope they feel the same inspiration and fulfillment I do. -Lisa
This class is for you! Any skill level can attend. Beginner, intermediate and advanced students alike will learn how to advance their glass fusing skills and expand their artistic style.
Join me and I’ll show you all the pro tips and tricks I use to make stunning 3-dimnesional art. You’ll learn how to combine advanced techniques in new ways to create extraordinary sculptural pieces of art.
You’ll leave class with several completed glass sculptures, my custom firing guides and a deeper understanding of sculptural fused glass fabrication. You’ll have the knowledge, confidence, and inspiration you’ve been craving to take your artwork to the next level.
Materials are included, that’s a $150.00 value!
May 2021 Student Testimonials
“My favorite thing about the class was the creative freedom – we were not required to make the same thing the same way. I was surprised by the variety and number items we made and the flexibility we had to go our own way with our projects. The glass studio was very comfortable and very clean with plenty of room.” -Ron
“My favorite thing about the class was the projects were tailored to our interests with user specific glass choices and design options. This makes the best type of learning environment. I loved the continued technical information that was used in daily discussions. Loved the amount of space we had for working and the use of top-quality tools and the hands-on assistance Lisa gave each one of us. You will hear and see me again. Thank you for your time and talent.” – Donna
“My favorite thing about the class was the creativity – putting things together in new ways – using different materials – and how welcome I felt. I was surprised how much we were able to get done and by Lisa’s ability to coach those of us on different levels. My least favorite part was that the class ended. The classroom setup was excellent – well organized. I really feel like Lisa gave me the tools to advance to a new level. It was worth the cost of the workshop, airfare, B&B, animal care and house sitting! Can’t wait to put what I leaned into practice and return for another workshop.” -Sue
Have you noticed that some art glass pieces don’t hold your interest? While others draw you in like a fish on a line and hold you captive. You study the shape, admire the colors, marvel over the pattern. You try to figure out how the pieces were made.
I’ve studied the same pieces with the same level of curiosity. It made me wonder, what’s the secret to making exceptional art? After careful consideration, I’ve concluded there are just 2 features that make artwork memorable.
The two features are unique form and dramatic imagery. Let’s break these down and identify how they impact the visual attraction of artwork.
Unique Form
Shape has a powerful effect on the level of attraction. Giving your work an unusual shape will immediately draw the attention of viewers. The simplest and easiest way to make stand out art is to give geometric shapes an organic profile. Notch the straight edges of a square. And a graceful curve to the straight edges of a rectangle. Scallop a circle to give a floral look.
Then take it a step farther and slump the art over a mold to give it a sculptural flare. Combine different molds together to make shapes all your own. Drape fiber paper or fiber blanket over the molds for more interesting results.
Another easy way to give glass artwork a sculptural presence is to create your own fused glass stand. Artsy bases add lift, they allow light to pass under and around the glass, and they increase the perceived value of the finished artwork.
Dramatic Imagery
Paintings are usually made on plain rectangular canvases. But what makes famous pieces of art memorable? It’s the picture of course. It doesn’t matter if the subject is abstract or pictorial. It’s the way the artist renders the image that makes it exciting and unforgettable.
Next time you design a piece of fused glass consider including a recognizable image in your work. This anchors the viewers eye and engages them longer than a piece without a focal point. Also, rendering the image in unexpected colors or with pattern, increases the visual desirability.
The secret to fine art revealed.
For exceptional art that will have people talking, combine both unique form and dramatic imagery. This more involved approach is what sets real artists apart from hobbyists and it’s what elevates their work from craft to fine art.
Are you ready to take your artwork to the next level?
Learn how easily you can immediately apply these concepts to your work to take it to the next level. Join me for my upcoming, Fusing for the Adventurous Webinar, Tuesday June 29, 2021 for more in-depth fusing tips and tricks that’ll get your work noticed.
Get ready to push boundaries, challenge old ideas and enjoy the thrill of limitless possibilities. Join glass artist Lisa Vogt in this comprehensive hands-on webinar, and learn how easy it is to use tried and true methods in unlikely, innovative ways!
With 4 major projects and a few bonus pieces, you’ll get more than you bargained for!
Radiant Ribbons combines dichroic glass and patterned rods into three wavy sections that create beautiful wall art, a dazzling focal point for any living space.
Leaves involves cutting and layering glass surrounded by bits of dichro. Depth is produced by having all of the component parts “floating” in frit and edged in solid color to construct a scene reminiscent of a shadow box.
Fun with Rods gives you the opportunity to fabricate a light and airy project with curvy slumped colored rods.
Plus, you’ll have the fun of kiln casting with murrini creating Hearts on Fire.
All of these techniques will produce dramatic results in your art, and take your work to an exciting new level of sophistication. Beginning and advanced fusers alike will find inspiration, motivation, and a renewed sense of artistic freedom by combining the ideas presented in this webinar.
And of course you’ll receive my custom firing guides.
Armed with your newfound skills, you’ll be incorporating these techniques into your work in no time, while expanding your creative visions. You’ll gain the cool confidence to turn your glass visions into reality. Don’t miss this great opportunity to take your work and inspiration to greater heights!
Wesley Chapel, Florida, 4-Day, Hands-on, Class size is limited.
This is the turning-point workshop you’ve been waiting for.
It’s hard to describe what it’s like when I’m feeling the creative flow. Time flies. Hours pass in what I thought were minutes. My naturally distracted mind is focused on what my hands are doing, and nothing else. I get lost in my own world. When I return to reality, I feel rejuvenated and spiritually uplifted. That’s why I like sharing my studio space with others. I try to give them that experience and hope they feel the same inspiration and fulfillment I do. -Lisa
This class is for you! Any skill level can attend. Beginner, intermediate and advanced students alike will learn how to advance their glass fusing skills and expand their artistic style.
Join me and I’ll show you all the pro tips and tricks I use to make stunning 3-dimnesional art. You’ll learn how to combine advanced techniques in new ways to create extraordinary sculptural pieces of art.
You’ll leave class with several completed glass sculptures, my custom firing guides and a deeper understanding of sculptural fused glass fabrication. You’ll have the knowledge, confidence, and inspiration you’ve been craving to take your artwork to the next level.
Materials are included, that’s a $150.00 value!
May 2021 Student Testimonials
“My favorite thing about the class was the creative freedom – we were not required to make the same thing the same way. I was surprised by the variety and number items we made and the flexibility we had to go our own way with our projects. The glass studio was very comfortable and very clean with plenty of room.” -Ron
“My favorite thing about the class was the projects were tailored to our interests with user specific glass choices and design options. This makes the best type of learning environment. I loved the continued technical information that was used in daily discussions. Loved the amount of space we had for working and the use of top-quality tools and the hands-on assistance Lisa gave each one of us. You will hear and see me again. Thank you for your time and talent.” – Donna
“My favorite thing about the class was the creativity – putting things together in new ways – using different materials – and how welcome I felt. I was surprised how much we were able to get done and by Lisa’s ability to coach those of us on different levels. My least favorite part was that the class ended. The classroom setup was excellent – well organized. I really feel like Lisa gave me the tools to advance to a new level. It was worth the cost of the workshop, airfare, B&B, animal care and house sitting! Can’t wait to put what I leaned into practice and return for another workshop.” -Sue
Read more student testimonials on my website.
NEW Artwear Designs by Lisa Designed for Artists by Artists. Tell them how you really feel with bold T-shirts, Eco-conscience tote bags and sassy mugs.
Watch it NOW! Start fusing today!
Downloadable instructional videos for every skill level.
Videos for every skill level and interest.
Check out my eBooks for elegant patterns and detailed fusing instructions.