

Posted on — Leave a comment

It’s No Mystery – 10 Ways to Create Great Artwork

Great fused glass artwork is no accident. It’s meticulously planned, skillfully executed and artistically presented in an aesthetically pleasing way. Exceptional artwork is the product of several elements. When combined they engage and captivate the viewer. 

These key characteristics are present in all great art. Keep them in mind when designing new work. Apply them when possible, and you’ll immediately see a powerful rise in the quality of your finished art.

How to create great artwork.

Mediterranean Shift from Advanced Glass Fusing Video

1 Design a pleasing composition.  

Composition refers to the placement of design elements within the artwork. By placing elements in a triangular fashion, you create wanted tension viewers find irresistible. Unless the pattern is a geometric grid, I avoid having elements in a straight line vertically or horizontally, it lacks fire.    

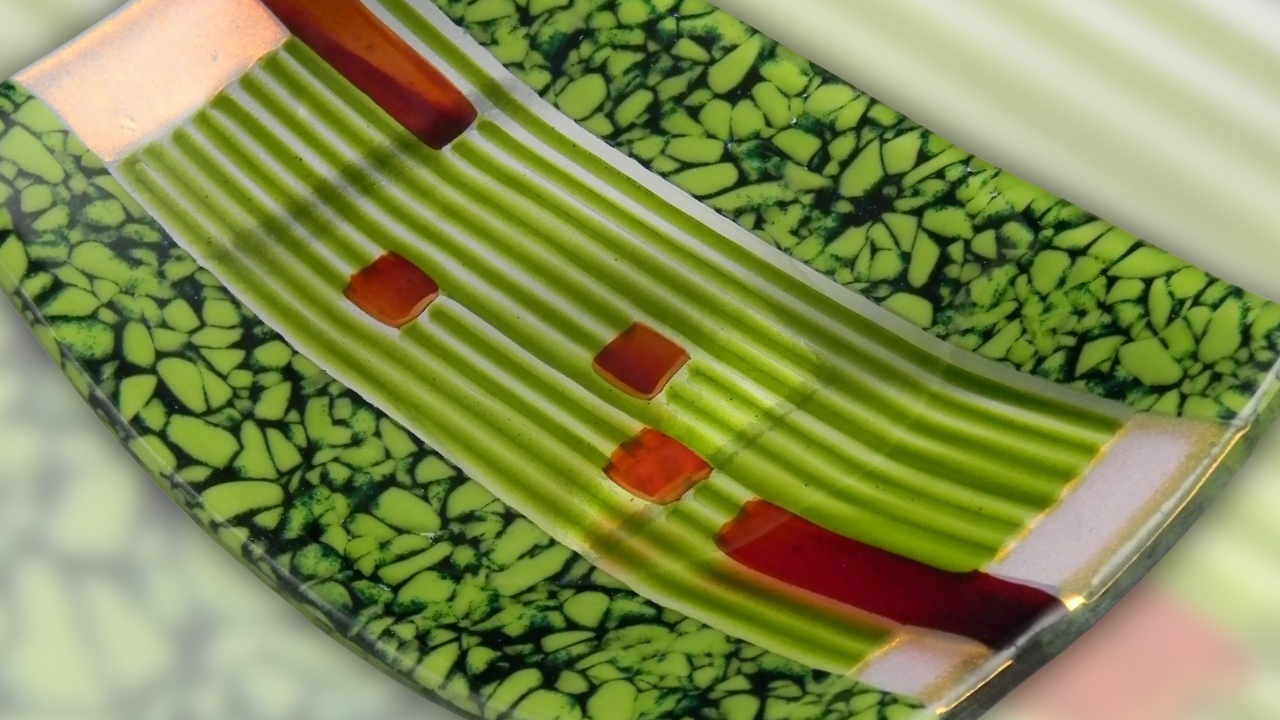
Dicro Dishes from Advanced Glass Fusing Video

2 Select an appealing color palate. 

Pick a color palate and stick with it. This shows artistic planning which increases the continuity of the work. When deciding on colors, I pick a setting and then choose colors appropriate for that landscape. For example, if I select a New England Shore as my setting I’d use soft celery green, medium blue, light amber and earth tones. Whereas, a Caribbean beach setting would call for vivid Amazon green, aqua blue, bright yellow and white.

Pisces from Advanced Glass Fusing Video

3 Engage the viewer with a focal point.

I believe all designs even geometric patterns can benefit from having a focal point. A focal point is something of interest that stands out from the background. It anchors the viewers eye and engages their imagination longer than the same piece with no focal point. It can be as simple as a high contrast color, a unique shape or an unexpected line.

Carnival Flow from Advanced Glass Fusing Video

4 Add visual or physical texture.

Texture invites discovery. It adds a third dimension that amps up the visual intricacy and perceived value of artwork. Include texture and your work will jump off the page.  

Moss from Advanced Glass Fusing Video

5 Add pattern.

Pattern is a terrific way to dress up basic shapes to make them more unique and appealing. It’s also a great tool you can use to reinforce a specific design theme. For example, a basket weave pattern would be a nice addition to a design featuring bamboo shoots. Likewise, brightly colored straight lines could be used to represent a towel that enhances a tropical beach scene. 

Arctic Freeze for Advanced Glass Fusing Video

6 Combine advanced techniques.

Combining techniques is fun and adds dramatic interest to fused glass art. Even simple applications deliver high impact results. Create several component pieces. Try arranging them in several different ways until one makes each piece more interesting than it was alone.   

Tropical Tango by Lisa Vogt

7 Design dramatic imagery.

Including dramatic imagery is a great way to make art memorable. Give the viewer a solid pictorial subject to digest. It’ll grab hold of them and not let go. Viewers easily connect with recognizable focal points.

Grape Tulip from Creative Shapes Video

8 Give your work an exciting shape.

Break free from the confines of expected shapes. Color outside the lines. Offer us a fresh new profile. It’s easy to notch or bump out a square. Add a curved edge to a rectangle. Scallop the outside of a circle. Your work will approve.

Envy from Advanced Glass Fusing Video

9 Give your work sculptural form.

This is the single most effective way to elevate your work from craft to fine art. Combine different slumping molds to create a unique freestanding shape all your own. Or build a mold by draping fiber blanket over kiln posts. The possibilities are endless.

Reflection form Advanced Glass Fusing Video

10 Follow through with a unique display.

You have a vision for your art. Carry that enthusiasm to the end. Consider making a display stand that contributes to the artwork’s energy and makes it impossible to forget. 

In the end, we want to connect with the viewer through our art. We want to stir emotion, deliver a message or fascinate their sense of wonder. Whatever your intention, a well-planned project made with insightful design theories will make your artwork great! 

For more in depth instruction check out my Advance Glass Fusing Video.

Not all projects are pictured here.

Follow my blog for weekly inspiration sent to your inbox! 

Happy Fusing!

Lisa & Niki


Premium Video Courses by Lisa


Posted on — Leave a comment

Create Visual Excitement with Pattern & Shape

Pattern and shape are two of the simplest elements that can easily be manipulated to dramatically increase the appeal of fused glass art. By adding unique patterns and building new shapes you can draw the viewer in and lock their attention tight. In the end, isn’t that our goal, to inspire people with our art?

You’ve enjoyed success making the usual plates, bowls and vases following practices and guidelines laid out by the experts. But the element of surprise and the thrill of the unexpected success has gone missing. If you find yourself blindly staring at the glass wishing for inspiration, then it’s time to break the rules. Make art that excites you again.

Before you run wildly through your glass studio, be sure to set this excursion up for success. Start by studying finished art that you find attractive. Define what it is about the piece that appeals to you. Is it the shape, the colors, the pattern, or the design? Take that element and put it aside temporarily. Maybe loosely sketch it out on paper for quick reference later. Do this for three individual pieces of art.

Brilliant Bubbles by Lisa Vogt as seen in Fusing For the Adventurous Webinar

Small details can have a huge impact on the visual appearance of your art.

Don’t underestimate the power of minor changes to customary pieces. When trying to navigate a new territory, you’ll have the greatest success if you take what has worked for you in the past and then expand on it to create something all new and unexpected.

Here’s how to get started.

Anchor the viewer’s eye with an interesting pattern. Unexpected bubbles are usually considered undesirable. But when made into a uniform design, bubbles can add a whole new dimension to the glass art. Designing with bubbles is a terrific way to add decoration and a little sparkle. Light dances inside the tiny dome shapes which increases the appearance of depth and the overall intricacy of the finished piece.

Here, I’m using stringers to establish the pattern. They’re placed even distances apart in two directions on a base glass and then capped with clear glass. The cool thing about this technique is the assembly method dictates the placement, size and shape of the bubbles. If the openings between the stringers are square, then the bubbles are round. Rectangular openings result in oval shaped bubbles. While triangular openings give you tear drop shaped bubbles.

Making small, 2” x 2” test pieces will give you an opportunity to try unusual color combinations. It also builds confidence because you know what to expect when you go bigger. The best part of this technique is the possibilities for imaginative designs are endless. Try it. You’ll be blown away!

Black Tie by Lisa Vogt as seen in Sculptural Fused Glass Video

Sculpture romances the viewer.

Sculpture romances the viewer. It pulls them in like a magnet. Give your art unique shape and the viewer will be hooked. With so many fusing materials at your disposal, it’s never been easier to get creative with your art’s profile. The easiest way to get funky shapes is to drape fiber material over an existing slumping mold. Give the fiber paper exaggerated contours by tucking kiln posts or fiber board between the mold and the fiber.

You can also achieve new shapes by combining different ceramic or stainless-steel slumping molds together. Some of my most exciting pieces have been made this way.

If you’re shy to jump in, build a sample out of clear glass. Make the sample the same shape, size, and thickness as the intended project. Clear is the best choice because it’s the least expensive glass. And you can see through it to see where the glass rests on the mold assembly. Then you’re able to adjust the final piece as needed. Plus, there’s no waste. The clear sample can be smashed and used for casting filler. It’s a win, win.    

The wonderful thing about this technique is every piece of glass slumped has a one-of-a-kind flare. They’re making your own personal original. Now that’s exciting! 

Get crazy and combine both techniques and you have a showstopper. The biggest drawback to this in-depth approach is the amount of time necessary to plan an exceptional project. True, not all projects warrant this much effort. But if you work in stages on a few, you’ll find the outcome is extremely rewarding.

Design developer.

Take it a step further and create your own design. Go back to the three pieces of art you studied earlier. Take the three elements that attracted you and combine them with a unique pattern and a sculptural shape. Now you’re on the threshold of greatness!

These are just a few examples of breaking the rules. If you’re ready to rush into your studio, excited about the possibilities, don’t stop here. These techniques have great potential for expansion in so many directions. Take them and run and set your imagination free.   

For more advanced instruction check out my Sculptural Fused Glass Video.

Check out my new video: How to Create & Retain Texture.

Follow my blog for weekly inspiration sent to your inbox! 

Happy Fusing!

Lisa & Niki


Premium Video Courses by Lisa


Posted on — Leave a comment

Defy Conventional Thinking and Make Something Amazing in 5 Easy Steps.

Knowledge – Confidence – Inspiration

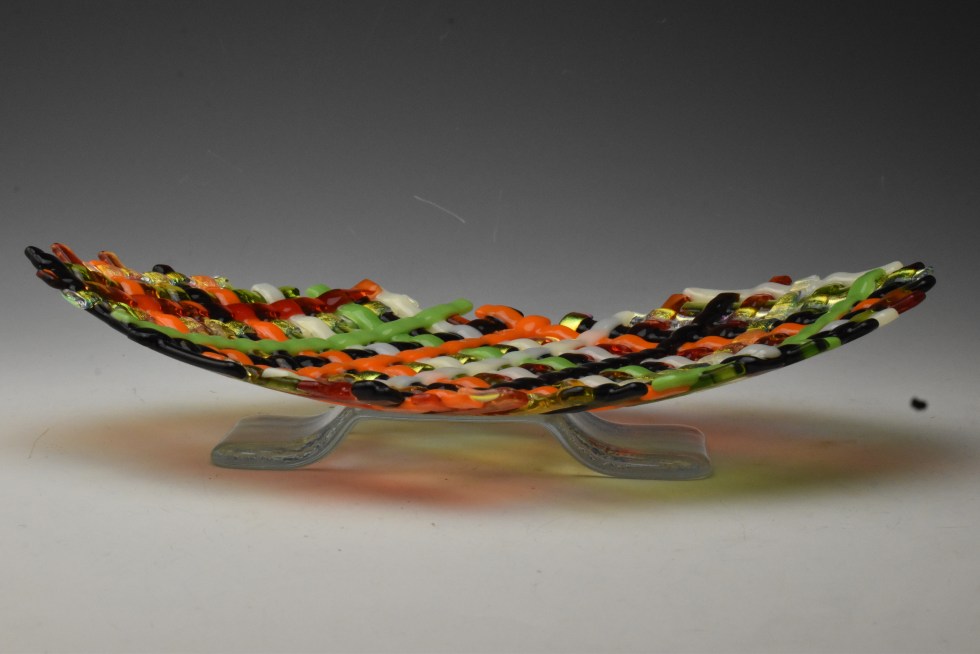
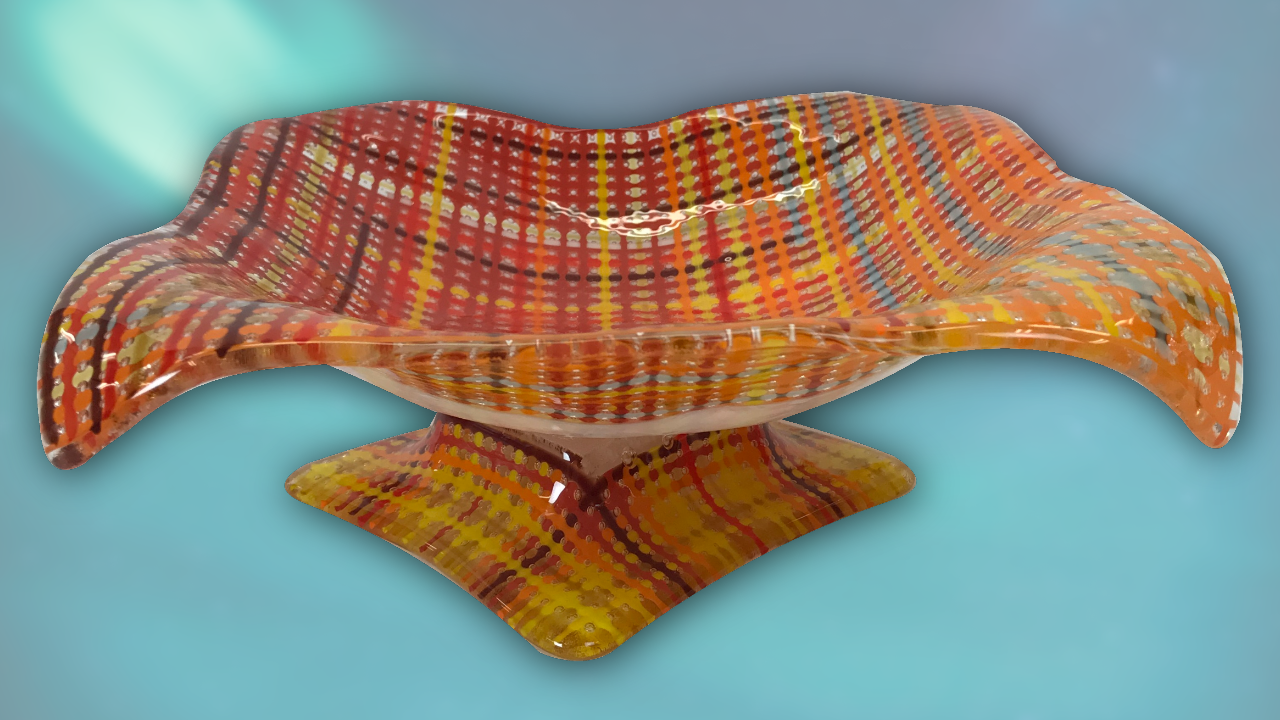
Weave Bowl Project Video

Start with a unique oval shape.

The oval is an elegant shape traditionally associated with luxury and wealth. It’s a shape that’s easy to make in glass. I honestly don’t know why, we as high thinking creatives, don’t take advantage of its particular attraction more often.

I’ve used the weave technique many times to make square bowls and rectangular lanterns. The openness of the construction, and the playful overlap of colors combined with the fascinating texture all contribute to the charm of the finished piece. I thought to myself, how can I take this winning combination to the next level? The answer of course was to use this simple, but effective technique to make an unexpected oval shape.

Fabricate your piece with a distinctive glass weave technique.

My weave technique is super easy, surprisingly fun to use and produces very effective results. It’s simple. Pick a color palate and cut a series of ¼ inch wide strips of glass. Cut more strips than you think you’ll need to make your project. This way you have extra and won’t have to interrupt the assembly step to cut more glass. I used both transparent and opal glass, plus dichroic glass on clear.

Draw the oval shape on a primed or fiber paper covered kiln shelf. The weave is made with 4 layers of glass strips. I laid my strips out diagonally for added interest. Layout layer 1 leaving plenty of room between the strips for layer 3. Cut the pieces to size. I intentionally cut my pieces to create a fringe edge. Layout the strips for layer 2 in the opposite direction. Leave room between the strips for layer 4. Repeat with layer 3 and 4. Carefully load the kiln shelf and assembled project in the kiln. Fire to a Tack Fuse temperature.

Use the heat of your kiln to create your own custom results.

This project is tack fused together. At this temperature the resulting project retains the woven texture.  The pieces are heated to the point where they stick together, and the bond is strong enough for the project to support its own weight. The attractive textural quality is both visual and physical which makes the piece more engaging. Consider using the tack fuse temperature to add details and accent pieces to fused glass art to introduce another facet of interest. Here, on this weave bowl the tack fuse option really increases the level of sophistication of this piece of art.   

Slump your glass to give it a graceful profile.

Slumping adds elegance and a pleasing three dimensional quality to your fused glass art. The physical texture created by the weave is also greatly enhanced by the gradual curvature of the bowl shape.

Finish with a custom base worthy of your exceptional artwork.

Making a custom stand or base is equally as exciting as making a striking piece of art. It’s rewarding to follow thorough to the natural completion of a project with a display that shows it off. A base gives the art lift which immediately increases the perceived value and visual intricacy of the finished piece. It also allows light to go through the glass and cast reflections that enlarge the overall impression of the art.  Keep the stand or base simple. It should add to the art, not overpower it, or distract from it’s beauty.   

Keep the dream alive!

One of the many things I love about working with glass is the endless design and fabrication options that are available to us. There are an abundance of exciting new approaches waiting for you to discover when you venture down the less traveled path of experimentation. Let’s go!

Happy Fusing!

Lisa & Niki

Follow my blog for weekly inspiration sent to your inbox! 

Tell them how you really feel with sassy mugs, Eco-totes and bold T-shirts!

Downloadable instructional videos for every skill level.

Posted on — Leave a comment

There is NO Always or Never in Glass Fusing

Glass fusers constantly ask me for advice. They want me to give them concrete answers to their questions. They seek the comfort and consistency of solid solutions to all their inquiries.

It’s just not that simple.  

There are SO many variables. How big is the project? What size kiln is being used, what type of construction are you using? Just to name a few. It’s impossible to give an accurate assessment of your process without knowing every detail of your specific construction and equipment.  

I’ve been fusing glass for 38 years. I consider myself experienced, not an expert. I don’t have all the answers. However, I use my years of experimentation to come up with practical solutions for building new projects and to solve unexpected problems.

Be smart. If someone offers, you must do it this way advice, they don’t know what they’re talking about. There’s no way they can take all the unknowns into account and give you valuable guidance.   

It’s your job as the artist to do your own research.

When you have a question about how to proceed on a project, it’s your job as the artist to do your own research. Find the best practices for you, in your workspace with your materials and then make educated decisions on how to complete the artwork to the best of your ability.     

A comment on one of my YouTube videos prompted this blog topic. The fuser asked if a slumping mold should be placed on kiln posts, instead of the kiln floor, to allow air circulation. This is a perfect example of, it depends. How big is the kiln? Where are the heating coils in the kiln? How tall is the mold?  Optimally, it’s best if the fused glass sitting on the mold is as far away from the heating coils as possible to prevent breakage. If you’re using a deep kiln and there’s room, sure put the mold on posts. If the kiln is shallow, I’d place the mold directly on the kiln floor.

It’s okay to take advice and only use the part that works for you. In fact, take lots of advice and make up your own personalized best practices. After all, you’re an artist, apply your creative spirit to the entire process technical facets included.  

You got this!

Follow my blog for weekly inspiration sent to your inbox! 

Happy Fusing!

Lisa & Niki

Knowledge – Confidence - Inspiration

Premium Video Courses by Lisa

Posted on — Leave a comment

How to Make Fused Glass Pendant Lights

Design, fabrication and installation by Jake and Jessie Battin

I love to watch the dreamy reaction of visitors the first time they visit our home. They look around at my colorful décor like kids in a candy store. Then, wide eyed they say something akin to, “This is definitely an artist’s house.” They tell me they’re amazed how I’ve incorporated artistic details and functional art into our everyday lifestyle. In my opinion, that’s the best way to appreciate art, with daily enjoyment of its beauty and grace.  

You can imagine how excited I was when my daughter and son-in-law mentioned they wanted to integrate glass art into their decorating plans for their new house. Of course, they have their own style and color scheme which made the process of designing and fabricating their pendant lights even more fun and fulfilling.

Jessie and Jake have played in my glass studio in the past. But this time was different. They didn’t want us to make the lights for them. Instead, they wanted to design and fabricate the lights themselves. I guided them along the way. We consulted about the size and shape the lights would take. But when it came time to cut the glass and assemble the pieces, they did the actual construction. It was fun to watch them process the cause and affect of the colors they chose and the design style they envisioned. It’s the same thrill I get when I teach hands-on classes and webinars. It’s as inspiring for me as it is for the students. I feed off their positive energy and enthusiasm for creating something that’s both beautiful and functional.

It was especially rewarding to watch them overcome obstacles as they occurred, and then not give up, but stick with the project to the end. Draping glass over a stainless-steel mold often delivers varying results. The size and shape of the glass, as well as the kiln you use all play a role in the outcome. Therefore, I suggested we make a test piece to ensure their glass colors and the finished shape matched their expectations. The test piece proved to be extremely valuable. We all concluded it was ugly, but still very valuable, as learning curves tend to be.

The test piece was even a bit of a surprise for me. I’ve been working with glass for more than 30 years. It continues to amaze me when the finished piece doesn’t resemble my anticipated vision. Then again, that’s one of the traits I love about this medium, it’s versatility, flexibility and promise of something new.

The test piece taught us so much. Jessie and Jake decided to eliminate some glass colors that the felt turned muddy after firing. We adjusted the tack fire schedule to give the accent pieces a softer look. And we also adjusted the drape temperature to ensure the pendant lights would have an organic, free form shape.

Yes, it took more time, and we used more material making the test piece. But it has a special significance because it paved the way to the pendant lights that turned out as planned.

The take-away here is simple. No matter how experienced you are, there is more to learn. Don’t hesitate to make test pieces and take notes. Take before and after pictures. The information you gain is valuable. It will give you the confidence to try new ideas and make more advanced pieces of art, and that is priceless.      

Happy Fusing!

Lisa & Niki

Follow my blog for weekly inspiration sent to your inbox! 

Tell them how you really feel with sassy mugs, Eco-totes and bold T-shirts!

Downloadable instructional videos for every skill level.