

Pattern and shape are two of the simplest elements that can easily be manipulated to dramatically increase the appeal of fused glass art. By adding unique patterns and building new shapes you can draw the viewer in and lock their attention tight. In the end, isn’t that our goal, to inspire people with our art?
You’ve enjoyed success making the usual plates, bowls and vases following practices and guidelines laid out by the experts. But the element of surprise and the thrill of the unexpected success has gone missing. If you find yourself blindly staring at the glass wishing for inspiration, then it’s time to break the rules. Make art that excites you again.
Before you run wildly through your glass studio, be sure to set this excursion up for success. Start by studying finished art that you find attractive. Define what it is about the piece that appeals to you. Is it the shape, the colors, the pattern, or the design? Take that element and put it aside temporarily. Maybe loosely sketch it out on paper for quick reference later. Do this for three individual pieces of art.

Small details can have a huge impact on the visual appearance of your art.
Don’t underestimate the power of minor changes to customary pieces. When trying to navigate a new territory, you’ll have the greatest success if you take what has worked for you in the past and then expand on it to create something all new and unexpected.
Here’s how to get started.
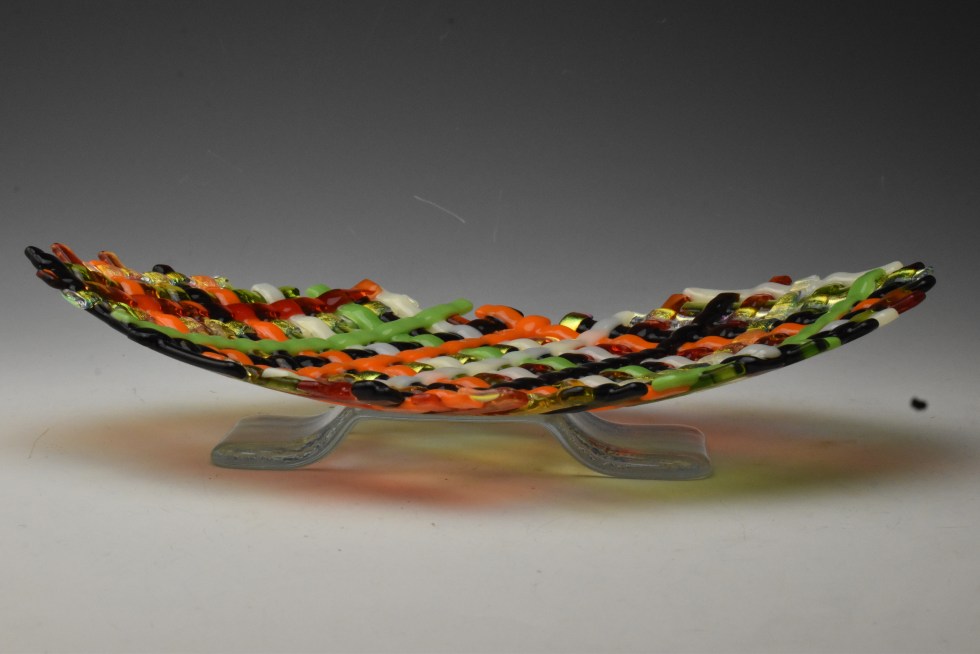
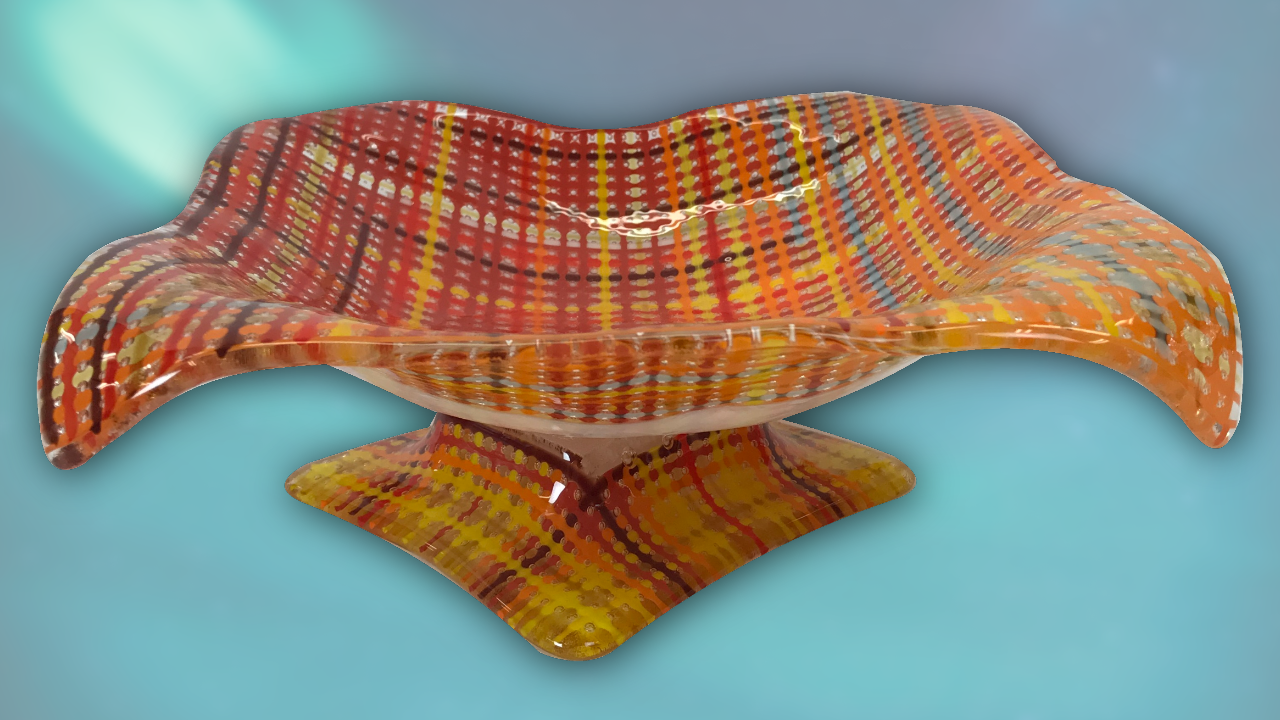
Anchor the viewer’s eye with an interesting pattern. Unexpected bubbles are usually considered undesirable. But when made into a uniform design, bubbles can add a whole new dimension to the glass art. Designing with bubbles is a terrific way to add decoration and a little sparkle. Light dances inside the tiny dome shapes which increases the appearance of depth and the overall intricacy of the finished piece.
Here, I’m using stringers to establish the pattern. They’re placed even distances apart in two directions on a base glass and then capped with clear glass. The cool thing about this technique is the assembly method dictates the placement, size and shape of the bubbles. If the openings between the stringers are square, then the bubbles are round. Rectangular openings result in oval shaped bubbles. While triangular openings give you tear drop shaped bubbles.
Making small, 2” x 2” test pieces will give you an opportunity to try unusual color combinations. It also builds confidence because you know what to expect when you go bigger. The best part of this technique is the possibilities for imaginative designs are endless. Try it. You’ll be blown away!

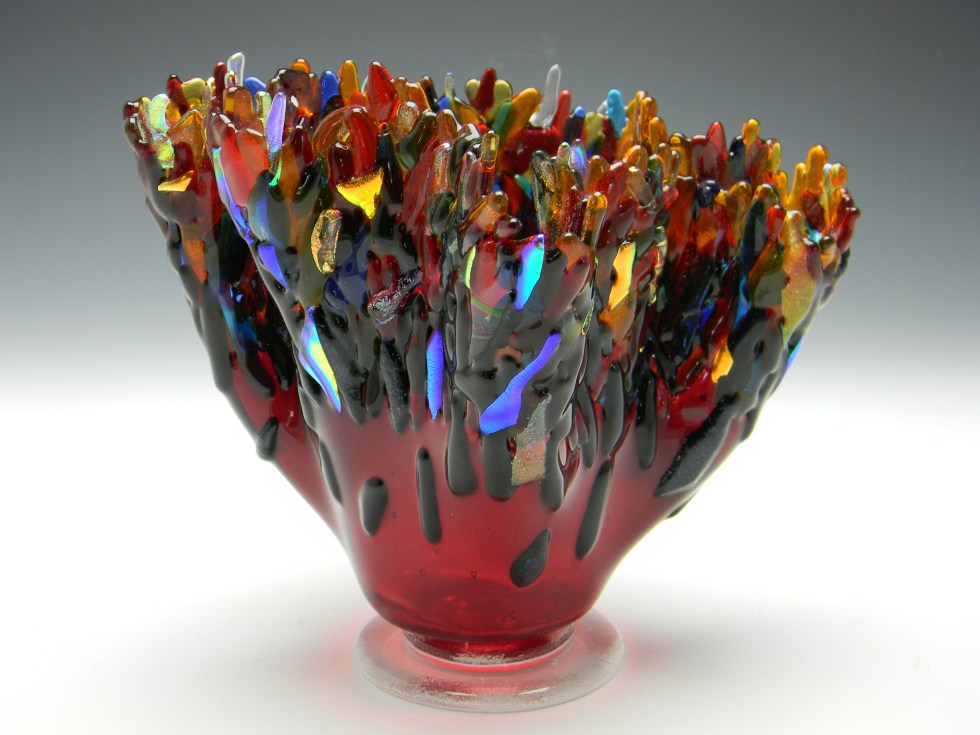
Sculpture romances the viewer.
Sculpture romances the viewer. It pulls them in like a magnet. Give your art unique shape and the viewer will be hooked. With so many fusing materials at your disposal, it’s never been easier to get creative with your art’s profile. The easiest way to get funky shapes is to drape fiber material over an existing slumping mold. Give the fiber paper exaggerated contours by tucking kiln posts or fiber board between the mold and the fiber.
You can also achieve new shapes by combining different ceramic or stainless-steel slumping molds together. Some of my most exciting pieces have been made this way.
If you’re shy to jump in, build a sample out of clear glass. Make the sample the same shape, size, and thickness as the intended project. Clear is the best choice because it’s the least expensive glass. And you can see through it to see where the glass rests on the mold assembly. Then you’re able to adjust the final piece as needed. Plus, there’s no waste. The clear sample can be smashed and used for casting filler. It’s a win, win.
The wonderful thing about this technique is every piece of glass slumped has a one-of-a-kind flare. They’re making your own personal original. Now that’s exciting!
Get crazy and combine both techniques and you have a showstopper. The biggest drawback to this in-depth approach is the amount of time necessary to plan an exceptional project. True, not all projects warrant this much effort. But if you work in stages on a few, you’ll find the outcome is extremely rewarding.
Design developer.
Take it a step further and create your own design. Go back to the three pieces of art you studied earlier. Take the three elements that attracted you and combine them with a unique pattern and a sculptural shape. Now you’re on the threshold of greatness!
These are just a few examples of breaking the rules. If you’re ready to rush into your studio, excited about the possibilities, don’t stop here. These techniques have great potential for expansion in so many directions. Take them and run and set your imagination free.

For more advanced instruction check out my Sculptural Fused Glass Video.

Check out my new video: How to Create & Retain Texture.
Follow my blog for weekly inspiration sent to your inbox!
Happy Fusing!
Lisa & Niki
Premium Video Courses by Lisa