Posted on Leave a comment

12 Tips to Improve the Quality of Fused Glass Art

1. Clean your glass before cutting it.

Itโ€™s much easier to clean a single square piece of glass than it is to clean a bunch of small pieces. Youโ€™ll also do a better job because you can see any dust or hint of glue from the manufacturerโ€™s stickers more easily on the larger surface area. I avoid using chemicals or cleaners that might introduce potential contaminants to my fused glass. I use plain water and clean cotton towels to clean and dry my glass.

2. Improve your accuracy by using the right tool for the job.

When cutting glass strips or circles for my projects I use certain tools to help improve the fit of my pieces. The benefits of using strip cutters and circle cutters are they reduce waste and scrap glass. Plus, their ease of use makes the project assembly faster, easier and more precise.

Wet saws are great for cutting intricate shapes that otherwise would have to be done in multiple pieces. This time and material saving approach also enables you to make more elaborate designs.

Mosaic nippers are handy to quickly and efficiently produce irregular pieces for playful patterns and whimsical designs.

3. Pick a color pallet and stick with it.

Being selective about the colors you use increases the strength of your artwork. It shows the purposeful design direction of the artist and at the same time establishes the mood of the piece. Use multiple shades of the same colors to create depth and greater visual interest. Select both transparent and opal glass in your color pallet to increase design depth.

4. Use high contrast colors.

Be bold! Combine striking colors to bring your design to life. Using high contrast colors enhances the linear details of your design. Itโ€™s an easy way to increase the impact and overall attractiveness of your glass art.  

5. Include a focal point.

A focal point gets the viewerโ€™s attention, engages them and makes your art memorable. Focal points can be literal like a leaf, a bird or a wave. Easily recognizable images are relatable and endearing. While abstract designs also benefit from having a focal point too. You can include an unexpected shape or pop of color to make your art more engaging.     

6. Do your best work.

Be meticulous with every step. The time and effort you put into each step makes the next step faster, easier and more professional looking. Make sure your glass pieces fit well. If you ask yourself, is this good enough? It likely isnโ€™t your best work. Redo that piece, re-cut the glass, do whatever it takes to make sure youโ€™ll be proud of your finished work.     

7. Build your projects with two full layers of glass to make them visually attractive and structurally durable.

This method of assembly produces beautiful smooth edge quality and a uniform thickness throughout your finished piece of art. These characteristics elevate your work to a professional quality thatโ€™s consistent with high end, gallery worthy artwork.   

8. Make your pieces a little smaller than your slumping molds to ensure they slump evenly.

If you intend to slump your fused glass project measure the slumping mold you plan to use in advance of laying out your design. Make your project ยฝ-inch smaller than the mold to accommodate any potential growth and to ensure the glass slumps evenly. When the glass is larger than the mold, or if it sits on the top edge of the mold, the glass may slip to one side and slump unevenly.  

9. Fire projects with other pieces with similar construction style.

Itโ€™s good practice to fire projects built with two layers together and fire projects made with one layer separately to ensure you have the best results possible for each type of construction. Large projects can be fired alongside small projects. Fire the kiln at a rate thatโ€™s appropriate for the largest project in the kiln.

10. If in doubt fire slower.

If youโ€™re concerned about your firing rate itโ€™s okay to fire your kiln more slowly and add more time to the annealing segment hold. This small change often improves your consistency and results in greater success.  

11. Re-prime your kiln shelf and slumping molds before use if they show signs of wear.

I clean and prime my kilns shelves every time in use them. Then Iโ€™m sure my glass wonโ€™t stick to the shelf. I prime my slumping molds when they show signs of wear. Wear includes: the primer looks thin or itโ€™s pealing. This routine maintenance enables me to fuse and slump with confidence.

12. Allow your kiln and the glass inside to cool to room temperature before opening the kiln.

Be patient! I know itโ€™s hard to resist opening the kiln. If Iโ€™m tempted to open my kiln, I ask myself whatโ€™s more important to me in six weeks from now? Is it that I get to see the project a few hours early OR that the project is cooled properly and stable? This idea gives me strength to be patient.  

Bonus 13. Take before and after pictures and take notes.

Pictures and notes help you gain confidence in your kiln work. They document your progress and are glowing examples of your artistic growth. Theyโ€™re also useful for trouble shooting unexpected results. Pictures and notes help you reproduce your successes and learn from your failures.   
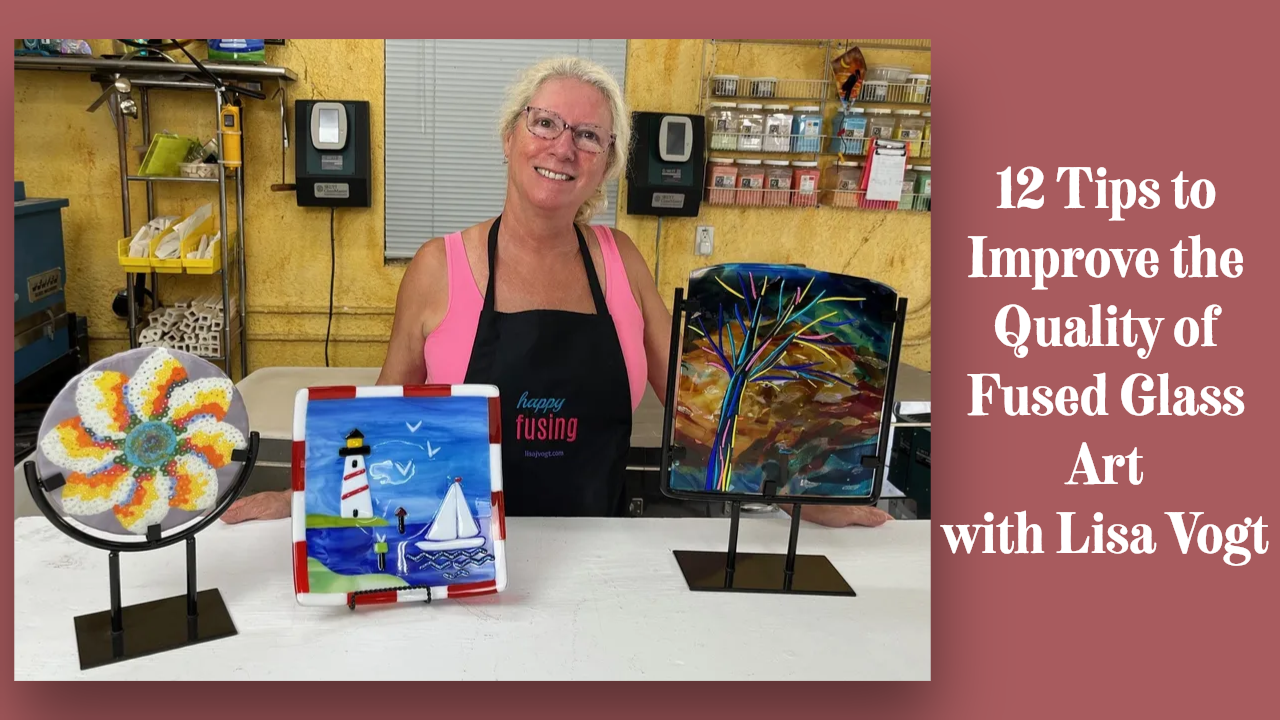
Check out my video.

Follow my blog for weekly inspiration sent to your inbox! 

Happy Fusing!

Lisa

Upcoming Class!

Advanced Glass Fusing Class

4-Day, Hands-on Class, Wesley Chapel, FL

February 4-7, 2025

YOU can make gallery quality fused glass art! Youโ€™ll love the personalized instruction in this exciting advanced technique, artistic awakening and skill building workshop. This is the turning point experience youโ€™ve been waiting for.

Someday is here! What are you waiting for? Youโ€™re in your prime. Youโ€™re at the peak of your interest in glass fusing. Take the next step and raise your artwork to an exciting new level of sophistication.

Join me for this intense workshop held in my private studio.
Wesley Chapel, Florida, 4-Day, Hands-on, Class size is limited.

In this class, you will push the boundaries art glass imposes. Students will explore innovative approaches to design and combine multiple advanced techniques to construct original art that reflects their own personal style. Youโ€™ll enjoy: the one-on-one instruction, making multifaceted projects, the well-equipped classroom, and the intimate class size.

Youโ€™ll love the concentrated, in-depth study and creative momentum youโ€™ll gain while actively producing, nonstop for four consecutive days. Youโ€™ll leave class with a working knowledge of kiln operation, custom project specific firing guides, and the inspiration youโ€™ve been craving to go bigger and do more elaborate works of fused glass art!

Join me and take your glass fusing to the next level!


Premium Video Courses by Lisa


Posted on Leave a comment

Welcome Summer! Bring the Beach Home

Sunny, relaxing summer days are here! Itโ€™s time for delicious family picnics, breezy boat rides and warm sand between your toes. This series of bowls combines simple lines, a pleasing color palate and a whimsical touch of nature with classic seaside style. Beach Day Bowls are perfect accents for creating beach style comfort in your home all summer long.

When I come across a pattern that really brings me joy, I like to recreate that design in different sizes. Then I display the companion pieces around my kitchen and family room to set a seasonal mood throughout our living space. If youโ€™re attracted to this pattern, consider making it in a few different sizes to get the most out of the simple, yet stylized ocean theme.

Beach Day Bowls as seen in Artful Home Video

How-to make the bowls.

These bowls are made with two layers of glass. The base layer is clear glass. The second, design layer is made up of cut glass pieces. Start by cutting the clear base.

Enlarge the pattern to your desired dimension. Use the pattern as a guide to cut the design layer. Cut the paper up. Glue it to the glass with a glue stick. Cut the glass as close to the paper pattern as possible to minimize the amount of grinding needed.

There are some deep, inside cuts in my pattern. Cut the glass as accurately as you can. Grind the pieces to improve the edge quality and overall fit of the design. Assemble the cut glass pieces on top of the clear base. Use fuserโ€™s glue to affix the design layer to the base layer. Itโ€™s okay if your pieces donโ€™t fit perfectly. Let the glue dry. This will prevent the glass from moving when you apply the frit.

Wave Pattern from Artful Home Video

Use a spoon and pour fine blue frit on top of the glass. Use a paint brush to move the frit into the gaps between the pieces to fill in the space and add a linear detail. Remove any excess frit by sweeping it off the glass. Be meticulous about your cleanup. Attention to detail make a difference. Doing your best work on every step will dramatically improve the quality of your finished artwork.

Use a razor knife and cut a bird footprint stencil out of stiff paper. I use file folders or poster board. You can also use plastic stencils available at your local craft store in the scrap booking department. Place the stencil on the area of the design that represents the sand. Sift powder brown frit over the stencil. Carefully lift the stencil off the glass.

Fire the assembled project to a full fuse temperature using the firing guide below.

Place the fused glass on a slumping mold and fire it to a slumping temperature using the guide below.

My bowls measure 10 inch x 10 inch, 6 inch x 6 inch and 4 inch by 4 inch. You can make these bowls in different sizes and get the same beautiful results.

Artful Home has 16 projects you’ll love!

Check out my video.

Follow my blog for weekly inspiration sent to your inbox! 

Happy Fusing!

Lisa

Upcoming Class!

Advanced Glass Fusing Class

4-Day, Hands-on Class, Wesley Chapel, FL

February 4-7, 2025

YOU can make gallery quality fused glass art! Youโ€™ll love the personalized instruction in this exciting advanced technique, artistic awakening and skill building workshop. This is the turning point experience youโ€™ve been waiting for.

Someday is here! What are you waiting for? Youโ€™re in your prime. Youโ€™re at the peak of your interest in glass fusing. Take the next step and raise your artwork to an exciting new level of sophistication.

Join me for this intense workshop held in my private studio.
Wesley Chapel, Florida, 4-Day, Hands-on, Class size is limited.

In this class, you will push the boundaries art glass imposes. Students will explore innovative approaches to design and combine multiple advanced techniques to construct original art that reflects their own personal style. Youโ€™ll enjoy: the one-on-one instruction, making multifaceted projects, the well-equipped classroom, and the intimate class size.

Youโ€™ll love the concentrated, in-depth study and creative momentum youโ€™ll gain while actively producing, nonstop for four consecutive days. Youโ€™ll leave class with a working knowledge of kiln operation, custom project specific firing guides, and the inspiration youโ€™ve been craving to go bigger and do more elaborate works of fused glass art!

Join me and take your glass fusing to the next level!


Premium Video Courses by Lisa


Posted on Leave a comment

Designing for the Most Difficult Client-YOURSELF!

Artists have vision. We can see our finished pieces of art in our minds eye long before we pull a sheet of glass off the shelf. We take for granted that everyone has the natural ability to come up with a new idea, plan how to make it, and then have the resulting artwork actually look like we envisioned. In my 38 yearsโ€™ experience making commission glass work for clients, I can tell you, not everyone has that gift.

So, we draw sketches and show sample glass colors to our clients. We give them insight into our process and hopefully a better understanding of what their finished artwork will look like. This planning makes it easy to work with customers.

The trouble starts when we want to make something for ourselves because frankly, we can make absolutely anything we can think of. Our only limitation is our imagination. And of course, artists have oodles of imagination. The sky is the limit. Often this realization causes anxiety over what to make. And that stress stalls or stops your productivity. It wastes your time and taps your energy.

So, how do you narrow down what to make when you have limitless possibilities? Itโ€™s easy. Treat yourself like a client.

Clients come to me all the time with a project in mind. They have a specific installation site in their home, or place of business, where they want to showcase custom art glass. The site usually dictates the shape of the art Iโ€™ll make. Whether itโ€™s a wall mount, a ceiling mount, going to be hung in a window or a freestanding piece, that site narrows down the design shape. And so, the first step in making art for yourself is to pick the installation site. Then decide what art shape is best suited for that specific location.

Designing for clients.

When working with a client, my next step is to look around the installation site. I identify the patterns, shapes and colors that are dominant and repeated in the customerโ€™s decor. I look at the patterns and colors on fabrics on their sofa and drapes. I look at the metal color and style of their light fixtures, door knobs and faucets. I look for shapes and colors that are repeated, over and over in their existing artwork.

For example, in one clientโ€™s home circles and ribbon shapes were prevalent. Their furniture had silver, half-circle shaped drawer pulls. The marble on the floor in their foyer had purple ribbon like veins running through the tiles. For that client, I designed 3 wall mounted pieces of art with circle shapes. All of the circles had purple veins running through them. The glass rounds were then mounted to custom metal frames with a silver finish that matched their other existing fixtures.

Designing for yourself.

When designing for yourself, look around your site and take note of the shapes you gravitate toward. Look at the patterns you like and the colors you keep selecting. Then design something totally new that includes all those elements.

The last and easiest step I follow when working with clients is to eliminate subjects they donโ€™t like. It can be difficult to narrow down exactly what they do like or want in their design. But clients usually have very strong opinions about designs they will not consider. For example, some customerโ€™s love traditional designs with classic, graceful curving shapes and jewel tone colors. While others favor contemporary themes with strong lines and bold primary colors. Some like literal, pictorial designs like flowers, birds, and landscapes. While others prefer abstract, organic designs with a focus on unique shapes, engaging textures and a play on color mixes.

When working for yourself, mentally list the designs you do not like or want. Surprisingly, this simple exercise makes what you do like crystal clear.

When it came time to make a fused glass backsplash for my kitchen I hit a wall. There were so many options and directions the design could take that I didnโ€™t do anything for the longest time. I considered designing a pattern with geometric designs or maybe floras or possibly flowing ribbons. I wanted my backsplash to be unique. But at the same time, it needed to be consistent with the style of my home and not so stylized that non-artists would think it was over-the-top.

My indecision was frustrating.

But I know thereโ€™s a fine line between classy and gaudy. Just because we can make something extravagant, doesnโ€™t always mean we should. For artists, sometimes restraint is the biggest challenge we have to face. 

The backsplash was a big job that would take months to complete. It would be time consuming to cut the glass, fuse the glass and then install the fused glass tiles. I wanted to get started so I could make tiles between commission pieces. But having limitless possibilities stalled me into inactivity and therefore nothing happened.  

Finally, I decided to draw a small scale version of the design I was considering on the computer. Then I could get a feel for the overall impression and decide if I liked how it looked before cutting any glass. And if I didnโ€™t like my design, I could easily plug a new design into the template. I could also test different color combinations until I had one that felt right. The template also made it easy to calculate the amount of material Iโ€™d need to cover the wall of my kitchen. Though it seemed a step backwards, the drawing simplified the huge project and made it easier to plan how to proceed. It also gave me confidence that my time and effort would result in an installation Iโ€™d love. 

Making seasonal decorations is different.

Making table top art for your home is one thing. That type of seasonal decoration can be made spontaneously with reckless abandonment. Part of the fun is experimenting with new materials, exploring new assembly techniques and having surprising results. But when it comes to large scale, permanent installations donโ€™t rush. Let the process evolve naturally. Give yourself time to consider different directions before committing to the first design that comes to mind. Then lay the design out on paper to ensure it is indeed what you want.

My Kitchen Backsplash

After a great deal of consideration, I decided to use ceramic tile in combination with fused glass accents to create an original design for my kitchen backsplash. I feel the mixed media is engaging and reflects my unique personal style. Now that the installation is done, Iโ€™m glad I waited until the right blend of materials presented itself. Iโ€™m thrilled with the bold design and the way the materials enhance the environment without overshadowing other design features.   

Lesson learned.

Treat yourself with the same courtesy you treat your clients. Then youโ€™re certain to have an installation youโ€™ll be proud of and admire for years to come. 

Good luck getting started and finishing your own big projects. Keep making beautiful glass work. Youโ€™re doing a great job!

Happy Fusing!

Lisa

Check out my video.

Follow my blog for weekly inspiration sent to your inbox! 

Happy Fusing!

Lisa

Upcoming Class!

Advanced Glass Fusing Class

4-Day, Hands-on Class, Wesley Chapel, FL

February 4-7, 2025

YOU can make gallery quality fused glass art! Youโ€™ll love the personalized instruction in this exciting advanced technique, artistic awakening and skill building workshop. This is the turning point experience youโ€™ve been waiting for.

Someday is here! What are you waiting for? Youโ€™re in your prime. Youโ€™re at the peak of your interest in glass fusing. Take the next step and raise your artwork to an exciting new level of sophistication.

Join me for this intense workshop held in my private studio.
Wesley Chapel, Florida, 4-Day, Hands-on, Class size is limited.

In this class, you will push the boundaries art glass imposes. Students will explore innovative approaches to design and combine multiple advanced techniques to construct original art that reflects their own personal style. Youโ€™ll enjoy: the one-on-one instruction, making multifaceted projects, the well-equipped classroom, and the intimate class size.

Youโ€™ll love the concentrated, in-depth study and creative momentum youโ€™ll gain while actively producing, nonstop for four consecutive days. Youโ€™ll leave class with a working knowledge of kiln operation, custom project specific firing guides, and the inspiration youโ€™ve been craving to go bigger and do more elaborate works of fused glass art!

Join me and take your glass fusing to the next level!


Premium Video Courses by Lisa


Posted on 2 Comments

Unlock the Mystery of Pattern Bars

Go sculptural!

Are you an adventurous artist ready to push boundaries and apply advanced techniques? If you answered yes, this project is for you.

The beauty of pattern bars is that they can be made in a wide variety of sizes, styles, shapes, and designs. The idea is to create a decorative element that can be cut into pieces and reassembled to make a unique and ornate focal point within your art.

Another nice thing about pattern bars is you can work small and still make a huge impact. So, donโ€™t hesitate to try making your own decorative elements even if youโ€™re new to fusing or have a small kiln. All you need is a little imagination and heat resistant material to contain your glass during fusing.

When I came up with the idea to fuse an inverted stack of glass, I wasnโ€™t exactly sure what the resulting slab would look like. I didnโ€™t let the unknown stop me from trying. I knew the hot glass would fill the open space in the container I created, but I wasnโ€™t sure if the design would retain its linear appearance or if it the colors would blend together. As luck would have it, I got a little bit of both.    

Reflection by Lisa Vogt as seen in Advanced Glass Fusing Video.

To make Reflection I stacked 16 pieces of glass. I started by cutting 3-inch-wide strips from select opal glass colors and transparent glass colors. I also cut 3-inch-wide strips of clear glass. The 3-inch-wide strips were then cut to different lengths. No two pieces were the same length. I alternated color glass and clear glass. The glass was then stacked on the kiln shelf with the shortest piece down on the kiln first. Each consecutive layer was longer than the previous layer.  It was like building an upside-down pyramid.

Tip:

When selecting my glass, I like to use a combination of opal glass, clear glass and transparent color glass. Each type of glass brings its own special facet to the pattern. Opal colors show off the intricacy of the pattern well. Clear glass boosts the visual depth of the design, while transparent colors give the finished artwork a regal jewel tone quality. 

When I fused the stacked glass, I contained it with ยฝ inch thick strips of fiber board. I use fiber board kiln shelves in my kilns. When they get damaged, I cut them down and use them as dams to contain thick glass. My firing guide is below.

Why do you have to dam the glass you ask?

When stacked glass is fired to the full fuse temperature of 1465 degrees Fahrenheit it will spread out to a ยผ inch thickness. To construct thicker projects, we contain the glass with props, in this case fiber board. The fiber board is then held in place with kiln posts. 

Tip:

When I mention materials that I use in my kilns, like fiber board, Iโ€™m always referring to materials that I purchase from my art glass supplier specifically for kiln use. Donโ€™t substitute other building materials from your local hardware store to save money. It will cost you in inconsistent results and possible kiln damage. 

After the glass is fired the pattern bar was cut into long ยผ inch thick slabs with a wet saw. I use an inexpensive tile saw fitted with a wet blade for my heavy-duty straight cutting. Itโ€™s fast, easy to use and gives me consistent results. The cut strips are then reassembled so the pattern on the left side is a mirror image of the pattern on the right side of the art. The glass is then fired a second time to a full fuse temperature. This bonds the pieces together and makes all of the surfaces shinny. I made two matching components. One will be used as the vertical portion of the sculpture.

I slumped the second component over a small block of ยฝ inch thick fiber board using the firing guide below. This element was then used as a decorative base to display the vertical portion. I glued the two pieces together with E6000 adhesive. I prop the project up and let the glue dry overnight.

Reflection as seen in Advanced Glass Fusing Video

Tip:

Go the extra mile and build your own custom display bases for your special pieces of fused glass. It adds a personal touch that elevates the overall quality and sophistication of your artwork.      

Pattern bars are a great way to add energy to your fused glass artwork. Theyโ€™re easy to make and the number of design variations and color combinations is staggering. Plus, you can work small and still have dynamic results. Next time your kiln is sitting idle try an experimental pattern bar or two. Just watch out. The low-pressure assembly combined with the thrill of unpredictable results is an addictive potion. Iโ€™m sure your new work will be both mysterious and magical.

Wherever you are in your artistic journey youโ€™re doing great!

Weโ€™re all learning new things every day. Keep going. Enjoy the journey.

Thank you for all the positive feedback about my blog and videos. Itโ€™s your kind and encouraging support that inspires me to keep sharing.

Happy Fusing!

Lisa

Reflection is one of 10 advanced designs in my, Advanced Glass Fusing video available as a download on my website.

Check out my video.

Follow my blog for weekly inspiration sent to your inbox! 

Happy Fusing!

Lisa

Upcoming Class!

Advanced Glass Fusing Class

4-Day, Hands-on Class, Wesley Chapel, FL

February 4-7, 2025

YOU can make gallery quality fused glass art! Youโ€™ll love the personalized instruction in this exciting advanced technique, artistic awakening and skill building workshop. This is the turning point experience youโ€™ve been waiting for.

Someday is here! What are you waiting for? Youโ€™re in your prime. Youโ€™re at the peak of your interest in glass fusing. Take the next step and raise your artwork to an exciting new level of sophistication.

Join me for this intense workshop held in my private studio.
Wesley Chapel, Florida, 4-Day, Hands-on, Class size is limited.

In this class, you will push the boundaries art glass imposes. Students will explore innovative approaches to design and combine multiple advanced techniques to construct original art that reflects their own personal style. Youโ€™ll enjoy: the one-on-one instruction, making multifaceted projects, the well-equipped classroom, and the intimate class size.

Youโ€™ll love the concentrated, in-depth study and creative momentum youโ€™ll gain while actively producing, nonstop for four consecutive days. Youโ€™ll leave class with a working knowledge of kiln operation, custom project specific firing guides, and the inspiration youโ€™ve been craving to go bigger and do more elaborate works of fused glass art!

Join me and take your glass fusing to the next level!


Premium Video Courses by Lisa


Posted on Leave a comment

Bird of Paradise Flower How-to

Tropical flowers, with their vivid colors and striking shapes have always been a favorite subject for my glass art. The bird of paradise flower is especially fun. Thanks to its easily recognizable profile, I can render it in fantasy colors knowing the image will remain familiar and be imprinted with my personal, artistic flare.    

When planning this project, I imagined the spiky flower petals having blended colors that would add a rounded quality and fullness to the design. I decided glass frit would give me the bright colors and subtle shading I was looking for. I then decided to use a high contrast, solid color background that would showcase the flower.

Bird of Paradise by Lisa Vogt as seen in Painting with Frit Video

Frit and cut sheet glass are a great combination for creating dramatic images.

Frit is a terrific filler material, but itโ€™s difficult to establish a hard edge with frit alone. It leaves a fuzzy or blurred line around the individual design shapes. And so, wherever I want strong line quality and solid color saturation I cut the glass shapes out of sheet glass. The cut glass outlines and contains the frit giving my artwork the professional quality crispness I strive for.

How to make the bird of paradise flower.

This project is made with two layers of glass. The base layer is clear glass.

The second layer is made up of cut pieces and frit. I started the second layer with a narrow border to visually frame the art and add a nice punch of color.

I selected black glass for the background to contrast the colorful flower petals and plant stem. The background is cut with a saw to minimize the number of pieces and to give me a very clean, accurate shape for the flower. The cut pieces of the second layer are glued to the base layer with a small amount of fuserโ€™s glue.

Tip: Let the glue dry before applying the frit. Otherwise, the cut glass pieces move around during assembly which results in a blurry edge.

Select your frit sizes and colors with purpose.

I chose to use fine and medium size frit, in both opal and transparent glasses. I selected bright, eye-popping colors that would contrast the flat black and dance in the light. I apply the frit with a spoon, filling the open spaces to the height of the cut glass surrounding them. Once filled, I grade the frit with a paint brush to blend and soften the colors.  

Clean up is key to exceptional quality craftsmanship.  

Once Iโ€™m satisfied with my frit color mixes and the coverage, I take a small paint brush and clean any overflow off the background glass. I take my time with this step and make sure to remove any excess frit that might distract the viewer from my beautifully detailed flower.   

Frit is a fun way to add a painterly quality to fused glass art. I use it to add detail and shading to increase the visual intricacy and attractiveness of my pieces. Applying frit is a fast, easy way to put a personal spin and your artistic touch on your favorite patterns. Go ahead. Give frit a try. The possibilities are endless.

Tips for Fabulous Frit Designs

Use different frit sizes to enhance your design.

Cut glass wherever you want solid color and strong line quality.

Use both transparent and opal glasses.

Create a light source.

Apply light colors first then layer dark colors on top.

Blend your colors.

Use dark, high contrast colors to create shadows.

Pile the frit on. Donโ€™t be skimpy.

Plan your frit application. It shouldnโ€™t be random.

Use stringers and noodles to add linear details.

Be meticulous about your clean up.

Wherever you are in your artistic journey youโ€™re doing great! Keep learning, trying new techniques and seeking the support of community. It only gets better.

This Bird of Paradise pattern is one of 6 graceful designs in my, Painting with Frit video available as a download on my website.

Check out my video.

Follow my blog for weekly inspiration sent to your inbox! 

Happy Fusing!

Lisa

Upcoming Class!

Advanced Glass Fusing Class

4-Day, Hands-on Class, Wesley Chapel, FL

February 4-7, 2025

YOU can make gallery quality fused glass art! Youโ€™ll love the personalized instruction in this exciting advanced technique, artistic awakening and skill building workshop. This is the turning point experience youโ€™ve been waiting for.

Someday is here! What are you waiting for? Youโ€™re in your prime. Youโ€™re at the peak of your interest in glass fusing. Take the next step and raise your artwork to an exciting new level of sophistication.

Join me for this intense workshop held in my private studio.
Wesley Chapel, Florida, 4-Day, Hands-on, Class size is limited.

In this class, you will push the boundaries art glass imposes. Students will explore innovative approaches to design and combine multiple advanced techniques to construct original art that reflects their own personal style. Youโ€™ll enjoy: the one-on-one instruction, making multifaceted projects, the well-equipped classroom, and the intimate class size.

Youโ€™ll love the concentrated, in-depth study and creative momentum youโ€™ll gain while actively producing, nonstop for four consecutive days. Youโ€™ll leave class with a working knowledge of kiln operation, custom project specific firing guides, and the inspiration youโ€™ve been craving to go bigger and do more elaborate works of fused glass art!

Join me and take your glass fusing to the next level!


Premium Video Courses by Lisa