

Posted on — Leave a comment

Designing for the Most Difficult Client-YOURSELF!

Artists have vision. We can see our finished pieces of art in our minds eye long before we pull a sheet of glass off the shelf. We take for granted that everyone has the natural ability to come up with a new idea, plan how to make it, and then have the resulting artwork actually look like we envisioned. In my 38 years’ experience making commission glass work for clients, I can tell you, not everyone has that gift.

So, we draw sketches and show sample glass colors to our clients. We give them insight into our process and hopefully a better understanding of what their finished artwork will look like. This planning makes it easy to work with customers.

The trouble starts when we want to make something for ourselves because frankly, we can make absolutely anything we can think of. Our only limitation is our imagination. And of course, artists have oodles of imagination. The sky is the limit. Often this realization causes anxiety over what to make. And that stress stalls or stops your productivity. It wastes your time and taps your energy.

So, how do you narrow down what to make when you have limitless possibilities? It’s easy. Treat yourself like a client.

Clients come to me all the time with a project in mind. They have a specific installation site in their home, or place of business, where they want to showcase custom art glass. The site usually dictates the shape of the art I’ll make. Whether it’s a wall mount, a ceiling mount, going to be hung in a window or a freestanding piece, that site narrows down the design shape. And so, the first step in making art for yourself is to pick the installation site. Then decide what art shape is best suited for that specific location.

Designing for clients.

When working with a client, my next step is to look around the installation site. I identify the patterns, shapes and colors that are dominant and repeated in the customer’s decor. I look at the patterns and colors on fabrics on their sofa and drapes. I look at the metal color and style of their light fixtures, door knobs and faucets. I look for shapes and colors that are repeated, over and over in their existing artwork.

For example, in one client’s home circles and ribbon shapes were prevalent. Their furniture had silver, half-circle shaped drawer pulls. The marble on the floor in their foyer had purple ribbon like veins running through the tiles. For that client, I designed 3 wall mounted pieces of art with circle shapes. All of the circles had purple veins running through them. The glass rounds were then mounted to custom metal frames with a silver finish that matched their other existing fixtures.

Designing for yourself.

When designing for yourself, look around your site and take note of the shapes you gravitate toward. Look at the patterns you like and the colors you keep selecting. Then design something totally new that includes all those elements.

The last and easiest step I follow when working with clients is to eliminate subjects they don’t like. It can be difficult to narrow down exactly what they do like or want in their design. But clients usually have very strong opinions about designs they will not consider. For example, some customer’s love traditional designs with classic, graceful curving shapes and jewel tone colors. While others favor contemporary themes with strong lines and bold primary colors. Some like literal, pictorial designs like flowers, birds, and landscapes. While others prefer abstract, organic designs with a focus on unique shapes, engaging textures and a play on color mixes.

When working for yourself, mentally list the designs you do not like or want. Surprisingly, this simple exercise makes what you do like crystal clear.

When it came time to make a fused glass backsplash for my kitchen I hit a wall. There were so many options and directions the design could take that I didn’t do anything for the longest time. I considered designing a pattern with geometric designs or maybe floras or possibly flowing ribbons. I wanted my backsplash to be unique. But at the same time, it needed to be consistent with the style of my home and not so stylized that non-artists would think it was over-the-top.

My indecision was frustrating.

But I know there’s a fine line between classy and gaudy. Just because we can make something extravagant, doesn’t always mean we should. For artists, sometimes restraint is the biggest challenge we have to face. 

The backsplash was a big job that would take months to complete. It would be time consuming to cut the glass, fuse the glass and then install the fused glass tiles. I wanted to get started so I could make tiles between commission pieces. But having limitless possibilities stalled me into inactivity and therefore nothing happened.  

Finally, I decided to draw a small scale version of the design I was considering on the computer. Then I could get a feel for the overall impression and decide if I liked how it looked before cutting any glass. And if I didn’t like my design, I could easily plug a new design into the template. I could also test different color combinations until I had one that felt right. The template also made it easy to calculate the amount of material I’d need to cover the wall of my kitchen. Though it seemed a step backwards, the drawing simplified the huge project and made it easier to plan how to proceed. It also gave me confidence that my time and effort would result in an installation I’d love. 

Making seasonal decorations is different.

Making table top art for your home is one thing. That type of seasonal decoration can be made spontaneously with reckless abandonment. Part of the fun is experimenting with new materials, exploring new assembly techniques and having surprising results. But when it comes to large scale, permanent installations don’t rush. Let the process evolve naturally. Give yourself time to consider different directions before committing to the first design that comes to mind. Then lay the design out on paper to ensure it is indeed what you want.

My Kitchen Backsplash

After a great deal of consideration, I decided to use ceramic tile in combination with fused glass accents to create an original design for my kitchen backsplash. I feel the mixed media is engaging and reflects my unique personal style. Now that the installation is done, I’m glad I waited until the right blend of materials presented itself. I’m thrilled with the bold design and the way the materials enhance the environment without overshadowing other design features.   

Lesson learned.

Treat yourself with the same courtesy you treat your clients. Then you’re certain to have an installation you’ll be proud of and admire for years to come. 

Good luck getting started and finishing your own big projects. Keep making beautiful glass work. You’re doing a great job!

Happy Fusing!

Lisa

Check out my video.

Follow my blog for weekly inspiration sent to your inbox! 

Happy Fusing!

Lisa

Upcoming Class!

Advanced Glass Fusing Class

4-Day, Hands-on Class, Wesley Chapel, FL

February 4-7, 2025

YOU can make gallery quality fused glass art! You’ll love the personalized instruction in this exciting advanced technique, artistic awakening and skill building workshop. This is the turning point experience you’ve been waiting for.

Someday is here! What are you waiting for? You’re in your prime. You’re at the peak of your interest in glass fusing. Take the next step and raise your artwork to an exciting new level of sophistication.

Join me for this intense workshop held in my private studio.
Wesley Chapel, Florida, 4-Day, Hands-on, Class size is limited.

In this class, you will push the boundaries art glass imposes. Students will explore innovative approaches to design and combine multiple advanced techniques to construct original art that reflects their own personal style. You’ll enjoy: the one-on-one instruction, making multifaceted projects, the well-equipped classroom, and the intimate class size.

You’ll love the concentrated, in-depth study and creative momentum you’ll gain while actively producing, nonstop for four consecutive days. You’ll leave class with a working knowledge of kiln operation, custom project specific firing guides, and the inspiration you’ve been craving to go bigger and do more elaborate works of fused glass art!

Join me and take your glass fusing to the next level!


Premium Video Courses by Lisa


Posted on — 2 Comments

Unlock the Mystery of Pattern Bars

Go sculptural!

Are you an adventurous artist ready to push boundaries and apply advanced techniques? If you answered yes, this project is for you.

The beauty of pattern bars is that they can be made in a wide variety of sizes, styles, shapes, and designs. The idea is to create a decorative element that can be cut into pieces and reassembled to make a unique and ornate focal point within your art.

Another nice thing about pattern bars is you can work small and still make a huge impact. So, don’t hesitate to try making your own decorative elements even if you’re new to fusing or have a small kiln. All you need is a little imagination and heat resistant material to contain your glass during fusing.

When I came up with the idea to fuse an inverted stack of glass, I wasn’t exactly sure what the resulting slab would look like. I didn’t let the unknown stop me from trying. I knew the hot glass would fill the open space in the container I created, but I wasn’t sure if the design would retain its linear appearance or if it the colors would blend together. As luck would have it, I got a little bit of both.    

Reflection by Lisa Vogt as seen in Advanced Glass Fusing Video.

To make Reflection I stacked 16 pieces of glass. I started by cutting 3-inch-wide strips from select opal glass colors and transparent glass colors. I also cut 3-inch-wide strips of clear glass. The 3-inch-wide strips were then cut to different lengths. No two pieces were the same length. I alternated color glass and clear glass. The glass was then stacked on the kiln shelf with the shortest piece down on the kiln first. Each consecutive layer was longer than the previous layer.  It was like building an upside-down pyramid.

Tip:

When selecting my glass, I like to use a combination of opal glass, clear glass and transparent color glass. Each type of glass brings its own special facet to the pattern. Opal colors show off the intricacy of the pattern well. Clear glass boosts the visual depth of the design, while transparent colors give the finished artwork a regal jewel tone quality. 

When I fused the stacked glass, I contained it with ½ inch thick strips of fiber board. I use fiber board kiln shelves in my kilns. When they get damaged, I cut them down and use them as dams to contain thick glass. My firing guide is below.

Why do you have to dam the glass you ask?

When stacked glass is fired to the full fuse temperature of 1465 degrees Fahrenheit it will spread out to a ¼ inch thickness. To construct thicker projects, we contain the glass with props, in this case fiber board. The fiber board is then held in place with kiln posts. 

Tip:

When I mention materials that I use in my kilns, like fiber board, I’m always referring to materials that I purchase from my art glass supplier specifically for kiln use. Don’t substitute other building materials from your local hardware store to save money. It will cost you in inconsistent results and possible kiln damage. 

After the glass is fired the pattern bar was cut into long ¼ inch thick slabs with a wet saw. I use an inexpensive tile saw fitted with a wet blade for my heavy-duty straight cutting. It’s fast, easy to use and gives me consistent results. The cut strips are then reassembled so the pattern on the left side is a mirror image of the pattern on the right side of the art. The glass is then fired a second time to a full fuse temperature. This bonds the pieces together and makes all of the surfaces shinny. I made two matching components. One will be used as the vertical portion of the sculpture.

I slumped the second component over a small block of ½ inch thick fiber board using the firing guide below. This element was then used as a decorative base to display the vertical portion. I glued the two pieces together with E6000 adhesive. I prop the project up and let the glue dry overnight.

Reflection as seen in Advanced Glass Fusing Video

Tip:

Go the extra mile and build your own custom display bases for your special pieces of fused glass. It adds a personal touch that elevates the overall quality and sophistication of your artwork.      

Pattern bars are a great way to add energy to your fused glass artwork. They’re easy to make and the number of design variations and color combinations is staggering. Plus, you can work small and still have dynamic results. Next time your kiln is sitting idle try an experimental pattern bar or two. Just watch out. The low-pressure assembly combined with the thrill of unpredictable results is an addictive potion. I’m sure your new work will be both mysterious and magical.

Wherever you are in your artistic journey you’re doing great!

We’re all learning new things every day. Keep going. Enjoy the journey.

Thank you for all the positive feedback about my blog and videos. It’s your kind and encouraging support that inspires me to keep sharing.

Happy Fusing!

Lisa

Reflection is one of 10 advanced designs in my, Advanced Glass Fusing video available as a download on my website.

Check out my video.

Follow my blog for weekly inspiration sent to your inbox! 

Happy Fusing!

Lisa

Upcoming Class!

Advanced Glass Fusing Class

4-Day, Hands-on Class, Wesley Chapel, FL

February 4-7, 2025

YOU can make gallery quality fused glass art! You’ll love the personalized instruction in this exciting advanced technique, artistic awakening and skill building workshop. This is the turning point experience you’ve been waiting for.

Someday is here! What are you waiting for? You’re in your prime. You’re at the peak of your interest in glass fusing. Take the next step and raise your artwork to an exciting new level of sophistication.

Join me for this intense workshop held in my private studio.
Wesley Chapel, Florida, 4-Day, Hands-on, Class size is limited.

In this class, you will push the boundaries art glass imposes. Students will explore innovative approaches to design and combine multiple advanced techniques to construct original art that reflects their own personal style. You’ll enjoy: the one-on-one instruction, making multifaceted projects, the well-equipped classroom, and the intimate class size.

You’ll love the concentrated, in-depth study and creative momentum you’ll gain while actively producing, nonstop for four consecutive days. You’ll leave class with a working knowledge of kiln operation, custom project specific firing guides, and the inspiration you’ve been craving to go bigger and do more elaborate works of fused glass art!

Join me and take your glass fusing to the next level!


Premium Video Courses by Lisa


Posted on — Leave a comment

Bird of Paradise Flower How-to

Tropical flowers, with their vivid colors and striking shapes have always been a favorite subject for my glass art. The bird of paradise flower is especially fun. Thanks to its easily recognizable profile, I can render it in fantasy colors knowing the image will remain familiar and be imprinted with my personal, artistic flare.    

When planning this project, I imagined the spiky flower petals having blended colors that would add a rounded quality and fullness to the design. I decided glass frit would give me the bright colors and subtle shading I was looking for. I then decided to use a high contrast, solid color background that would showcase the flower.

Bird of Paradise by Lisa Vogt as seen in Painting with Frit Video

Frit and cut sheet glass are a great combination for creating dramatic images.

Frit is a terrific filler material, but it’s difficult to establish a hard edge with frit alone. It leaves a fuzzy or blurred line around the individual design shapes. And so, wherever I want strong line quality and solid color saturation I cut the glass shapes out of sheet glass. The cut glass outlines and contains the frit giving my artwork the professional quality crispness I strive for.

How to make the bird of paradise flower.

This project is made with two layers of glass. The base layer is clear glass.

The second layer is made up of cut pieces and frit. I started the second layer with a narrow border to visually frame the art and add a nice punch of color.

I selected black glass for the background to contrast the colorful flower petals and plant stem. The background is cut with a saw to minimize the number of pieces and to give me a very clean, accurate shape for the flower. The cut pieces of the second layer are glued to the base layer with a small amount of fuser’s glue.

Tip: Let the glue dry before applying the frit. Otherwise, the cut glass pieces move around during assembly which results in a blurry edge.

Select your frit sizes and colors with purpose.

I chose to use fine and medium size frit, in both opal and transparent glasses. I selected bright, eye-popping colors that would contrast the flat black and dance in the light. I apply the frit with a spoon, filling the open spaces to the height of the cut glass surrounding them. Once filled, I grade the frit with a paint brush to blend and soften the colors.  

Clean up is key to exceptional quality craftsmanship.  

Once I’m satisfied with my frit color mixes and the coverage, I take a small paint brush and clean any overflow off the background glass. I take my time with this step and make sure to remove any excess frit that might distract the viewer from my beautifully detailed flower.   

Frit is a fun way to add a painterly quality to fused glass art. I use it to add detail and shading to increase the visual intricacy and attractiveness of my pieces. Applying frit is a fast, easy way to put a personal spin and your artistic touch on your favorite patterns. Go ahead. Give frit a try. The possibilities are endless.

Tips for Fabulous Frit Designs

Use different frit sizes to enhance your design.

Cut glass wherever you want solid color and strong line quality.

Use both transparent and opal glasses.

Create a light source.

Apply light colors first then layer dark colors on top.

Blend your colors.

Use dark, high contrast colors to create shadows.

Pile the frit on. Don’t be skimpy.

Plan your frit application. It shouldn’t be random.

Use stringers and noodles to add linear details.

Be meticulous about your clean up.

Wherever you are in your artistic journey you’re doing great! Keep learning, trying new techniques and seeking the support of community. It only gets better.

This Bird of Paradise pattern is one of 6 graceful designs in my, Painting with Frit video available as a download on my website.

Check out my video.

Follow my blog for weekly inspiration sent to your inbox! 

Happy Fusing!

Lisa

Upcoming Class!

Advanced Glass Fusing Class

4-Day, Hands-on Class, Wesley Chapel, FL

February 4-7, 2025

YOU can make gallery quality fused glass art! You’ll love the personalized instruction in this exciting advanced technique, artistic awakening and skill building workshop. This is the turning point experience you’ve been waiting for.

Someday is here! What are you waiting for? You’re in your prime. You’re at the peak of your interest in glass fusing. Take the next step and raise your artwork to an exciting new level of sophistication.

Join me for this intense workshop held in my private studio.
Wesley Chapel, Florida, 4-Day, Hands-on, Class size is limited.

In this class, you will push the boundaries art glass imposes. Students will explore innovative approaches to design and combine multiple advanced techniques to construct original art that reflects their own personal style. You’ll enjoy: the one-on-one instruction, making multifaceted projects, the well-equipped classroom, and the intimate class size.

You’ll love the concentrated, in-depth study and creative momentum you’ll gain while actively producing, nonstop for four consecutive days. You’ll leave class with a working knowledge of kiln operation, custom project specific firing guides, and the inspiration you’ve been craving to go bigger and do more elaborate works of fused glass art!

Join me and take your glass fusing to the next level!


Premium Video Courses by Lisa


Posted on — Leave a comment

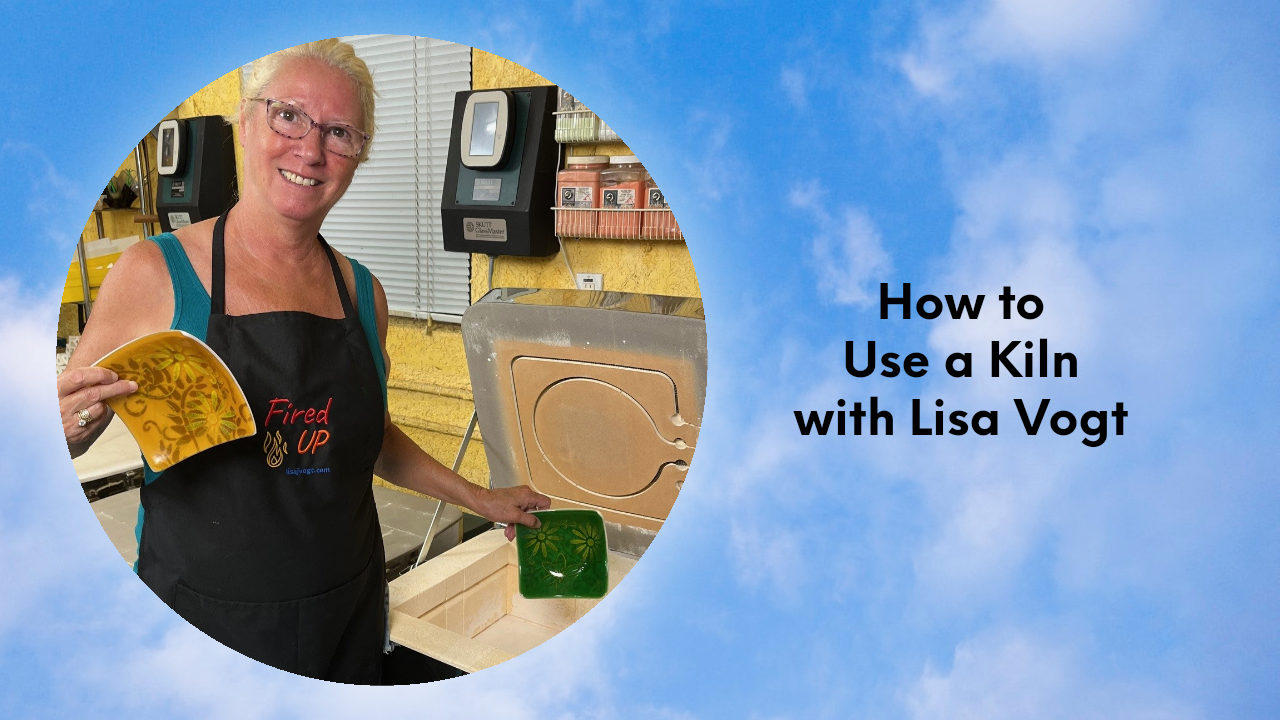
How to Use a Kiln

Getting a new glass fusing kiln is very exciting. But it can also be a little scary to be responsible for your own firings. Students tell me all the time that they purchased a kiln weeks, months, even years ago and it’s still in the box! If you’re one of those tortured glass artists with a burning desire to fire glass, but the thought of being on your own sends icy chills down your spine, this is the nudge you’ve been waiting for.

I’m here to help.

Let me start by saying, you will have varying results. That’s okay. Initially, your goal is to build a relationship with your new equipment. You want to get to know how your particular kiln works and define the results you want to achieve. Yes, it takes a few test firings. Yes, you will ruin some glass. The great news is you will definitely learn something valuable from every firing. And you’ll gain experience while building confidence. It’s a win, win. Now, open that box and set your kiln up. This is going to be fun!

For those of you who are already making awesome projects, you’re likely wondering why I chose this entry-level topic, knowing most of you have experience. A lot of fusers rely on studios and workshops to fire their glass. In those situations, you’re not directly involved with kiln operation. This article will give you insight into what you’re missing.

If you are firing your own artwork, good for you. Consider this a refresher course on kiln operation. I firmly believe that we can all benefit from other artist’s experience. We’re inclined to absorb information, even information we’re already familiar with, at every stage of our artistic growth. The following guides might clarify techniques you’re already using. Or they may shed light on new methods worth trying.

Setting up your new kiln.

Safety is extremely important! Remember, you’ll be firing glass at high temperatures, and you don’t want to create a fire hazard. Reference the owner’s manual and follow the manufacturer’s suggestions on where to place your kiln. They’ll offer recommendations on the type of flooring your kiln should rest on, as well as distance-from-the-wall measurements. Set your kiln up accordingly.

Carefully vacuum the inside of your new kiln to remove any material that might have come lose during shipping. Then coat the kiln bottom, inside the firing chamber with kiln wash or shelf primer. Follow the directions on the kiln wash container and apply two or three even coats. This preventive step will protect the kiln floor if glass accidentally ends up on the bottom. If you have a new kiln shelf, you’ll want to coat it with kiln wash as well. Let the shelf dry completely before using it. Then plug your kiln in, and let the firing begin.

Test firing your new kiln.

I recommend making a quick, easy project to test the firing temperature and effect that temperature has on your glass. For fast results, you can fire two layers of scrap glass together. Personally, that overly simplified approach causes my artistic soul pain. I like to make something with every firing. So, I came up with a very simple project that I was willing to risk coming out poorly, for the sake of getting to know how my new kiln fired.

But first, a little bit about project assembly.

How projects are assembled has a direct effect on the durability and, “look” of the finished piece. Most of my projects are assembled using two full layers of glass.

Glass seeks a level of ¼ inch thick when it’s heated to the full fuse temperature of 1465 degrees. (I’m using COE 96, but this temperature works equally as well on COE 90.) By assembling with two layers of glass, I maintain control over the size and shape of my finished piece.

Fusing one layer of glass will cause the project to shrink. And it will have a fragile, sharp, irregular edge. While fusing three layers of glass will result in the project growing in size, which changes the original shape considerably.

Since two layers is my go-to type of assembly, I made my test piece with this fabrication method. If your go-to is a different type of assembly, you’ll want to duplicate that for your test piece.

I cut a 6 inch by 6 inch square of white glass for the base of my project. Then I cut a 6 inch by 6 inch square of transparent color to stack on the white base. This simple combination was too plain for my artsy heart to handle. So, I used plastic stencils to give the plain glass a little pizazz. I quickly sifted green opal, powder frit over the stencil on the white base layer. I sifted yellow opal, powder frit over the stencil on the top color layer giving the project a subtle pattern. On the white base layer, I used a leaf pattern stencil. On the color layer, I used a flower pattern stencil to create delicate variations on the two layers. I intentionally applied in a higher concentration of frit on the left side of the base layer. On the color layer, I applied a higher concentration of frit on the right side. This way, you’d see each pattern independently and the two patterns overlapping in the middle of the square.

Loading your new kiln.

Place 3 or 4 short kiln posts on the floor of the kiln. Position the primed, or fiber paper lined, ceramic kiln shelf on the posts. Placing the ceramic shelf on posts makes it easier to load and unload the shelf. It also allows air to circulate around the shelf when the kiln is firing.

Important note about the position of your kiln shelf inside your kiln.

I use short posts on purpose to make sure the ceramic kiln shelf is positioned low inside the kiln. The posts are necessary for air flow around the ceramic shelf, so don’t skip them. But we also want to keep the glass project, assembled on the shelf as far away from the heating coils, in the lid as possible. You want a minimum of 5 to 6 inches between the glass project and the heating coils. If the glass is too close to the coils the glass can break due to thermal shock which is a result of heating too quickly.

The same applies for slumping molds.

It’s important to apply this same idea when placing a fused project on a slumping mold. In my smaller kilns, I remove the kiln shelf and place the slumping mold directly on the kiln floor to ensure that the glass is as far away from the heating coils as possible.   

Be careful not to bump or bend the probe inside the kiln when loading the kiln shelf. The probe is a thermocouple that transmits the interior temperature of your kiln to the kiln’s controller.

Fiber board kiln shelves are different.

I place fiber board kiln shelves directly on the floor of my kilns without using any kiln posts. The fiber material is porous. Therefore, air circulates through the shelf ensuring even heating. 

Glass fusing test fire.

I fired the assembled glass to a full fuse temperature on a primed ceramic kiln shelf. I used Auto Mode and the preset Full Fuse program in my Firebox 14 kiln controller. I was happy with the results.

Characteristics of a terrific full fuse firing.

The fused glass retained its square shape and original size of 6 inch by 6 inch. It also had uniform thickness, smooth surface, rounded edges and a clean back side. The frit design details melted into the top layer giving the project a shiny, smooth surface. 

Characteristics of an under-fired full fuse firing.  

An under-fired project will retain its square shape and its original size of 6 inch by 6 inch. The edges are hard, angular and sometimes sharp. Since the two layers are not completely fused together, a seam may appear on the edge showing how the layers were stacked. The back side of the project is clean and smooth. Design details, like frit may have texture and might not be fully melted into the top layer.

The solution to an under-fired project is to re-fire it a little hotter. To get more heat results, I usually add ten degrees to the target temperature. The target temperature is the temperature that gives you the desired results.

For full fuse results I fire the glass to 1465 degrees and hold it there for ten minutes. For tack fuse results I fire the glass to 1365 degrees and hold it there for 10 minutes. For slumping results, I fire the glass to 1265 degrees and hold it there for 10 minutes. (These temps are for COE 96 glass, but they will work equally as well in COE 90 glass.) 

Characteristics of an over-fired full fuse firing.

An over-fired project will grow in size. The outside edges will round out. The glass will lose its square shape and be larger than the original 6 inch by 6 inch size. Kiln wash may stick to the backside and may be difficult to remove. The design details, like frit will be completely fired in giving the project a smooth shiny surface.

The solution for an over-fired project might be to grind the edges to regain the square shape. Or you can remake and re-fire the project at a lower temperature.

Glass slumping test fire.  

To test how my new kiln slumped glass I placed a square ceramic mold in the kiln and positioned the fused glass on top. Using the controller and Auto Mode I set the kiln firing speed to fast and the process to slump. I was happy with the results.

Characteristics of a successful slump.

A successfully slumped glass project conforms to the shape of the mold. It also retains a clean shape and height of the sides of the project.

Characteristics of an under-slumped project.

An under-slumped project does not conform to the mold. The glass project doesn’t have enough drop and so the piece is shallow. The piece may also wobble on the table because it didn’t come in contact with the flat bottom of the mold like it should have.

The solution is to re-fire the glass in the mold and hold it at the target temperature a little longer than the first time. I usually add 10 minutes hold to the original program.   

Characteristics of an over-slumped project.

An over-slumped project picks up a lot of texture from the mold. It also loses some of its shape because the sides slide down into the mold. The result is an uneven top edge or rim. The solution is to call it something new or remake the project.

Take notes.

I recommend taking notes on how you assemble your pieces and on your firing steps. This way you can easily reproduce your successes and learn from the pieces that didn’t come out as you expected.

Be brave. You can do it.

It takes a little time to become familiar with your new kiln. The good news is you’ll learn new and exciting things every step of the way. Don’t hesitate to jump in and start firing. No matter what your results are you’ll enjoy the creative process and making your own personalized pieces of art. 

I believe in you!

Check out my video to see how to use a kiln.

Follow my blog for weekly inspiration sent to your inbox! 

Happy Fusing!

Lisa

Upcoming Class!

Advanced Glass Fusing Class

4-Day, Hands-on Class, Wesley Chapel, FL

February 4-7, 2025

YOU can make gallery quality fused glass art! You’ll love the personalized instruction in this exciting advanced technique, artistic awakening and skill building workshop. This is the turning point experience you’ve been waiting for.

Someday is here! What are you waiting for? You’re in your prime. You’re at the peak of your interest in glass fusing. Take the next step and raise your artwork to an exciting new level of sophistication.

Join me for this intense workshop held in my private studio.
Wesley Chapel, Florida, 4-Day, Hands-on, Class size is limited.

In this class, you will push the boundaries art glass imposes. Students will explore innovative approaches to design and combine multiple advanced techniques to construct original art that reflects their own personal style. You’ll enjoy: the one-on-one instruction, making multifaceted projects, the well-equipped classroom, and the intimate class size.

You’ll love the concentrated, in-depth study and creative momentum you’ll gain while actively producing, nonstop for four consecutive days. You’ll leave class with a working knowledge of kiln operation, custom project specific firing guides, and the inspiration you’ve been craving to go bigger and do more elaborate works of fused glass art!

Join me and take your glass fusing to the next level!


Premium Video Courses by Lisa


Posted on — Leave a comment

How to Cut Glass – 5 Tips

One of the fastest and easiest ways to improve your fused glass art and dramatically expand your design style is to develop your glass cutting skills.

The beauty of working with fusing is the simplicity of the medium. Many people come to the craft with little or no glass cutting experience. Due to the ease of fabrication and wealth of readily available information, they’re successfully producing attractive pieces from the start.

But if you’re now tiring of the simple cut and assemble methods that got you started and longing to move in a more advanced direction, a small dose of technique is the jump start you need.

It may seem like a trivial topic to address, but your project complexity is in direct relation to your cutting confidence. In other words, the better you cut, the more likely you are to venture outside of your comfort zone and take on more challenging projects.

Here are some tips to get started. 

1 Consistent pressure.

Contrary to popular belief, it doesn’t take a heavy hand to make a good score line on glass. What it takes is consistent, medium pressure from the very beginning to the very end of the score. The glass cutter should, “sing” as it rolls over the surface of the glass. It’s a pleasant, consistent sound beginning to end. It’s not a cringing grinding noise. A good score is visible its entire length. But it’s not messy and littered with thin splinters. The grinding noise and splinters are signs you’re applying way too much pressure.

Many beginners start strong but let up the pressure as their hand moves farther away from their body. In this case, breakage tends to occur ¾ of the way down the score line. Beginners believe the score comes solely from the hand. A good score comes from making your wrist, elbow and shoulder one rigid tool. This combined strength and rigidity helps you apply consistent pressure the entire length of the score even at an awkward distance from your body. 

When cutting an unusually long piece, I turn the glass so I can run my score right to left instead of away from my body. This way I can move my body along with my hand and more easily maintain the consistent pressure needed for a successful break.    

2 Cut on the smoothest side of the glass.

In some cases, I prefer the look, color or pattern on the textured side of a sheet of glass. I turn the glass over and cut on the smoother side and then simply turn the glass back over when I assemble my project. The glass cutter wheel will have better, more consistent, contact with the glass the entire length of the score if you cut on the smoothest side. 

3 Beginning and end.

Try to start your score as close to the leading edge of the glass as possible without falling backward off the glass. Apply consistent, medium pressure from the very start. End the score as close to the far edge as possible without falling off the glass. Repeatedly falling off the glass edge will damage the cutter wheel and could possibly cause the glass to shatter.  

4 Use the right tool for the job.

Use a strip cutter or circle cutter when applicable. Accuracy is key for professional quality artwork. These tools give your work consistency. Plus, they save material by reducing waste and breakage.

When cutting strips, I cut a few more than I need and select the best, straightest strips for my project. The extra pieces find their way into smaller projects, pot melts or free flows. Nothing goes to waste.

Whenever possible, I opt to use running pliers over grozing or breaking pliers to break glass away from a sheet. Running pliers give the most reliable results. They work best if the glass being removed is at least as wide as the rubber tipped plier jaw. When breaking narrow or small curved pieces away, I choose grozing plies because the narrow jaw fits in tight places and allows me to get close to the score line.     

5 Use paper patterns.

Don’t hesitate to cut around a paper pattern to include an intricate shape in your work. This is a terrific way to transition away from strictly geometric designs and into pieces with lively organic elements.

Glass wants to break in a straight line. To cut rounded shapes, we make a series or gradual curves and break the excess glass away in steps until we have a glass shape that closely resembles our pattern.  

When cutting around a paper pattern piece, cut as close to the paper as possible without running into it. Beginners tend to cut a wide safety halo around the paper. It just postpones the inevitable. Be brave. Go for it. If the glass is going to break unfavorably the halo, no matter how heavenly, won’t prevent it.

Something to build on.  

The more time and effort you put into each step makes the next step easier and the finished product that much better. Don’t rush a project just to get it in the kiln. Give it the time it needs and produce your best work, every time. If you have to ask, “Is this good enough,” it probably isn’t. Do yourself a favor, re-do that piece or step. You can thank me later when you’re doing the, my piece came out awesome, happy dance.  

Go ahead. Cut it up!

Check out my newest video to see how to cut glass.

Follow my blog for weekly inspiration sent to your inbox! 

Happy Fusing!

Lisa

Upcoming Class!

Advanced Glass Fusing Class

4-Day, Hands-on Class, Wesley Chapel, FL

February 4-7, 2025

YOU can make gallery quality fused glass art! You’ll love the personalized instruction in this exciting advanced technique, artistic awakening and skill building workshop. This is the turning point experience you’ve been waiting for.

Someday is here! What are you waiting for? You’re in your prime. You’re at the peak of your interest in glass fusing. Take the next step and raise your artwork to an exciting new level of sophistication.

Join me for this intense workshop held in my private studio.
Wesley Chapel, Florida, 4-Day, Hands-on, Class size is limited.

In this class, you will push the boundaries art glass imposes. Students will explore innovative approaches to design and combine multiple advanced techniques to construct original art that reflects their own personal style. You’ll enjoy: the one-on-one instruction, making multifaceted projects, the well-equipped classroom, and the intimate class size.

You’ll love the concentrated, in-depth study and creative momentum you’ll gain while actively producing, nonstop for four consecutive days. You’ll leave class with a working knowledge of kiln operation, custom project specific firing guides, and the inspiration you’ve been craving to go bigger and do more elaborate works of fused glass art!

Join me and take your glass fusing to the next level!


Premium Video Courses by Lisa