

Posted on — Leave a comment

It’s No Mystery – 10 Ways to Create Great Artwork

Great fused glass artwork is no accident. It’s meticulously planned, skillfully executed and artistically presented in an aesthetically pleasing way. Exceptional artwork is the product of several elements. When combined they engage and captivate the viewer. 

These key characteristics are present in all great art. Keep them in mind when designing new work. Apply them when possible, and you’ll immediately see a powerful rise in the quality of your finished art.

How to create great artwork.

Mediterranean Shift from Advanced Glass Fusing Video

1 Design a pleasing composition.  

Composition refers to the placement of design elements within the artwork. By placing elements in a triangular fashion, you create wanted tension viewers find irresistible. Unless the pattern is a geometric grid, I avoid having elements in a straight line vertically or horizontally, it lacks fire.    

Dicro Dishes from Advanced Glass Fusing Video

2 Select an appealing color palate. 

Pick a color palate and stick with it. This shows artistic planning which increases the continuity of the work. When deciding on colors, I pick a setting and then choose colors appropriate for that landscape. For example, if I select a New England Shore as my setting I’d use soft celery green, medium blue, light amber and earth tones. Whereas, a Caribbean beach setting would call for vivid Amazon green, aqua blue, bright yellow and white.

Pisces from Advanced Glass Fusing Video

3 Engage the viewer with a focal point.

I believe all designs even geometric patterns can benefit from having a focal point. A focal point is something of interest that stands out from the background. It anchors the viewers eye and engages their imagination longer than the same piece with no focal point. It can be as simple as a high contrast color, a unique shape or an unexpected line.

Carnival Flow from Advanced Glass Fusing Video

4 Add visual or physical texture.

Texture invites discovery. It adds a third dimension that amps up the visual intricacy and perceived value of artwork. Include texture and your work will jump off the page.  

Moss from Advanced Glass Fusing Video

5 Add pattern.

Pattern is a terrific way to dress up basic shapes to make them more unique and appealing. It’s also a great tool you can use to reinforce a specific design theme. For example, a basket weave pattern would be a nice addition to a design featuring bamboo shoots. Likewise, brightly colored straight lines could be used to represent a towel that enhances a tropical beach scene. 

Arctic Freeze for Advanced Glass Fusing Video

6 Combine advanced techniques.

Combining techniques is fun and adds dramatic interest to fused glass art. Even simple applications deliver high impact results. Create several component pieces. Try arranging them in several different ways until one makes each piece more interesting than it was alone.   

Tropical Tango by Lisa Vogt

7 Design dramatic imagery.

Including dramatic imagery is a great way to make art memorable. Give the viewer a solid pictorial subject to digest. It’ll grab hold of them and not let go. Viewers easily connect with recognizable focal points.

Grape Tulip from Creative Shapes Video

8 Give your work an exciting shape.

Break free from the confines of expected shapes. Color outside the lines. Offer us a fresh new profile. It’s easy to notch or bump out a square. Add a curved edge to a rectangle. Scallop the outside of a circle. Your work will approve.

Envy from Advanced Glass Fusing Video

9 Give your work sculptural form.

This is the single most effective way to elevate your work from craft to fine art. Combine different slumping molds to create a unique freestanding shape all your own. Or build a mold by draping fiber blanket over kiln posts. The possibilities are endless.

Reflection form Advanced Glass Fusing Video

10 Follow through with a unique display.

You have a vision for your art. Carry that enthusiasm to the end. Consider making a display stand that contributes to the artwork’s energy and makes it impossible to forget. 

In the end, we want to connect with the viewer through our art. We want to stir emotion, deliver a message or fascinate their sense of wonder. Whatever your intention, a well-planned project made with insightful design theories will make your artwork great! 

For more in depth instruction check out my Advance Glass Fusing Video.

Not all projects are pictured here.

Follow my blog for weekly inspiration sent to your inbox! 

Happy Fusing!

Lisa

Upcoming Class!

Advanced Glass Fusing Class

4-Day, Hands-on Class, Wesley Chapel, FL

ONLY 3 SEATS LEFT!

February 4-7, 2025

YOU can make gallery quality fused glass art! You’ll love the personalized instruction in this exciting advanced technique, artistic awakening and skill building workshop. This is the turning point experience you’ve been waiting for.

Someday is here! What are you waiting for? You’re in your prime. You’re at the peak of your interest in glass fusing. Take the next step and raise your artwork to an exciting new level of sophistication.

Join me for this intense workshop held in my private studio.
Wesley Chapel, Florida, 4-Day, Hands-on, Class size is limited.

In this class, you will push the boundaries art glass imposes. Students will explore innovative approaches to design and combine multiple advanced techniques to construct original art that reflects their own personal style. You’ll enjoy: the one-on-one instruction, making multifaceted projects, the well-equipped classroom, and the intimate class size.

You’ll love the concentrated, in-depth study and creative momentum you’ll gain while actively producing, nonstop for four consecutive days. You’ll leave class with a working knowledge of kiln operation, custom project specific firing guides, and the inspiration you’ve been craving to go bigger and do more elaborate works of fused glass art!

Join me and take your glass fusing to the next level!


Premium Video Courses by Lisa


Posted on — 2 Comments

Finding Inspiration in Unlikely Places

Summer is a wonderful time to enjoy outdoor activities and breath in the beauty of nature. It’s refreshing to be away from my glass studio in environments rich with color, pattern and new scenes. I cherish time cooling off on the water and the exhilaration of hiking in the woods. The outings clear my mind of old design themes, they rejuvenate my spirit and inspire new design ideas.

I may be off work, but my creative subconscious is on duty collecting tidbits that’ll later be integral parts of my new art. I seek exciting new compositions by studying tiny details like the delicate curled shoots of ferns. I imagine the extreme color combinations studying the broad strokes of a spectacular, cotton candy pink sunset. Even familiar settings, seen with renewed artistic curiosity, offer new appeal.

Fairy Tale Forest as seen in Painting with Frit with Lisa Vogt Video

Fairy Tale Forest was inspired by a path I frequently walk in the woods. It’s an enchanted place with specked shade, inviting curves that promise adventure and the musical sounds of nature alive in the brush. Tall pines and century old oaks form a canopy overhead. The cathedral like tunnel makes me feel small, at ease and safe. It’s as if the trees are guarding me with the wisdom of their age. It’s such a magical place, I half expect to see a white unicorn trotting around palmetto bushes.

The truth is the path doesn’t really look like my design. I exercised my artistic license. I designed the art to convey the way I feel, the comfort and joy I have when I’m strolling down the leaf blanketed trail.

I never would have stretched my artistic vision to that extent without the actual experience of walking down that path.

Paradise Palm as seen in Painting with Frit Video

Paradise Palm was inspired by a favorite lagoon on the coast. Again, the artwork loosely represents the landscape. It’s really a representation of good times and fond memories of time spent with my family.

River Bottom as seen in Fusing for the Adventurous Webinar with Lisa Vogt

River Bottom was inspired by the ditch that lines my street. Really. I was walking one morning and noticed the sunlight shining on the water in the retention ditch on my road. The sun pierced through the clear water down to the bottom where it lit up the tiny green leaves of mossy plants. They sparkled like glitter covered light bulbs. It was so captivating I then noticed some lacy tree leaves suspended in time, and the striking shadows of tree trunks stretching across the placid surface of the water. I thought, this is a beautiful scene, how can I render this in glass?

The project looks simple. You have to see it in person, after hearing the story to really appreciate the true beauty and depth of River Bottom. The take away, the invaluable lesson, is that beauty is all around us. We just have to look for it and then let it inspire us to be creative.

Take it outside!

This summer while you’re exploring beaches, mountains and cities open yourself to discovery. Then, when the artistic spark flares, you’ll have an exciting collection of new ideas to fuel what you fire.

Painting with Frit with Lisa Vogt Video, 6 amazing projects!

Follow my blog for weekly inspiration sent to your inbox! 

Happy Fusing!

Lisa

Upcoming Class!

Advanced Glass Fusing Class

4-Day, Hands-on Class, Wesley Chapel, FL

ONLY 3 SEATS LEFT!

February 4-7, 2025

YOU can make gallery quality fused glass art! You’ll love the personalized instruction in this exciting advanced technique, artistic awakening and skill building workshop. This is the turning point experience you’ve been waiting for.

Someday is here! What are you waiting for? You’re in your prime. You’re at the peak of your interest in glass fusing. Take the next step and raise your artwork to an exciting new level of sophistication.

Join me for this intense workshop held in my private studio.
Wesley Chapel, Florida, 4-Day, Hands-on, Class size is limited.

In this class, you will push the boundaries art glass imposes. Students will explore innovative approaches to design and combine multiple advanced techniques to construct original art that reflects their own personal style. You’ll enjoy: the one-on-one instruction, making multifaceted projects, the well-equipped classroom, and the intimate class size.

You’ll love the concentrated, in-depth study and creative momentum you’ll gain while actively producing, nonstop for four consecutive days. You’ll leave class with a working knowledge of kiln operation, custom project specific firing guides, and the inspiration you’ve been craving to go bigger and do more elaborate works of fused glass art!

Join me and take your glass fusing to the next level!


Premium Video Courses by Lisa


Posted on — Leave a comment

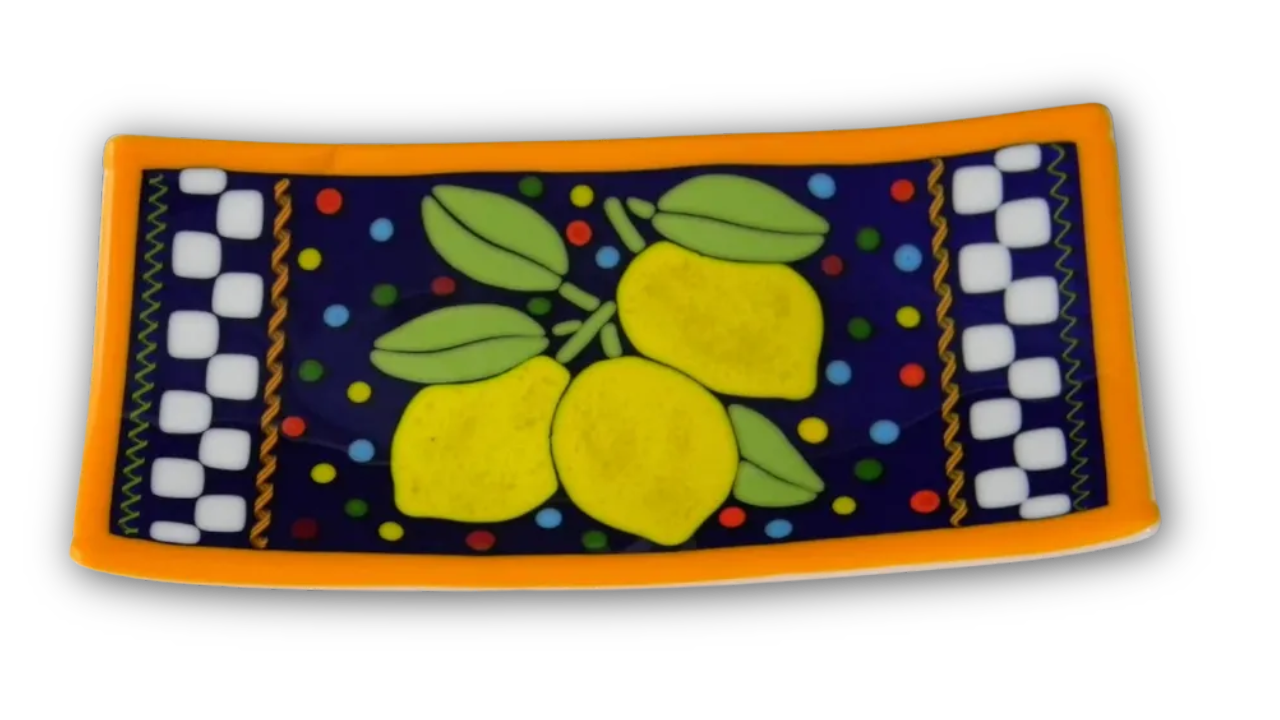
Sweet Lemon Tray

Beautiful art and good food have a lot in common. Art is memorable when it exceeds a purely visual purpose. Extraordinary art engages the viewer, stirs their emotions, and frees their sense of wonder. Skilled artists create art that draws attention visually and then stimulates a personal connection with the viewer for a mind and body experience. Likewise, gourmet chefs know presentation is everything. They pair foods with complementary flavors and pleasing colors to appeal to all the senses. Top cooks know a truly delicious meal experience begins with the anticipation of the first savory bite.

When designing new pieces of art, I apply these multifaceted concepts from the beginning. I select a pleasing shape that enhances my design idea. Then I pair a complementary color palate with an engaging subject matter.

Before I drew the design, I imagined this vivid lemon tray brightening up my dark kitchen counter. I felt the cluster of yellow lemons and bright green leaves arranged on the royal blue background embodied the essence of lighthearted cheer. I believed the giving fruit would bring the joy and comfort that we enjoy during family meals to the hard-surfaces.

You can make art that lifts the mood in your home too. Here’s how to make the Lemon Tray.

2

This tray is 7 in. x 14in. It’s made with two layers of glass plus accents.

Tip: Clean the sheet glass prior to cutting. I wash the glass with plain water and dry it with cotton towels.

Base Layer: Cut a 7 inch by 14 inch rectangle out of clear glass for the base layer.

Design Layer: Cut 4 –  ½ wide strips of opal orange or yellow glass for the outer border. Cut the strips to size. Cut the blue background glass to 6 inch by 13 inch.


Arrange the yellow border and blue background on the clear base. Glue the pieces in place with fuser’s glue. The glue keeps the glass from sliding when you load the assembled project in the kiln. Set the glass aside and let the glue dry.

AH Lemons
Enlarge this lemon drawing to 5.5 in. x 5.5 in.

Accent Layer: Draw the lemons and leaf pattern on paper. Cut the pattern up with scissors. Use a glue stick to affix the cut paper pattern pieces to the appropriate glass. Use opal yellow glass for the lemons and opal green glass for the leaves. Grind the cut glass to remove any sharp edges and improve the glass fit. Clean the ground glass with water. Dry the glass with a towel.

3

Arrange the cut lemon and leaf pieces on the  blue background. Glue them in place with fuser’s glue.

Tip: Use the smallest amount of glue possible so it burns off without leaving any residue behind.

4

This is your opportunity to be the artist.

Decorate the background with fusible materials that you have on hand. Cut squares. Use stingers or noodles. Don’t worry about duplicating my design exactly. Instead, have fun with it. For best results, I recommend using high contrast colors and opal glass for maximum visibility and impact.

Here’s how I decorated the background. Cut twisted cane to size. Arrange the cane on the background. Snip murrine into pieces with mosaic nippers. Place the murrine on the blue field to create dots. Cut a narrow strip of white glass into squares. Arrange them between the cane.  Glue the decorations in place so they don’t roll when you carry the assembled project to the kiln. Sprinkle clear, medium size frit on the lemons. This gives the flat yellow glass the illusion of texture.

Fuse and slump the project using the firing guides on my website.

When making your next piece of art dig deeper than the obvious. Great art is more than eye candy. Consider what you want your art to convey beyond being pretty. It can stimulate good moods, add a refreshing airiness to your space and bring positive energy to your life.

Follow my blog for weekly inspiration sent to your inbox! 

Happy Fusing!

Lisa

Upcoming Class!

Advanced Glass Fusing Class

4-Day, Hands-on Class, Wesley Chapel, FL

ONLY 3 SEATS LEFT!

February 4-7, 2025

YOU can make gallery quality fused glass art! You’ll love the personalized instruction in this exciting advanced technique, artistic awakening and skill building workshop. This is the turning point experience you’ve been waiting for.

Someday is here! What are you waiting for? You’re in your prime. You’re at the peak of your interest in glass fusing. Take the next step and raise your artwork to an exciting new level of sophistication.

Join me for this intense workshop held in my private studio.
Wesley Chapel, Florida, 4-Day, Hands-on, Class size is limited.

In this class, you will push the boundaries art glass imposes. Students will explore innovative approaches to design and combine multiple advanced techniques to construct original art that reflects their own personal style. You’ll enjoy: the one-on-one instruction, making multifaceted projects, the well-equipped classroom, and the intimate class size.

You’ll love the concentrated, in-depth study and creative momentum you’ll gain while actively producing, nonstop for four consecutive days. You’ll leave class with a working knowledge of kiln operation, custom project specific firing guides, and the inspiration you’ve been craving to go bigger and do more elaborate works of fused glass art!

Join me and take your glass fusing to the next level!


Premium Video Courses by Lisa


Posted on — Leave a comment

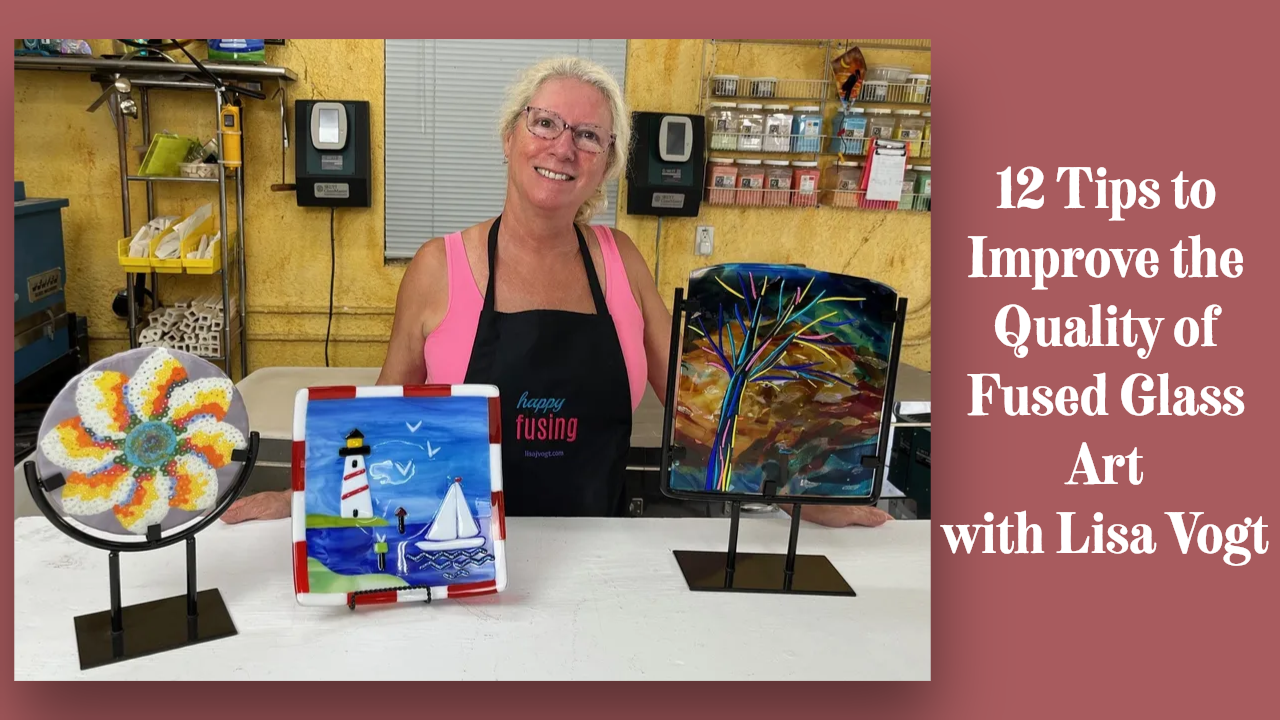
12 Tips to Improve the Quality of Fused Glass Art

1. Clean your glass before cutting it.

It’s much easier to clean a single square piece of glass than it is to clean a bunch of small pieces. You’ll also do a better job because you can see any dust or hint of glue from the manufacturer’s stickers more easily on the larger surface area. I avoid using chemicals or cleaners that might introduce potential contaminants to my fused glass. I use plain water and clean cotton towels to clean and dry my glass.

2. Improve your accuracy by using the right tool for the job.

When cutting glass strips or circles for my projects I use certain tools to help improve the fit of my pieces. The benefits of using strip cutters and circle cutters are they reduce waste and scrap glass. Plus, their ease of use makes the project assembly faster, easier and more precise.

Wet saws are great for cutting intricate shapes that otherwise would have to be done in multiple pieces. This time and material saving approach also enables you to make more elaborate designs.

Mosaic nippers are handy to quickly and efficiently produce irregular pieces for playful patterns and whimsical designs.

3. Pick a color pallet and stick with it.

Being selective about the colors you use increases the strength of your artwork. It shows the purposeful design direction of the artist and at the same time establishes the mood of the piece. Use multiple shades of the same colors to create depth and greater visual interest. Select both transparent and opal glass in your color pallet to increase design depth.

4. Use high contrast colors.

Be bold! Combine striking colors to bring your design to life. Using high contrast colors enhances the linear details of your design. It’s an easy way to increase the impact and overall attractiveness of your glass art.  

5. Include a focal point.

A focal point gets the viewer’s attention, engages them and makes your art memorable. Focal points can be literal like a leaf, a bird or a wave. Easily recognizable images are relatable and endearing. While abstract designs also benefit from having a focal point too. You can include an unexpected shape or pop of color to make your art more engaging.     

6. Do your best work.

Be meticulous with every step. The time and effort you put into each step makes the next step faster, easier and more professional looking. Make sure your glass pieces fit well. If you ask yourself, is this good enough? It likely isn’t your best work. Redo that piece, re-cut the glass, do whatever it takes to make sure you’ll be proud of your finished work.     

7. Build your projects with two full layers of glass to make them visually attractive and structurally durable.

This method of assembly produces beautiful smooth edge quality and a uniform thickness throughout your finished piece of art. These characteristics elevate your work to a professional quality that’s consistent with high end, gallery worthy artwork.   

8. Make your pieces a little smaller than your slumping molds to ensure they slump evenly.

If you intend to slump your fused glass project measure the slumping mold you plan to use in advance of laying out your design. Make your project ½-inch smaller than the mold to accommodate any potential growth and to ensure the glass slumps evenly. When the glass is larger than the mold, or if it sits on the top edge of the mold, the glass may slip to one side and slump unevenly.  

9. Fire projects with other pieces with similar construction style.

It’s good practice to fire projects built with two layers together and fire projects made with one layer separately to ensure you have the best results possible for each type of construction. Large projects can be fired alongside small projects. Fire the kiln at a rate that’s appropriate for the largest project in the kiln.

10. If in doubt fire slower.

If you’re concerned about your firing rate it’s okay to fire your kiln more slowly and add more time to the annealing segment hold. This small change often improves your consistency and results in greater success.  

11. Re-prime your kiln shelf and slumping molds before use if they show signs of wear.

I clean and prime my kilns shelves every time in use them. Then I’m sure my glass won’t stick to the shelf. I prime my slumping molds when they show signs of wear. Wear includes: the primer looks thin or it’s pealing. This routine maintenance enables me to fuse and slump with confidence.

12. Allow your kiln and the glass inside to cool to room temperature before opening the kiln.

Be patient! I know it’s hard to resist opening the kiln. If I’m tempted to open my kiln, I ask myself what’s more important to me in six weeks from now? Is it that I get to see the project a few hours early OR that the project is cooled properly and stable? This idea gives me strength to be patient.  

Bonus 13. Take before and after pictures and take notes.

Pictures and notes help you gain confidence in your kiln work. They document your progress and are glowing examples of your artistic growth. They’re also useful for trouble shooting unexpected results. Pictures and notes help you reproduce your successes and learn from your failures.   

Check out my video.

Follow my blog for weekly inspiration sent to your inbox! 

Happy Fusing!

Lisa

Upcoming Class!

Advanced Glass Fusing Class

4-Day, Hands-on Class, Wesley Chapel, FL

February 4-7, 2025

YOU can make gallery quality fused glass art! You’ll love the personalized instruction in this exciting advanced technique, artistic awakening and skill building workshop. This is the turning point experience you’ve been waiting for.

Someday is here! What are you waiting for? You’re in your prime. You’re at the peak of your interest in glass fusing. Take the next step and raise your artwork to an exciting new level of sophistication.

Join me for this intense workshop held in my private studio.
Wesley Chapel, Florida, 4-Day, Hands-on, Class size is limited.

In this class, you will push the boundaries art glass imposes. Students will explore innovative approaches to design and combine multiple advanced techniques to construct original art that reflects their own personal style. You’ll enjoy: the one-on-one instruction, making multifaceted projects, the well-equipped classroom, and the intimate class size.

You’ll love the concentrated, in-depth study and creative momentum you’ll gain while actively producing, nonstop for four consecutive days. You’ll leave class with a working knowledge of kiln operation, custom project specific firing guides, and the inspiration you’ve been craving to go bigger and do more elaborate works of fused glass art!

Join me and take your glass fusing to the next level!


Premium Video Courses by Lisa


Posted on — Leave a comment

Welcome Summer! Bring the Beach Home

Sunny, relaxing summer days are here! It’s time for delicious family picnics, breezy boat rides and warm sand between your toes. This series of bowls combines simple lines, a pleasing color palate and a whimsical touch of nature with classic seaside style. Beach Day Bowls are perfect accents for creating beach style comfort in your home all summer long.

When I come across a pattern that really brings me joy, I like to recreate that design in different sizes. Then I display the companion pieces around my kitchen and family room to set a seasonal mood throughout our living space. If you’re attracted to this pattern, consider making it in a few different sizes to get the most out of the simple, yet stylized ocean theme.

Beach Day Bowls as seen in Artful Home Video

How-to make the bowls.

These bowls are made with two layers of glass. The base layer is clear glass. The second, design layer is made up of cut glass pieces. Start by cutting the clear base.

Enlarge the pattern to your desired dimension. Use the pattern as a guide to cut the design layer. Cut the paper up. Glue it to the glass with a glue stick. Cut the glass as close to the paper pattern as possible to minimize the amount of grinding needed.

There are some deep, inside cuts in my pattern. Cut the glass as accurately as you can. Grind the pieces to improve the edge quality and overall fit of the design. Assemble the cut glass pieces on top of the clear base. Use fuser’s glue to affix the design layer to the base layer. It’s okay if your pieces don’t fit perfectly. Let the glue dry. This will prevent the glass from moving when you apply the frit.

Wave Pattern from Artful Home Video

Use a spoon and pour fine blue frit on top of the glass. Use a paint brush to move the frit into the gaps between the pieces to fill in the space and add a linear detail. Remove any excess frit by sweeping it off the glass. Be meticulous about your cleanup. Attention to detail make a difference. Doing your best work on every step will dramatically improve the quality of your finished artwork.

Use a razor knife and cut a bird footprint stencil out of stiff paper. I use file folders or poster board. You can also use plastic stencils available at your local craft store in the scrap booking department. Place the stencil on the area of the design that represents the sand. Sift powder brown frit over the stencil. Carefully lift the stencil off the glass.

Fire the assembled project to a full fuse temperature using the firing guide below.

Place the fused glass on a slumping mold and fire it to a slumping temperature using the guide below.

My bowls measure 10 inch x 10 inch, 6 inch x 6 inch and 4 inch by 4 inch. You can make these bowls in different sizes and get the same beautiful results.

Artful Home has 16 projects you’ll love!

Check out my video.

Follow my blog for weekly inspiration sent to your inbox! 

Happy Fusing!

Lisa

Upcoming Class!

Advanced Glass Fusing Class

4-Day, Hands-on Class, Wesley Chapel, FL

February 4-7, 2025

YOU can make gallery quality fused glass art! You’ll love the personalized instruction in this exciting advanced technique, artistic awakening and skill building workshop. This is the turning point experience you’ve been waiting for.

Someday is here! What are you waiting for? You’re in your prime. You’re at the peak of your interest in glass fusing. Take the next step and raise your artwork to an exciting new level of sophistication.

Join me for this intense workshop held in my private studio.
Wesley Chapel, Florida, 4-Day, Hands-on, Class size is limited.

In this class, you will push the boundaries art glass imposes. Students will explore innovative approaches to design and combine multiple advanced techniques to construct original art that reflects their own personal style. You’ll enjoy: the one-on-one instruction, making multifaceted projects, the well-equipped classroom, and the intimate class size.

You’ll love the concentrated, in-depth study and creative momentum you’ll gain while actively producing, nonstop for four consecutive days. You’ll leave class with a working knowledge of kiln operation, custom project specific firing guides, and the inspiration you’ve been craving to go bigger and do more elaborate works of fused glass art!

Join me and take your glass fusing to the next level!


Premium Video Courses by Lisa